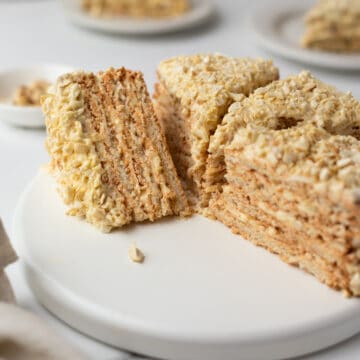
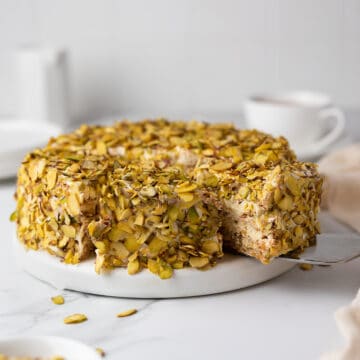
Kiev cake, or Kyiv cake, is a classic Ukrainian cake made with two hazelnut meringue layers sandwiched with Charlotte cream. It is crunchy, sweet, and delicious. Just the best among Slavic cakes!

Kiev cake
Kiev cake, also known as Kievsky cake or Kievsky tort, is a hazelnut meringue cake, one of the most known Ukrainian cakes. Just like Tiramisu in Italy, Sans Rival cake in the Philippines, and Kyiv cake in Ukraine.
Jump to:
Invented in the 1950s, Kyiv cake was initially made with cashew nuts. The modern version now features rich hazelnuts and is my absolute favorite.
Despite many recipe variations, including sponge cake layers, I offer you the authentic Kievsky cake recipe made at Karl Marx confectionary factory (now Roshen company).
It is prepared with two layers of crunchy hazelnut meringue, alternating with layers of cognac-infused buttercream. A special occasion cake is perfect for a birthday or other celebration.
Ingredients
For ingredients and detailed instructions, refer to the recipe card below.
Kiev cake has a few ingredients, but everything comes together due to a special technique of making nut meringue and Charlotte cream.
- Large eggs at room temperature. You will need to separate the egg whites from the yolks and let the egg whites age. While the original Kiev cake recipe calls for aging egg whites for 12 hours, I don't recommend going over 2 hours following FDA Food safety handling rules.
- Sugar: Use granulated or caster sugar for the nut meringue, plus some vanilla sugar.
- Flour: Just all-purpose flour, the same as plain flour.
- Roasted hazelnuts, either store-bought or homemade. Follow this recipe on how to roast hazelnuts.
- Whole milk with 3.2% milk fat. Please avoid low-fat and skimmed milk.
- Unsalted butter: Choose top-quality European-style butter with 82% fat content. It is essential for making this recipe.
- Cognac or dark rum to flavor the butter-based cream.
- Unsweetened cocoa powder: I always use
How to make Kiev cake (step-by-step instructions)
Step 1. Separate the egg whites from the egg yolks. Cover the bowl with egg yolks with plastic film and refrigerate.
Step 2. Keep the whites at room temperature (uncovered) for 2 hours. Then, warm the mixer bowl by rinsing it with hot water and dry it. Add the egg whites to the bowl and warm them to 75-76°F (23-24°C), checking with a cooking or infrared thermometer.
Pro tip: If you live in Europe, use eggs safely stored at room temperature (not in the fridge). This won't affect the taste of the finished cake.
Step 3. Preheat the oven to 300°F (150°C). Grind the roasted hazelnuts into coarse crumbs in short pulses using a food processor (photo 1). Alternatively, you can utilize a knife to get chopped hazelnuts.
Step 4. Mix the prepared nuts, 1 ⅛ cup (225 g) of sugar (#1), and sifted all-purpose flour (photo 2).

PHOTO 1

PHOTO 2
Step 5. Place the egg whites in the metal bowl of a stand mixer fitted with a whisk attachment. Beat at a low speed, gradually increasing it to medium. With the first small bubbles, start adding sugar.
Step 6. Add the remaining sugar #2 (¼ cup or 50 g) in two additions, each time whisking well for 30 seconds. Add the vanilla sugar and continue whisking at medium or speed for 4-5 minutes. The meringue will become glossy with stiff peaks (photo 3) and hold its shape on the beaters with a stable bird's beak.
Step 7. Pour dry ingredients into the whisked egg whites in 3 additions and gently mix with a rubber spatula from the bottom to top (photo 4). Try to work in one direction: from the center of the bowl to the sides, turning the bowl clockwise with another hand. Don't overmix: mix to combine!

PHOTO 3

PHOTO 4
Step 8. Place two cake rings on a baking sheet lined with parchment paper: one 7-inch (18 cm), the other 8-inch (20 cm) in diameter. Don't grease the sides of the rings.
Step 9. Divide the meringue mixture between two cake molds, ensuring the meringue height is the same. Smooth the surface of the meringue with a spatula (photo 5).
Pro tip: Use two clean toothpicks to check the height of the meringue in both rings.
Step 10. Bake in the preheated oven for about 2 hours until the meringue layers are slightly browned. Don't open the oven door for the first 90 minutes.
Pro tip: If the cakes darken quickly, try to bake the meringue disks with the oven ajar or shorten the baking time.
Step 11. Remove the cakes from the oven and allow them to cool still in the cake rings. Leave them uncovered at room temperature for 12-24 hours (still in the cake rings!)
Step 12. The next day, use a knife to remove the cake layers and carefully peel the parchment paper.
Step 13. Place the smaller cake disk on top of the larger cake disc and cut to one size (photo 6). You will have two cake discs with a diameter of 7-inch (18 cm) and a thickness of 1.2 inch (3 cm). Collect the scraps and crush them into crumbs by hand.

PHOTO 5

PHOTO 6
Step 14. To make the Charlotte cream, pour milk into a heavy-bottomed medium saucepan and add sugar. Bring it almost to a boil.
Step 15. Take the remaining yolks out of the refrigerator and mix them with a hand whisk. If the surface of the yolks has dried out, pass them through a fine-mesh sieve.
Step 16. Pour the hot milk syrup over the egg yolks in a thin stream, stirring constantly to prevent the yolks from curdling.
Step 17. Bring the mixture back into the saucepan and place on medium heat. Cook until thickens, constantly stirring vigorously. You should get the cooked mixture with the consistency of thin condensed milk.
Step 18. Remove it from the heat and transfer it to a shallow enough plate to stop cooking the cream. Cover the cream with plastic wrap in contact and leave to cool at room temperature (photo 7).
Step 19. Beat softened butter with vanilla sugar until whitish. Add the custard that has cooled to room temperature to the butter, one tablespoon at a time (photo 8).
Pro tip: Make sure that the butter and custard base are at the same temperature. Otherwise, the cream risks stratifying.

PHOTO 7

PHOTO 8
Step 20. To assemble the cake, divide the cream into two equal parts. Add cognac to one part of the cream and whisk again with a mixer. Take about 3 tablespoons of the cream for the decoration. Sift cocoa powder over another part of the cream and mix with an electric mixer.
Step 21. Apply about a teaspoon of the white cream to a cake board or a serving plate so the cake does not slip. Place the first cake layer with the smooth side down (the bottom of the cake on the cake board).
Step 22. Spread the white cream on the surface of the cake (photo 9). Don't use the cream left for garnish!
Pro tip: Optionally, use an adjustable cake ring lined with an acetate collar to assemble the cake.
Step 23. Put the top layer with a smooth side up and press slightly. If using a cake ring, bring the cake to the refrigerator to stabilize the cream for about 30 minutes. Otherwise, proceed.
Step 24. Remove the cake ring if used. Cover the top of the cake with chocolate cream. Apply a fairly thin layer of the cream to the sides of the cake and sprinkle with the prepared crumbs (photo 10).

PHOTO 9

PHOTO 10
Step 25. To decorate the cake, transfer the chocolate cream to a piping bag with Wilton open star tip M1. Pipe the cream around the edge of the cake.
Step 26. Transfer the white cream to a pastry bag with a tip M1. Pipe two to three cream swirls or other floral designs with chocolate or white cream. Sprinkle half the cake with crumbs. Refrigerate the cake for at least 4-6 hours, preferably overnight.

Expert tips
- Replace hazelnuts with cashews if desired.
- Bake the meringue cake layers right after the nut meringue mixture is made. Don't delay baking to prevent the meringue from collapsing.
- Respect the drying time for the nut meringue layers, which is 12-24 hours.
- If the egg yolks slightly dry out the next day, pass them through a fine mesh sieve.
- Omit cognac if serving the cake to kids and pregnant women.
Storing and freezing
Kyiv cake should be stored under a glass dome in the refrigerator for 72 hours, just like the original Roshen Kyivskiy cake is stored.
Freeze Kyiv cake for up to 3 months. To thaw, bring the cake to the fridge overnight.
Recipe FAQ
Yes, you can still make the Kiev cake without aging egg whites, but it will affect the stability of the meringue. The process of egg white aging reduces their water content by evaporation to strengthen the egg albumen.
I recommend using cake rings instead of round cake pans to make cake removal easier after baking.
No, Kyiv cake is made with a butter-based Charlotte cream instead of the classic Russian buttercream made with butter and sweetened condensed milk.
Love meringue desserts? Try these next!
- Vanilla meringue cake
- Pavlova roll (Meringue roulade)
- French meringue Merveilleux
- Large meringue
HUNGRY FOR MORE? Subscribe to my newsletter and follow me on Facebook, Pinterest, and Instagram for my latest updates.
PrintRecipe card
Kiev Cake (Classic Ukrainian Cake)
Kiev cake is a traditional Ukrainian cake made with two hazelnut meringue layers sandwiched with Charlotte cream. It is crunchy, sweet, and absolutely delicious.
- Total Time: 2 hours, 30 minutes (plus resting time)
- Yield: 10 1x
- Category: Cakes
- Method: Baking
- Cuisine: Ukrainian
Ingredients
For the meringue cake layers:
- 6 egg whites, aged (see the recipe)
- 1 ⅛ cup (225 g) granulated sugar (#1)
- ¼ cup (50 g) granulated sugar (#2)
- 6 ½ tablespoons (50 g) all-purpose flour
- 1 ⅓ cups (175 g) toasted hazelnuts
- 1 teaspoon vanilla sugar
For the Charlotte cream:
- 1 cup + 3 ½ tablespoons (275 g) unsalted butter, room temperature
- 6 egg yolks, cold
- ¾ cup (150 g) granulated sugar
- ⅔ cup + 2 teaspoons (175 g) whole milk 3.2% fat
- 1 ⅓ tablespoons (10 g) cocoa powder
- 1 teaspoon vanilla sugar
- 1 tablespoon cognac
Instructions
-
Separate the egg whites from the egg yolks. Cover the bowl with egg yolks with plastic film and refrigerate. Keep the whites at room temperature (uncovered) for 2 hours. Then, warm the mixer bowl by rinsing it with hot water and dry it. Add the egg whites to the bowl and warm them to 75-76°F (23-24°C), checking with a cooking or infrared thermometer.
-
Preheat the oven to 300°F (150°C). Grind the roasted hazelnuts into coarse crumbs in short pulses using a food processor. Alternatively, you can utilize a knife to get chopped hazelnuts. Mix the prepared nuts, 1 ⅛ cup (225 g) of sugar (#1), and sifted all-purpose flour.
-
Place the egg whites in the metal bowl of a stand mixer fitted with a whisk attachment. Beat at a low speed, gradually increasing it to medium. With the first small bubbles, start adding sugar.
-
Add the remaining sugar #2 (¼ cup or 50 g) in two additions, each time whisking well for 30 seconds. Add the vanilla sugar and continue whisking at medium or speed for 4-5 minutes. The meringue will become glossy with stiff peaks and hold its shape on the beaters with a stable bird's beak.
-
Pour dry ingredients into the whisked egg whites in 3 additions and gently mix with a rubber spatula from the bottom to top. Try to work in one direction: from the center of the bowl to the sides, turning the bowl clockwise with another hand. Don't overmix: mix to combine!
-
Place two cake rings on a baking sheet lined with parchment paper: one 7-inch (18 cm), the other 8-inch (20 cm) in diameter. Don't grease the sides of the rings. Divide the meringue mixture between two cake molds, ensuring the meringue height is the same. Smooth the surface of the meringue with a spatula. Use two clean toothpicks to check the height of the meringue in both rings.
-
Bake in the preheated oven for about 2 hours until the meringue layers are slightly browned. Don't open the oven door for the first 90 minutes.
-
Remove the cakes from the oven and allow them to cool still in the cake rings. Leave them uncovered at room temperature for 12-24 hours (still in the cake rings!)
-
The next day, use a knife to remove the cake layers and carefully peel the parchment paper. Place the smaller cake disk on top of the larger cake disc and cut to one size. You will have two cake discs with a diameter of 7 inches (18 cm) and a thickness of 1.2 inches (3 cm). Collect the scraps and crush them into crumbs by hand.
-
To make the Charlotte cream, pour milk into a heavy-bottomed medium saucepan and add sugar. Bring it almost to a boil.
-
Take the remaining yolks out of the refrigerator and mix them with a hand whisk. If the surface of the yolks has dried out, pass them through a fine-mesh sieve. Pour the hot milk syrup over the egg yolks in a thin stream, stirring constantly to prevent the yolks from curdling.
-
Bring the mixture back into the saucepan and place on medium heat. Cook until thickens, constantly stirring vigorously. You should get the cooked mixture with the consistency of thin condensed milk.
-
Remove it from the heat and transfer it to a shallow enough plate to stop cooking the cream. Cover the cream with plastic wrap in contact and leave to cool at room temperature.
-
Beat softened butter with vanilla sugar until whitish. Add the custard that has cooled to room temperature to the butter (one tablespoon at a time). Make sure that the butter and custard base are at the same temperature. Otherwise, the cream risks stratifying.
-
To assemble the cake, divide the cream into two equal parts. Add cognac to one part of the cream and whisk again with a mixer. Take about 3 tablespoons of the cream for the decoration. Sift cocoa powder over another part of the cream and mix with an electric mixer.
-
Apply about a teaspoon of the white cream to a cake board or a serving plate so the cake does not slip. Place the first cake layer with the smooth side down (the bottom of the cake on the cake board). the white cream on the surface of the cake. Don't use the cream left for garnish!
-
Put the top layer with a smooth side up and press slightly. If using a cake ring, bring the cake to the refrigerator to stabilize the cream for about 30 minutes. Otherwise, proceed. Cover the top of the cake with chocolate cream. Apply a fairly thin layer of the cream to the sides of the cake and sprinkle with the prepared crumbs.
-
To decorate the cake, transfer the chocolate cream to a piping bag with Wilton open star tip M1. Pipe the cream around the edge of the cake. Transfer the white cream to a pastry bag with the tip M1.
-
Pipe two to three cream swirls or other floral designs with chocolate or white cream. Sprinkle half the cake with crumbs. Refrigerate the cake for at least 4-6 hours, preferably overnight.
Notes
- If you live in Europe, use eggs safely stored at room temperature (not in the fridge). This won't affect the taste of the finished cake.
- If the cakes darken quickly, try to bake the meringue disks with the oven ajar or shorten the baking time.
- Optionally, use an adjustable cake ring lined with an acetate collar to assemble the cake.
- Replace hazelnuts with cashews if desired.
- Bake the meringue cake layers right after the nut meringue mixture is made. Don't delay baking to prevent the meringue from collapsing.
- Respect the drying time for the nut meringue layers, which is 12-24 hours.
- If the egg yolks slightly dry out the next day, pass them through a fine mesh sieve.
- Omit cognac if serving the cake to kids and pregnant women.
Nutrition
- Serving Size: 1 slice
- Calories: 609
- Sugar: 45.6 g
- Sodium: 94 mg
- Fat: 39.7 g
- Saturated Fat: 17.2 g
- Carbohydrates: 52 g
- Fiber: 2.1 g
- Protein: 11.7 g
- Cholesterol: 284 mg
The nutritional information has been calculated using an online recipe nutrition calculator such as Verywellfit.com and is intended for informational purposes only. These figures should be used as a general guideline and not be construed as a guarantee.


Comments
No Comments