


Quick Summary: Mille feuille cake is a French pastry made of crisp, caramelized puff pastry layered with silky vanilla pastry cream. This single-layer version uses one sheet of store-bought puff pastry, piped vanilla-mascarpone cream, and fresh red fruit on top, making it far easier than the classic three-layer dessert and allowing it to come together with make-ahead components.
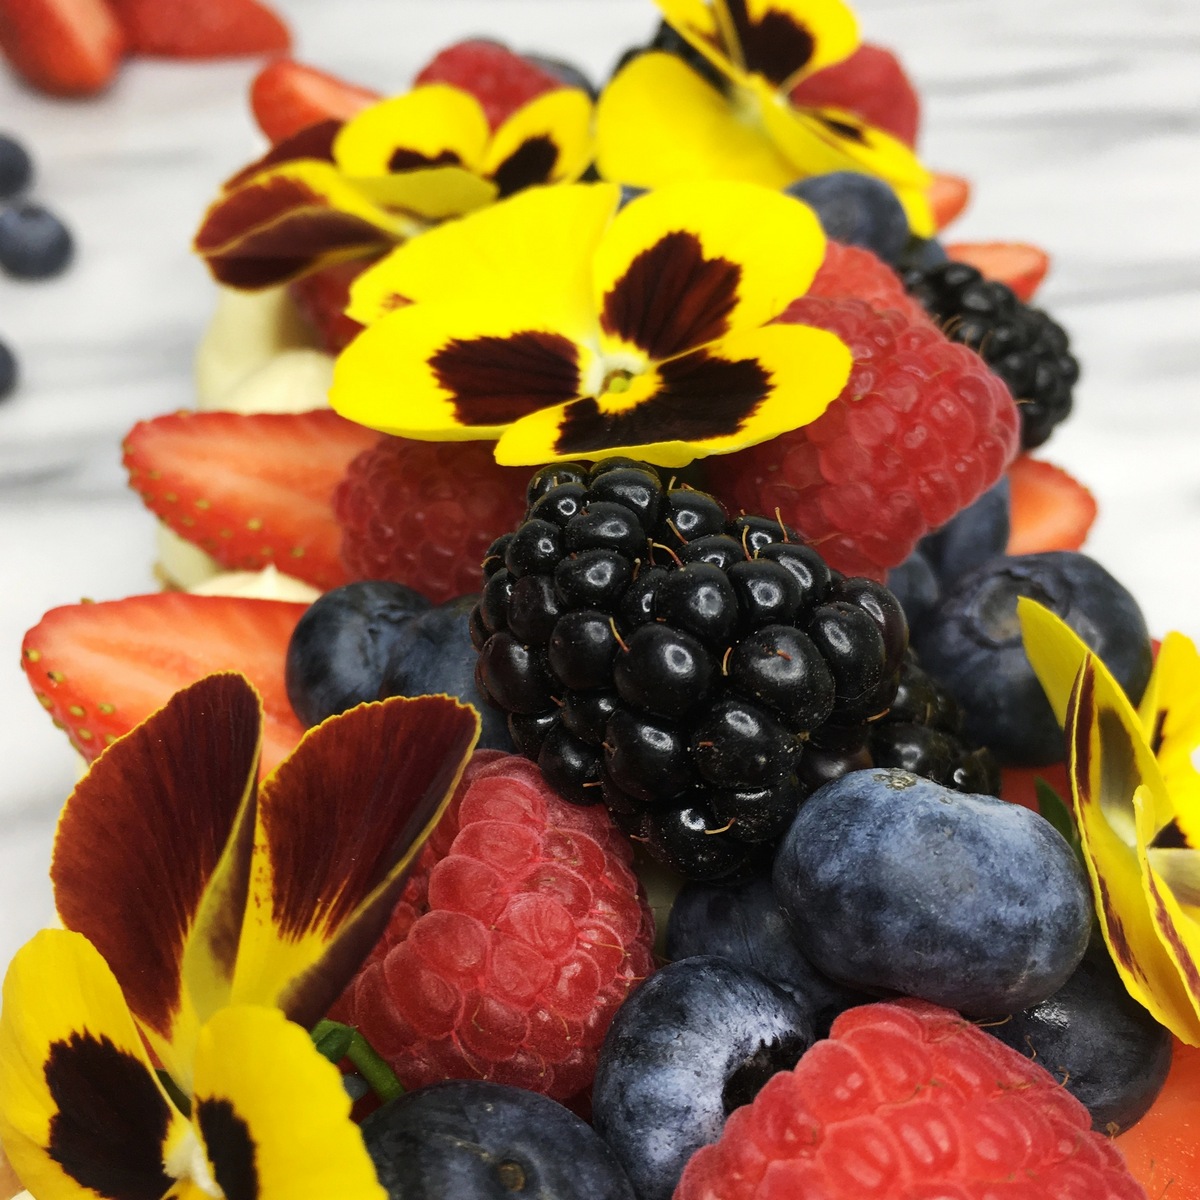
What is mille feuille cake?
Mille-feuille cake is a classic French pastry made with three layers of buttery puff pastry, filled with rich custard pastry cream, and sprinkled with icing sugar.
The term mille-feuille is also French and means "one thousand petals" or "one thousand sheets," referring to the layered pastry in the dessert. The word mille-feuille is pronounced meel-foy.
The first recipe for a millefeuille was published in François Pierre La Varenne's cookbook in 1651. The cake was decorated with fondant and a chocolate spiderweb design on top.
Why you'll love this recipe
- It is a fun project to share. Kids can pipe the cream balls and decorate this cake with fresh fruit and edible flowers.
- It is quick with store-bought pastry. Using a ready-made puff pastry saves you time on the crust.
- It is make-ahead friendly. Prepare the vanilla cream and crust a day in advance, then assemble the dessert in minutes the next day.
- It is easy to eat. The single-layer version is not excessively tall, so it slices and serves neatly.
- It has a faster shortcut. Swap the vanilla cream for mascarpone whipped cream and serve within an hour.
Ingredients
For ingredients and detailed instructions, refer to the recipe card below.
- Frozen puff pastry: this mille-feuille recipe calls for a store-bought puff pastry. Make sure to purchase square or rectangular puff pastry sheets. Choose a butter-based pastry rather than a shortening-based one to avoid an unpleasant aftertaste, or use homemade puff pastry if you prefer.
- Icing sugar: either make it yourself with a coffee grinder or use store-bought powdered sugar.
- Milk: the recipe calls for whole milk.
- Whipping cream: use heavy whipping cream of your favorite brand.
- Egg yolks: use yolks from large whole eggs.
- Gelatin: use gelatin sheets with a strength of 200 bloom. To substitute sheet gelatin, use 8 g of powdered gelatin and ¼ cup (60 ml) of cold water. Please keep in mind that 1 teaspoon contains 3.08 grams of powdered gelatin.
- Mascarpone: it is added to stabilize the whipped cream. The only downside of mascarpone-based whipped cream is that it dries out quickly, so you need to serve the dessert after assembling it.
- Vanilla pod: for the best vanilla flavor in the dessert, use these Madagascar vanilla beans.
- Red fruits: use fresh strawberries, raspberries, blueberries, or blackberries. Do not use frozen berries to decorate the cake.
- Cornstarch, brown sugar.
Equipment
Here are the main tools you need to make this mille feuille cake:
- Rolling pin, to roll out the puff pastry sheet.
- Two baking trays and parchment paper to bake the pastry flat (a perforated tray on top helps prevent it from puffing too much).
- A ruler and a sharp serrated knife, to cut a clean rectangular strip.
- A piping bag fitted with an Ateco plain pastry tube, to pipe the cream dollops.
- An electric mixer, to whip the cream mixture until it is aerated.
How to make mille feuille cake
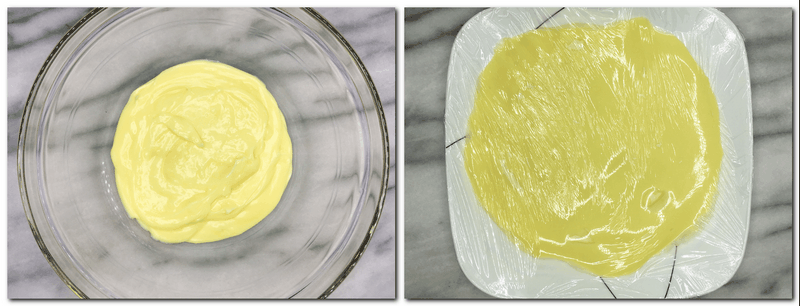
Step 1. To make the vanilla cream, start one day before. First, soak gelatin in cold water for 10 minutes.
Step 2. Whisk the remaining cream ingredients and the vanilla bean seeds in a medium pot. Bring the cream to a boil, continually stirring with a hand whisk.
Step 3. Remove the pan from the heat as soon as the cream thickens. Mix in the drained gelatin (photo 1).
Step 4. Pour the cream into a shallow dish, cover it with plastic wrap in contact with the cream, and chill for 24 hours (photo 2).
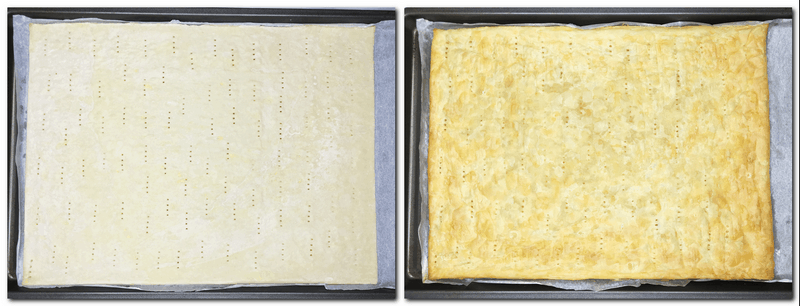
Step 5. To make the crust, preheat the oven to 355°F (180°C). Thaw a sheet of puff pastry. Using a rolling pin, roll it out on a lightly floured work surface, then prick it with a fork. Cut out a large rectangle (photo 3).
Step 6. Transfer the dough onto a lined baking tray between two sheets of parchment paper. Then cover it with a baking sheet or baking tray (not too heavy and, if possible, perforated).
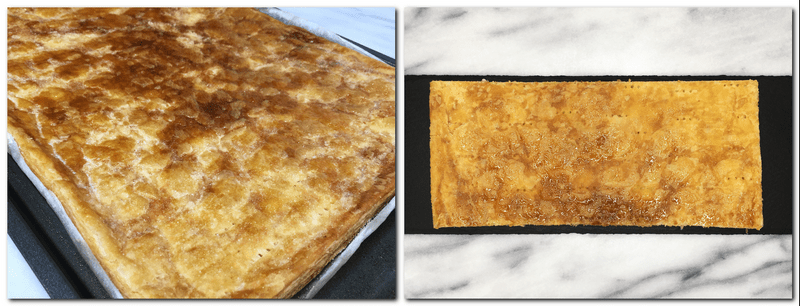
Step 7. Bake for about 30 minutes, rotating the pan halfway through. Make sure that the dough gets a beautiful gold color (photo 4).
Step 8. To caramelize the puff pastry, remove it from the oven. Remove the second baking sheet and the sheet of parchment paper from the top of the pastry. Sprinkle with icing sugar.
Step 9. Broil the pastry: bring the baking tray under the oven grill for a few minutes to caramelize the sugar until it turns a deep golden brown. It takes about 2 to 3 minutes; watch it closely to prevent the pastry from burning (photo 5).
Step 10. Remove from the oven and cool completely. With a ruler and a sharp serrated knife, cut a rectangular strip 4'' x 10'' (10 x 27 cm) (photo 6). Let it cool to room temperature, then transfer it to a serving platter.
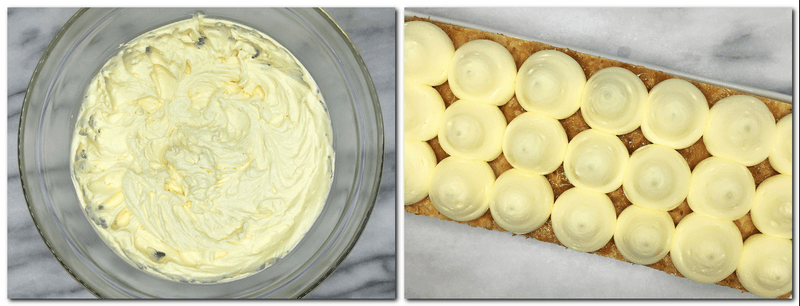
Step 11. To assemble the cake, whip the cream mixture with an electric mixer to aerate (photo 7). Transfer the pastry cream to a piping bag fitted with the Ateco plain pastry tube. Pipe dollops (the size of regular walnuts) onto a caramelized puff rectangle (photo 8).
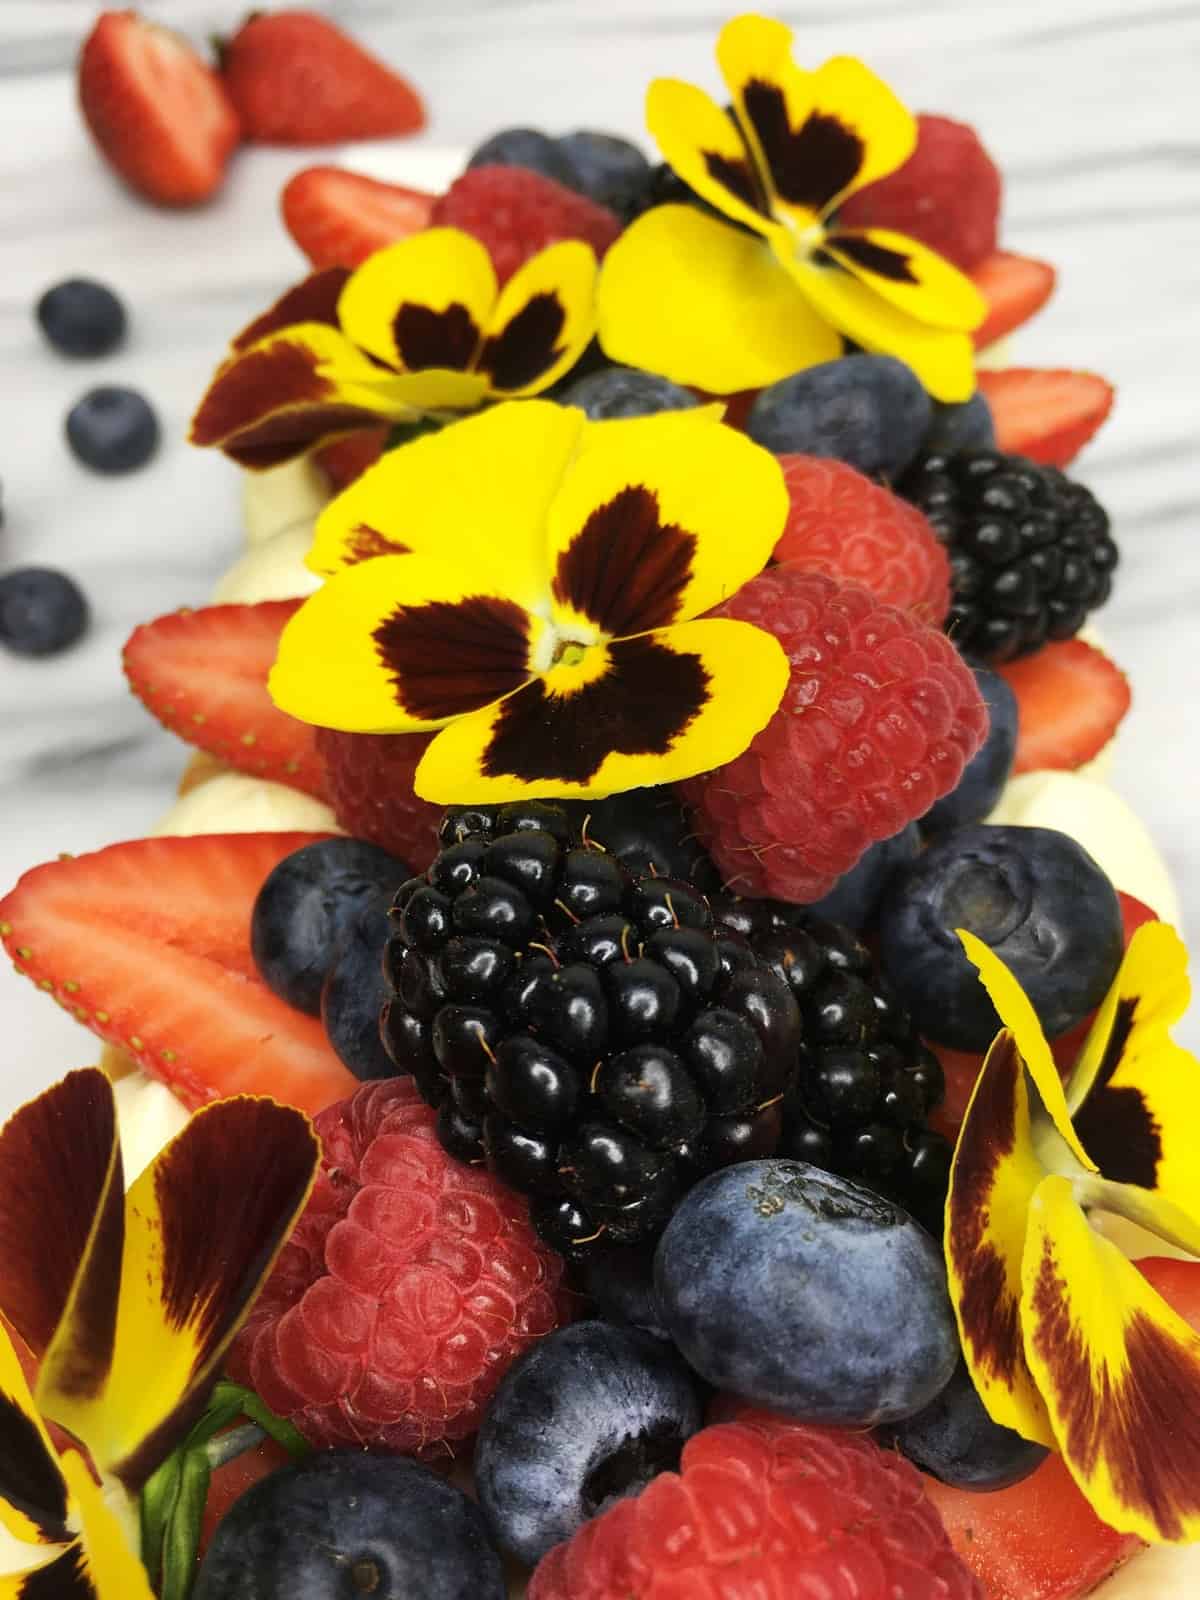
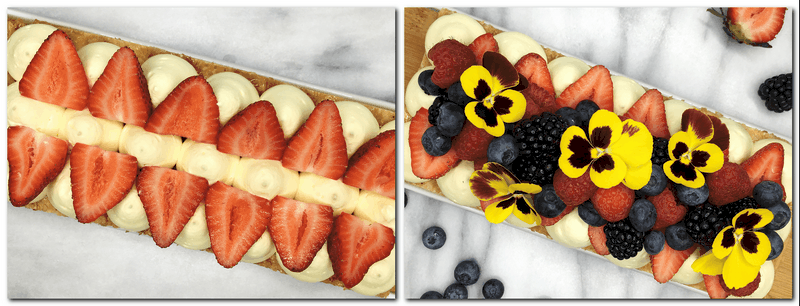
Step 12. Decorate the top of the cake with halves of fresh strawberries (photo 9), raspberries, blueberries, or other fresh fruit of your choice. Arrange edible flowers and mint leaves between fruits and serve immediately (photo 10).
Expert tips
- Cover the vanilla cream with plastic wrap in contact with the surface to prevent a crust from forming while refrigerating.
- Cover the puff pastry with a baking sheet on top of the parchment to prevent excessive puffing while baking.
- Do not burn the pastry while caramelizing. Two to three minutes is enough for a beautiful result.
- Cut the end of a pastry bag and decorate the cake with cream balls if you don't have a special tip; it works.
Recipe variations
- Traditional millefeuille: three flaky layers of puff pastry with two layers of pastry cream, topped with chocolate and vanilla glaze. You can also cover the top with royal icing, chocolate ganache, or dust it with powdered sugar.
- Modern single-layer version: nowadays, many French chefs make the dessert with a single layer of puff pastry, dusted with icing sugar, caramelized, then covered with a layer of cream and decorated with seasonal fruit.
- Savory mille-feuille: there is also a savory version made with cheese and spinach.
Storing & freezing
The mille-feuille dessert should be served after being assembled because:
- The mascarpone-based whipped cream tends to dry out quickly;
- The puff pastry layer absorbs the cream's liquid and loses crispiness.
I would not recommend storing the cake until the next day, even if refrigerated.
To freeze the mille-feuille, set the freezer to -13°F (-25°C) 8 hours before freezing the dessert. Place the cooled cake (no fruit on the top) on a cooling rack and bring it to the freezer.
Once it is frozen to the core, place the dessert in a Ziploc freezer bag and store it in a freezer set at -13°F (-25°C) for 2 months.
Thaw the mille-feuille in the refrigerator overnight. Decorate with fresh fruit if desired.
Recipe FAQ
Are mille-feuille and Napoleon the same?
While both pastries use three layers of puff pastry, the main difference is the cream used. Mille-feuille is filled with vanilla pastry cream, while Napoleon cake is usually made with almond cream. Mille-feuille can have sweet and savory fillings, while Napoleon is always sweet.
How do you make mille feuille cake as one big pastry?
Double or triple the cream recipe, cut a larger puff pastry layer, and make one big dessert. Cut it into pieces with a serrated knife and serve.
Can you make mille-feuille in advance?
Make the vanilla cream as directed one day ahead, and prepare the puff pastry crust one day in advance. The next day, whisk the cream and decorate the mille-feuille. This cake has to be served right after making it.
How do you cut mille feuille pastry?
Chill a classic three-layer mille-feuille cake for a few hours, or freeze it for 20 to 30 minutes, then cut it with a sharp serrated knife. This one-layered dessert can be cut right after making it with the same knife, without squashing it.
How do you eat mille feuille cake?
This dessert is best eaten with a fork and knife, but you can bite into it if it is made with a single layer of puff pastry, as in this cake.
Why is it called mille feuille?
Mille-feuille is French for "one thousand sheets" (or "one thousand petals"), a nod to the many thin, flaky layers created when puff pastry bakes and rises. The name is also written millefeuille (one word) or mille-feuille (hyphenated), and the pastry is known as millefoglie in Italy.
What is the difference between mille feuille and a Napoleon cake?
They are often used interchangeably, but a mille feuille traditionally uses vanilla pastry cream between crisp puff pastry layers. In contrast, many Napoleon cakes use a richer almond or buttercream filling and can be assembled in a taller, softer style.
Love cakes? Try these next!
Browse all the Cake Recipes
Want more delicious and beautiful recipes? Subscribe to my newsletter and follow me on Facebook, Pinterest, and Instagram for my latest updates. If you make this recipe, please leave a star rating on the recipe card and comment below!
PrintRecipe card
Mille Feuille Cake

This mille feuille cake is a French dessert made with crisp, caramelized puff pastry and vanilla-mascarpone cream. This easy single-layer version is topped with fresh red fruit and edible flowers, and it is much simpler to make than the classic three-layer pastry.
- Prep Time: 1 hour
- Cook Time: 30 minutes
- Total Time: 1 hour 30 minutes
- Yield: 6 1x
- Category: Cakes
- Method: Baking
- Cuisine: French
Ingredients
For the crust:
- 8.8 oz. (250 g) puff pastry
- 100 g icing (powdered) sugar
For the vanilla cream:
- ⅔ cup + 3 tablespoons (200 ml) of milk
- ½ cup + 1 teaspoon (120 ml) whipping cream
- 3 large egg yolks
- 1 ½ sheet of gelatin
- 6 oz. (170 g) mascarpone
- 1 ½ tablespoons (15 g) corn starch
- 9 ½ teaspoons (40 g) brown sugar
- 1 vanilla bean
For the decoration:
- fresh red fruit, edible flowers, fresh mint leaves
*Don't you have the correct baking pan on hand right now? Try this simple Cake Pan Converter!
** If needed, please refer to Baking Conversion Charts.
Instructions
- To make the pastry vanilla cream, start one day before. Soak gelatin in cold water for 10 minutes. Whisk the remaining cream ingredients in a medium pot. Bring the cream to a boil, continually stirring with a hand whisk. Remove the pot from the heat as soon as the cream thickens. Mix in the drained gelatin. Pour the cream into a shallow dish, wrap it with plastic film in contact, and chill for 24 hours.
- To make the crust, preheat the oven to 355°F (180°C). Thaw the puff pastry dough, roll it on a lightly floured work surface, and prick with a fork. Cut out a large rectangle. Put the dough on the baking sheet between two sheets of parchment paper and cover it with a baking sheet or baking tray (not too heavy and, if possible, perforated). Bake for about 30 minutes, rotating the pan halfway through. Make sure that the dough gets a beautiful caramel brown color.
- To caramelize the puff pastry, remove it from the oven. Remove the second baking sheet and the sheet of parchment paper from the top of the pastry. Sprinkle with icing sugar. Bring the baking sheet with the pastry under the oven grill for a few minutes to caramelize the sugar. It takes about two to three minutes; watch it carefully to prevent the pastry from burning. Remove from the oven, cool completely, and cut a rectangular strip 4'' x 10 '' (10 x 27 cm) with a ruler and a sharp serrated knife. Let it cool to room temperature.
- To assemble the cake, whip the cream to aerate. Place the cream in a pastry bag fitted with the Ateco plain pastry tip and pipe dollops (the size of regular walnuts) on a caramelized puff rectangle. Decorate the top of the cake with halves of fresh strawberries, raspberries, blueberries, or other fruits of your choice. Arrange edible flowers and mint leaves between fruits and serve immediately.
Notes
- Cover the vanilla cream with plastic wrap, pressing it onto the surface to prevent a crust from forming while refrigerating.
- Cover the puff pastry with a baking sheet on top of the parchment to prevent extensive puffing while baking.
- Do not burn the pastry while caramelizing. Two to three minutes is enough for a beautiful result.
- Cut the end of the pastry bag and decorate the cake with cream balls if you do not have a special tip. It works.
Nutrition
- Serving Size: 1 slice
- Calories: 485
- Sugar: 24.8 g
- Sodium: 157 mg
- Fat: 28.8 g
- Saturated Fat: 11.5 g
- Carbohydrates: 47.6 g
- Fiber: 0.6 g
- Protein: 10.4 g
- Cholesterol: 145 mg
The nutritional information has been calculated using an online recipe nutrition calculator such as Verywellfit.com and is intended for informational purposes only. These figures should be used as a general guideline and not be construed as a guarantee.
The recipe was adapted from Gourmandises cie. It was originally published on July 07, 2018. The recipe has been revised to include improved content and photos.
Patty at Spoonabilities says
How magnificent! I could have this for breakfast every single day (not only breakfast)!
Irina Karulina says
Patty, I have never thought of eating this cake three times a day, but this is a great idea. By the way, I often eat cakes for breakfast!:)
Tara says
Such a gorgeous dessert! I bet my kids would have so much fun making this with me. Love the flowers on top.
Irina Karulina says
Tara, yes, kids would love to participate! Each summer I plant edible flowers to decorate desserts. It is fun!
Josi says
What a fabulous dessert! The puff pastry with vanilla cream is such a great mix!
Irina Karulina says
Josi, thank you. This dessert is fully customizable: just use fruit of your choice to decorate the cake.
Tonje says
Lovely dessert, I can't wait to make it!
Irina Karulina says
Tonje, happy baking and enjoy!:)
Brian Jones says
A classic recipe that tastes as good as it looks although my presentation was not quite as good as yours 😉 Spot on!
Irina Karulina says
Oh, Brian, you have made my day! Practice makes things perfect!:) As you can imagine, I practice a lot:)
Bhawana says
I loved this cake, and it is entirely new to me. You write beautifully in detail all your baking recipes. Great going, and thank you for sharing.
Irina says
Thank you very much, Bhawana! I am so happy that you love the blog's recipes.
Emily says
What a gorgeous and delicious cake, I love anything that includes puff pastry! I love the decorative flowers as a garnish too.
Irina says
Thanks, Emily! Regarding edible flowers, I even started to plant them myself 🙂
Anjali says
This cake is gorgeous!! I love edible flowers as a garnish - that makes it so fun! I'll be trying this out this weekend!
Irina says
Happy baking and enjoy the recipe, Anjali! What the best is about this cake is that you can make it bigger.:)
Shanna says
Your presentation on this fun puff pastry is so amazing. It is almost too pretty to eat.
Irina says
Thanks for your comment, Shanna! You made me smiling!
Janelle says
I loved this cake, so pretty!
Irina says
Thanks, Janelle!