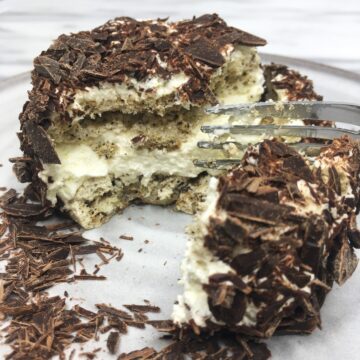
Enjoy this delicious, crowd-pleasing French meringue cake Merveilleux by sandwiching two meringue layers with a luscious mascarpone whipped cream. The dessert covered with rich dark chocolate shavings is absolutely decadent and worth every bite.

If you are looking for a perfect meringue cake, don't look any further than a dessert family Merveilleux. Start from little bundles of joy, individual meringue dessert Merveilleux that is simply delightful.
And while exploring the meringue world, don't hesitate to make the ultimate version - the French meringue gateau Merveilleux.
Meringue cake Merveilleux
Both strawberry meringue cake and Vanilla Meringue Cake seem to be the most common meringue cakes. But a French meringue layer cake Merveilleux with mascarpone frosting and covered with chocolate shavings takes the experience to a whole new level.
The cake's stature is astonishing, the texture is airy, and the taste is irresistible. It is extraordinary in every bite.

Why you should try this recipe
- The cake is gluten-free, meaning it will please everyone without restrictions.
- The meringue cake recipe is easy to make with a perfect baking shortcut: make the meringue layers one day in advance.
- Coffee-flavored mascarpone whipped cream will please coffee lovers.
- Decorating this cake is a breeze - no special skills are required. The meringue spirals can be imperfect, and the cream balls are dusted with powdered sugar and cocoa powder. Any imperfections will be hidden.
- Finally, the cake is perfect for birthday parties and other special occasions.
Ingredients
For ingredients and detailed instructions, refer to the recipe card below.
- Egg whites: Use large whole eggs to make the cake. Take chilled eggs out of the fridge, separate egg yolks from egg whites, and let egg whites come to room temperature for about 30-54 minutes.
- Sugar: Use a caster or baker's sugar to make the meringue. Or use a food processor to pulse granulated sugar for a few seconds to get superfine sugar. And if you need icing sugar, use a coffee grinder at home.
- Dark chocolate: Use a top-quality 70% dark chocolate like Valrhona dark chocolate.
- Heavy cream: Opt for heavy or heavy whipping cream with at least 30% fat content.
- Mascarpone cheese brings a beautiful tang flavor and stabilizes the whipped cream.
- Instant coffee: Use powdered instant coffee, which is much more effective in making coffee-flavored whipped cream.
- Cocoa powder: Opt for unsweetened cocoa powder to dust the cake.
Recipe variations
- Layers of meringue: Add unsweetened cocoa powder to the meringue mixture to create a chocolate meringue cake.
- Flavorings: Replace instant coffee with cocoa powder. Or add Biscoff cookie spread to make Biscoff whipped cream.
- Add-ins: Elevate the meringue cake further by adding juicy slices of fresh strawberries or other fresh fruit between cake layers. For a simple yet satisfying filling, go with plain mascarpone frosting.
- Decoration: Swap dark chocolate for milk or white chocolate. Or cover the entire cake with Lotus Biscoff crumble to create the iconic Biscoff cake.

How to make meringue cake
Making the meringue cake consists of a few steps, including preparing meringue layers, making mascarpone whipped cream and chocolate shavings, and assembling the cake.
Make the meringue
Preheat the oven to 210°F (100°C). Use a stainless steel circle or a plate 7 inches (18 cm) in diameter as a template, and draw two discs on two sheets of parchment paper. Turn them over and place them on two baking sheets.
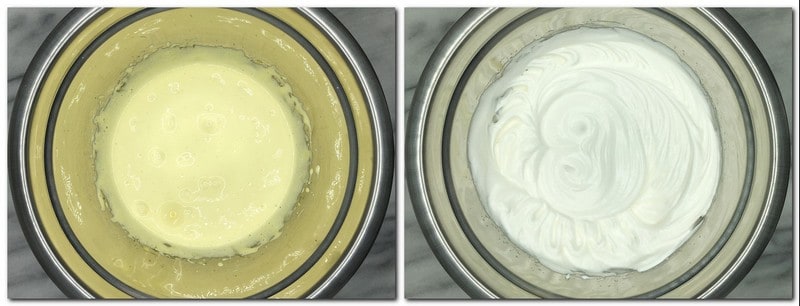
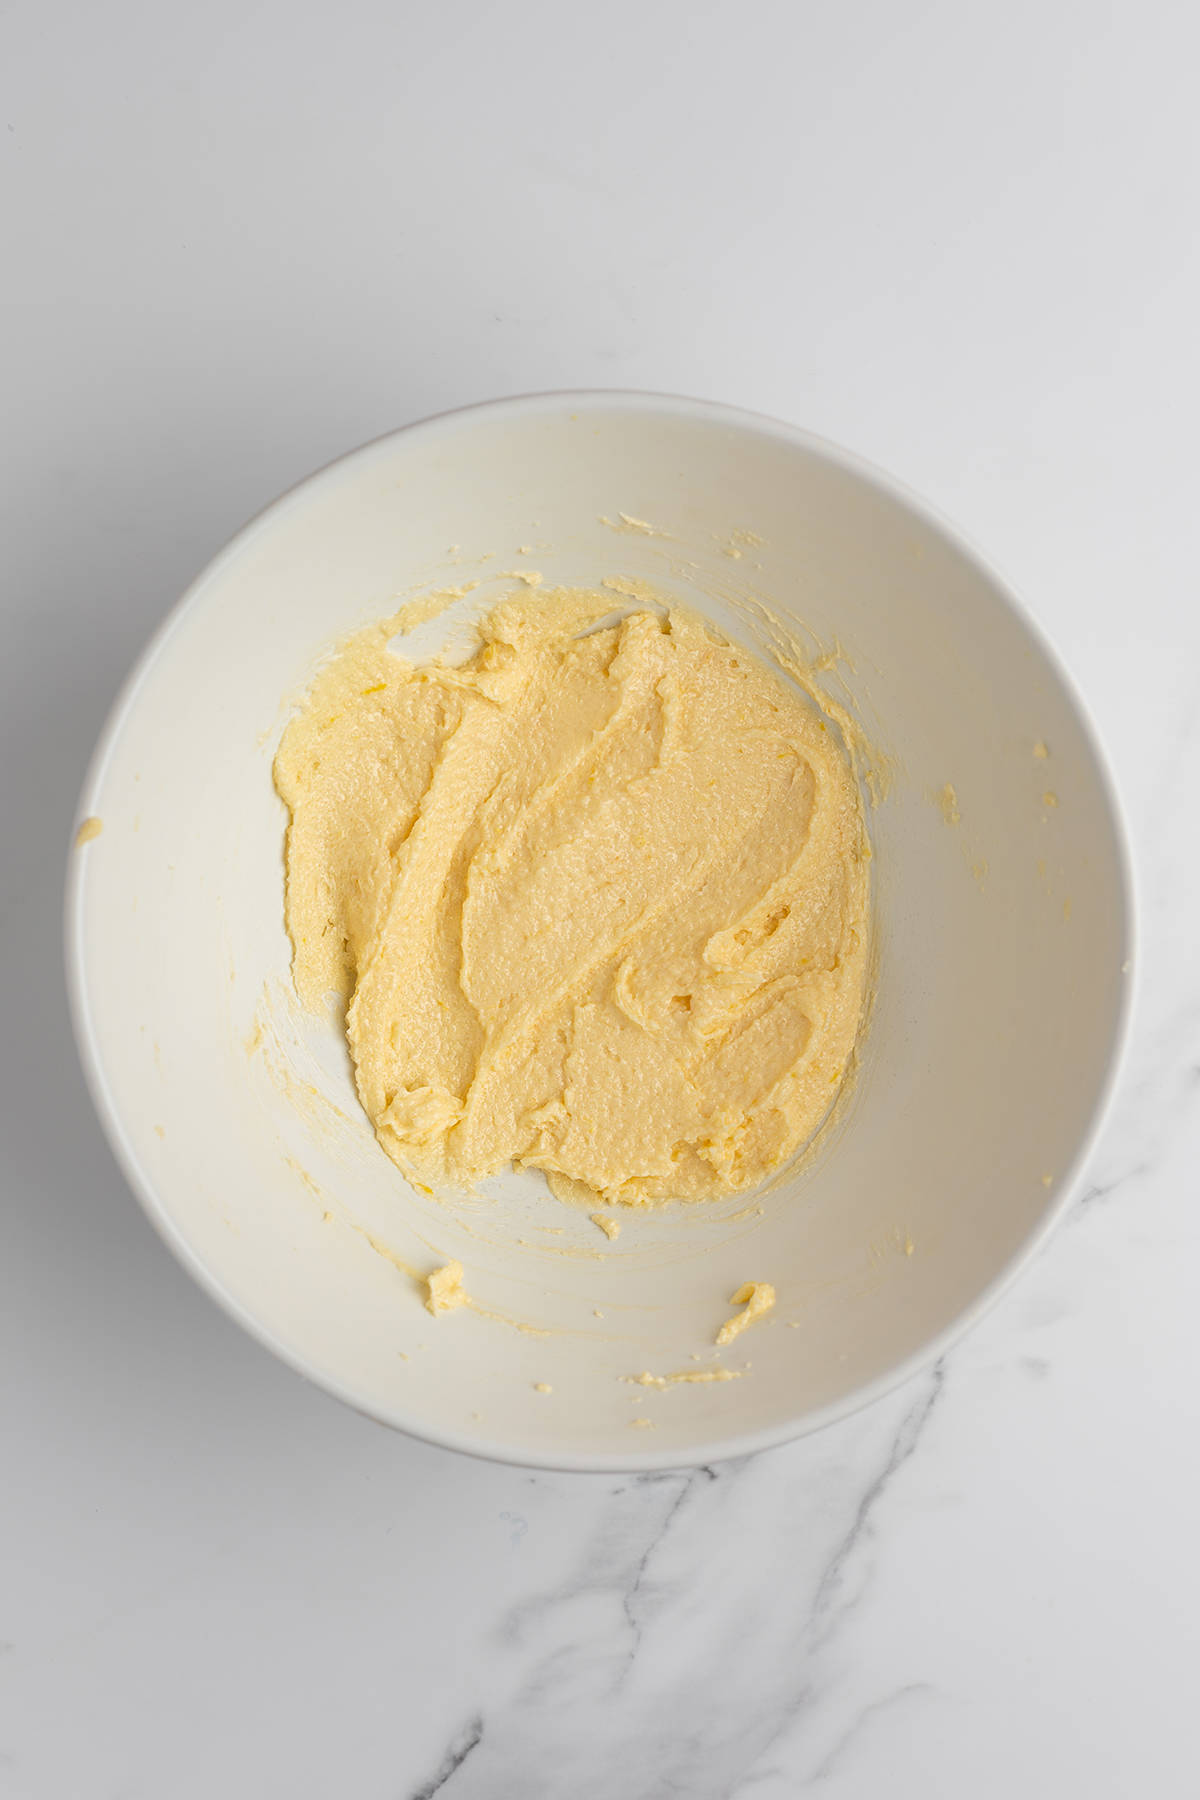
In a large bowl, place egg whites with a good pinch of salt. Beat with an electric mixer at medium-high speed for 3-4 minutes.
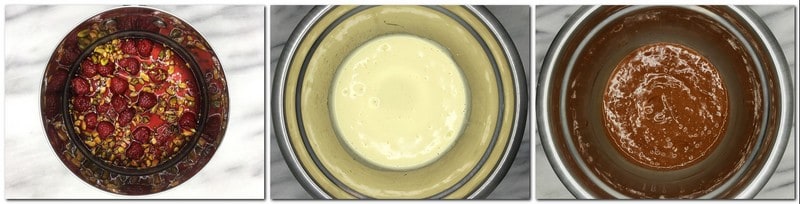
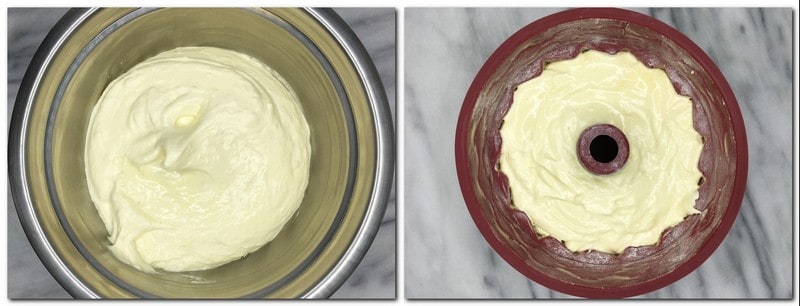
Switch the mixer speed to high, and gradually add caster sugar, about 2 tablespoons at a time. Whisk until sugar dissolves and stiff peaks form (photo 1).
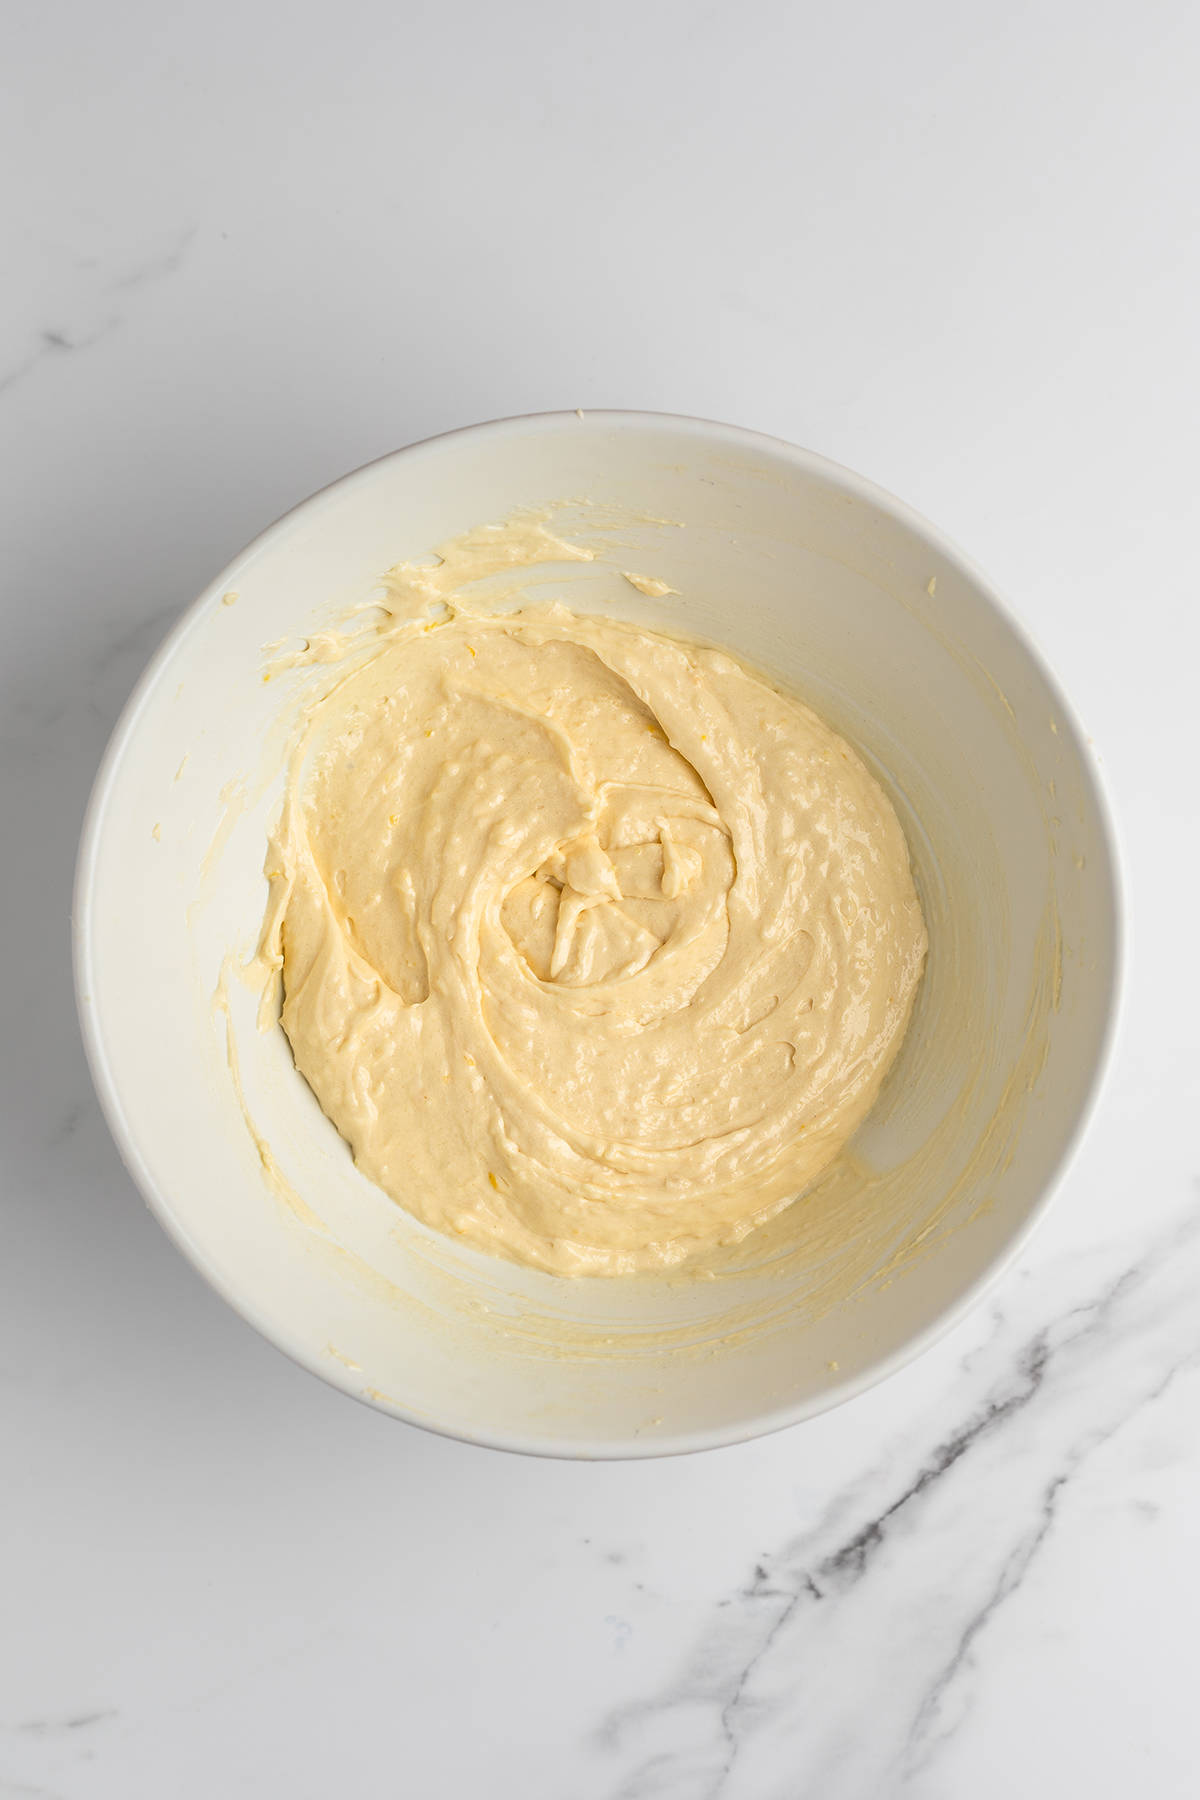
Add the sifted powdered (icing) sugar and gently mix with a rubber spatula (photo 2).

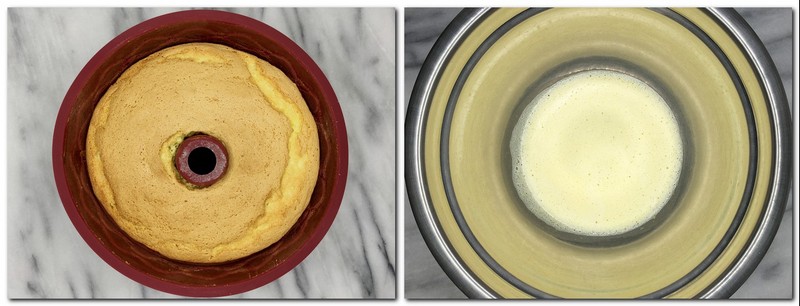
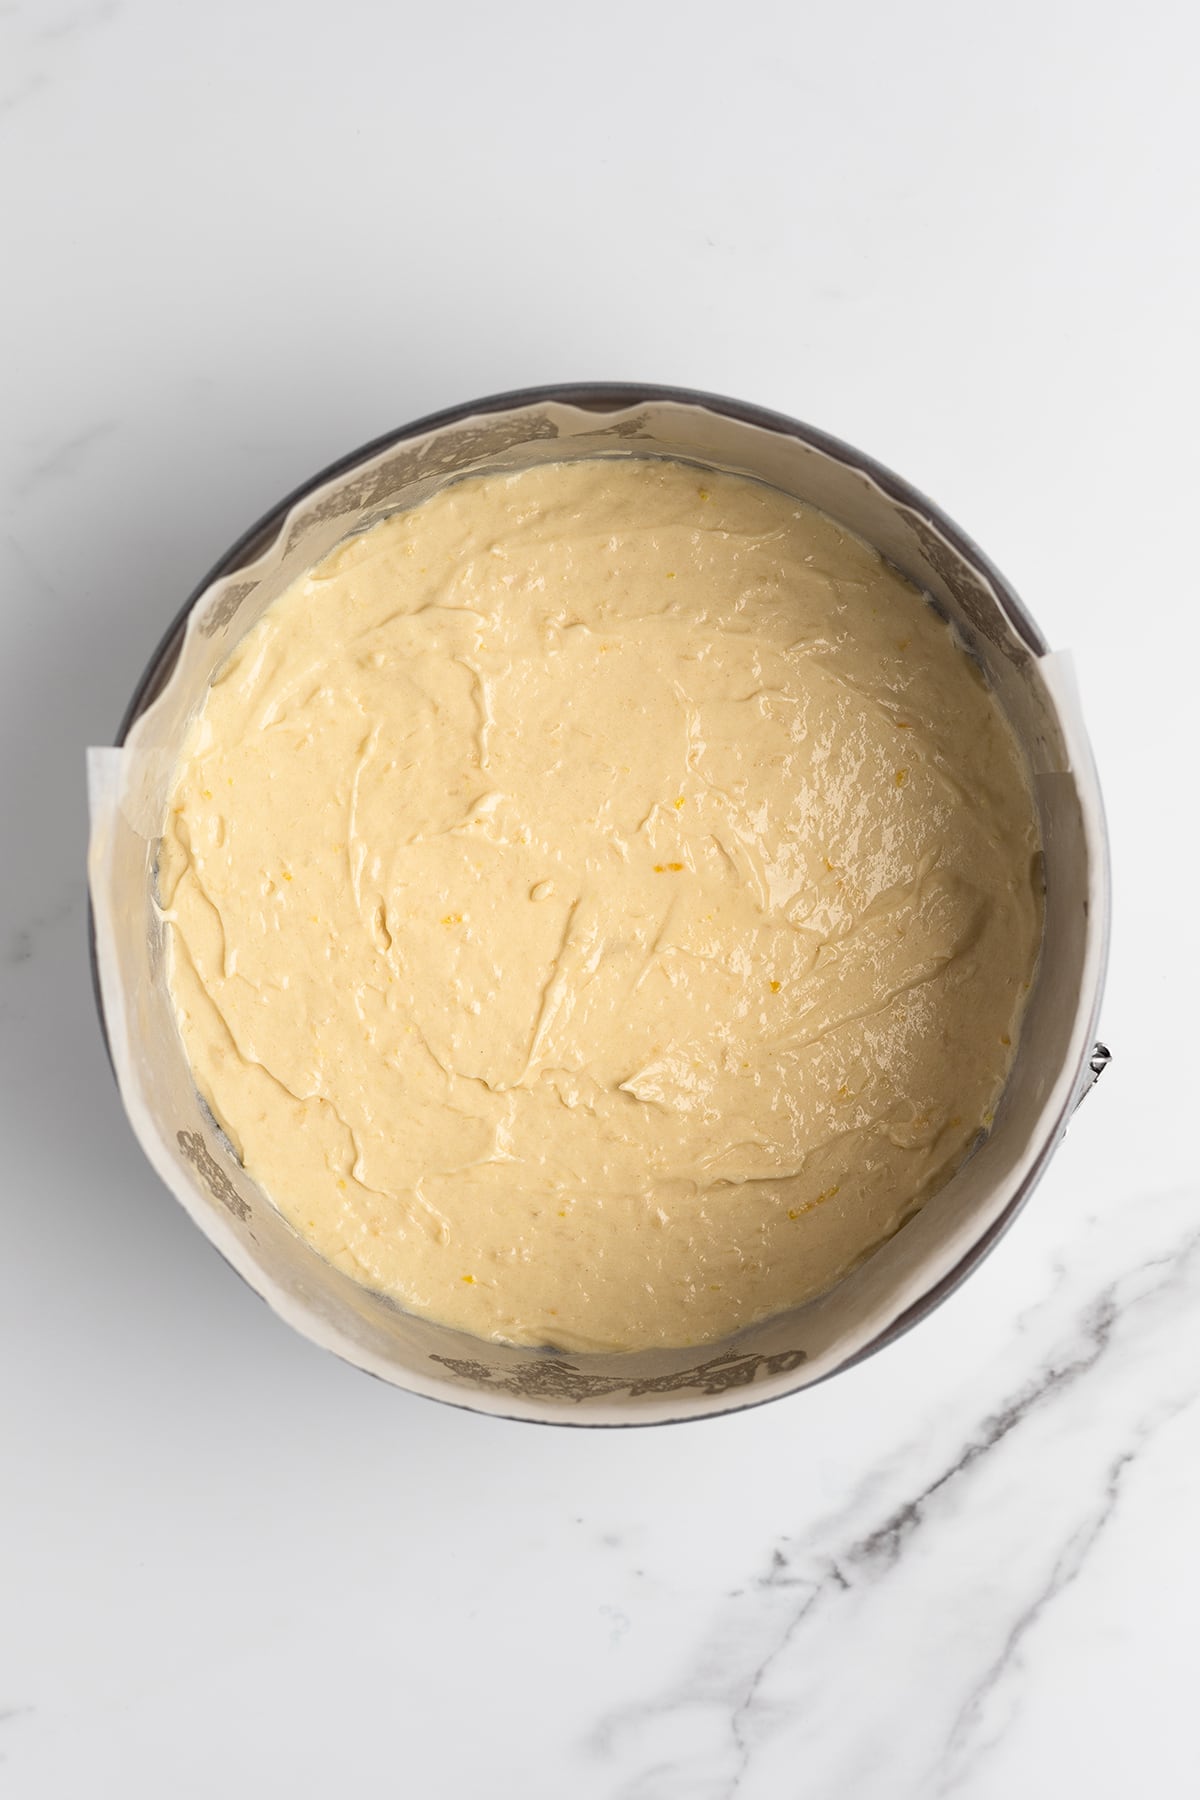
Place the meringue in a pastry bag with the cut end or Ateco plain pastry tip 809. Draw two spiral meringue disks on the parchment paper starting from the center of the circles (photo 3).
Pro tip: Alternatively, divide the meringue evenly between two 7-inch (18 cm) circles drawn on the prepared baking sheets. Use a spatula to spread it out.
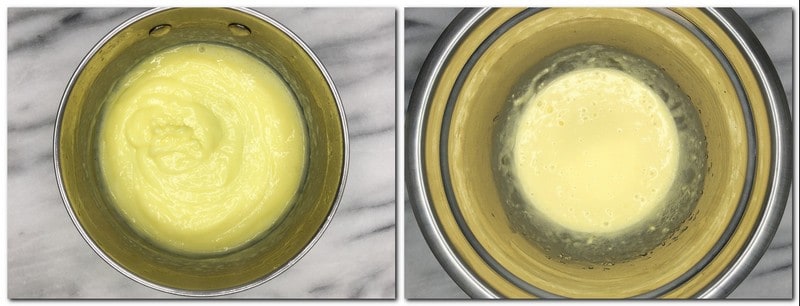
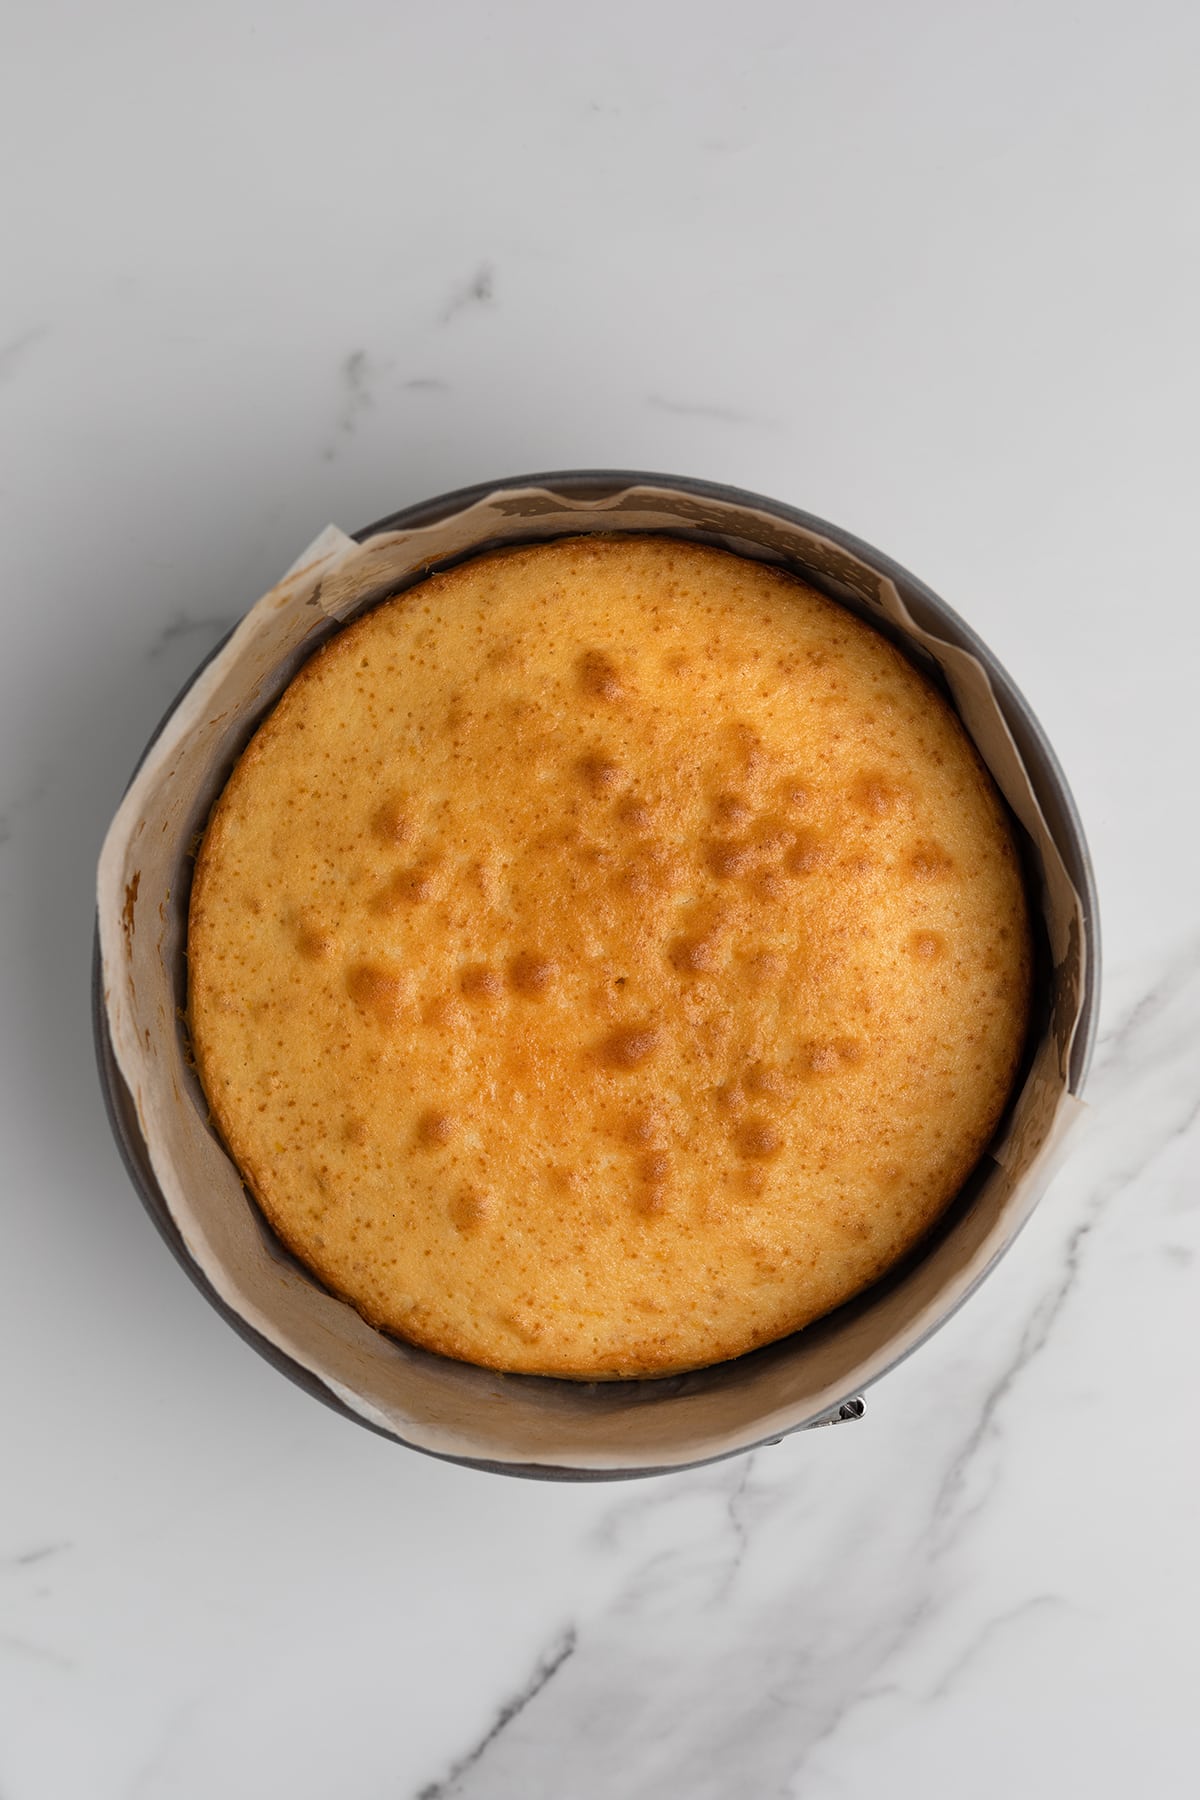
Bake the meringue cake layers for about 2 hours. Let them cool completely (photo 4).

Make mascarpone whipped cream
Consult the mascarpone frosting recipe for step-by-step photographed explanations, helpful tips, and tricks.
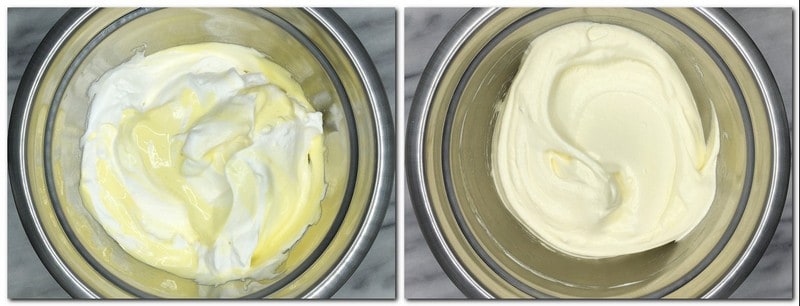
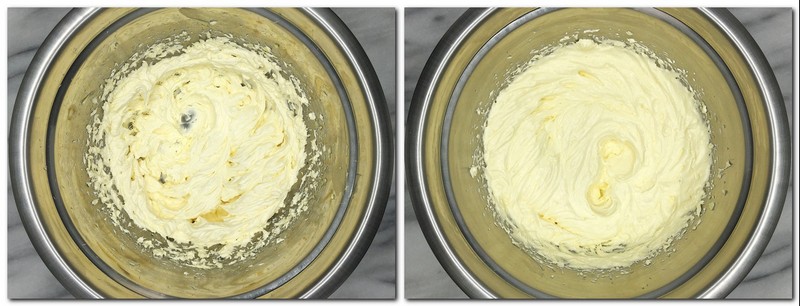
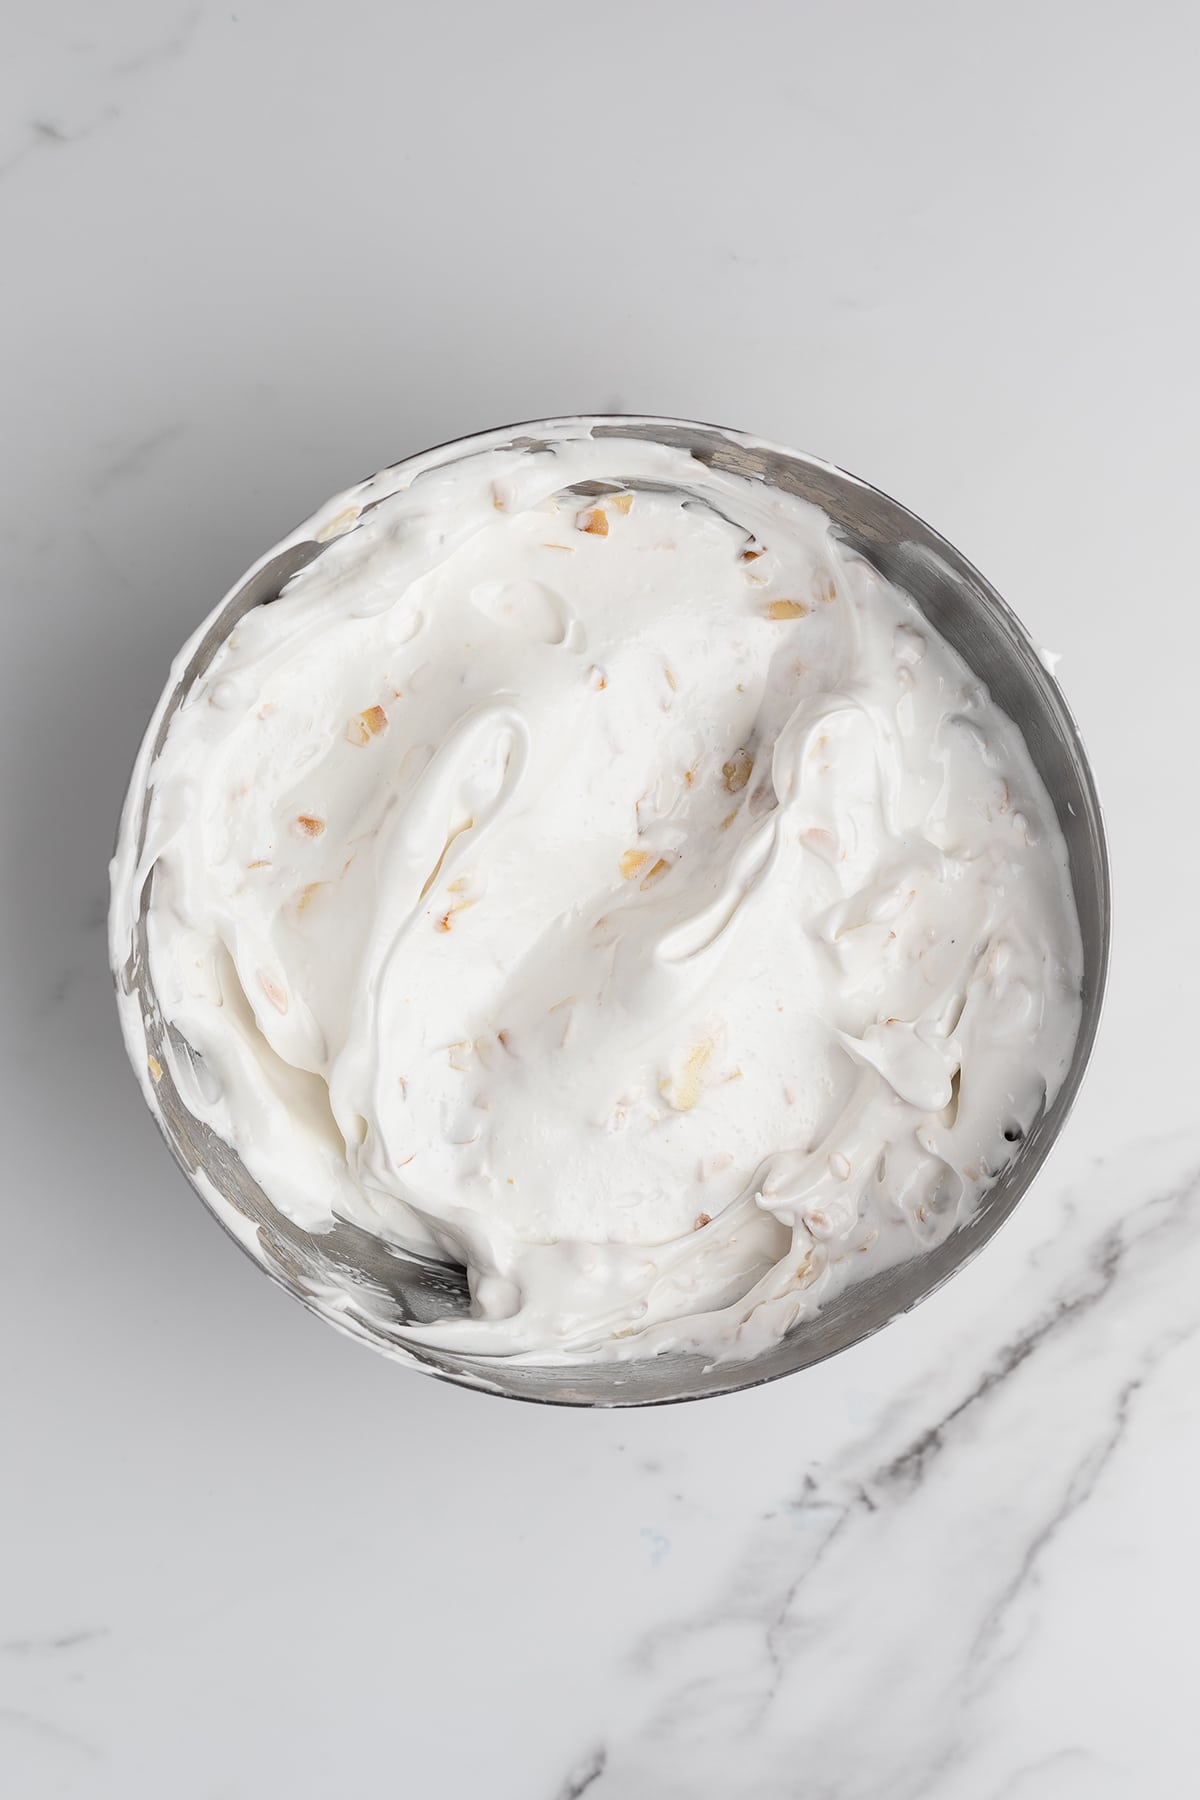
Place cold heavy cream, cold mascarpone, icing (powdered) sugar, and powdered instant coffee in the chilled bowl of a stand mixer with a whisk attachment. Whisk the cream until stiff peaks (photo 5).
Transfer the cream to a piping bag with the end cut about ½ inch (1 cm) or fitted with Ateco tip 809.
Make chocolate shavings
Use a vegetable peeler, scraping across a chocolate bar, to get medium-sized delicate curls. Make large chocolate shavings by scraping the chocolate with a knife if desired.
Assemble the meringue cake
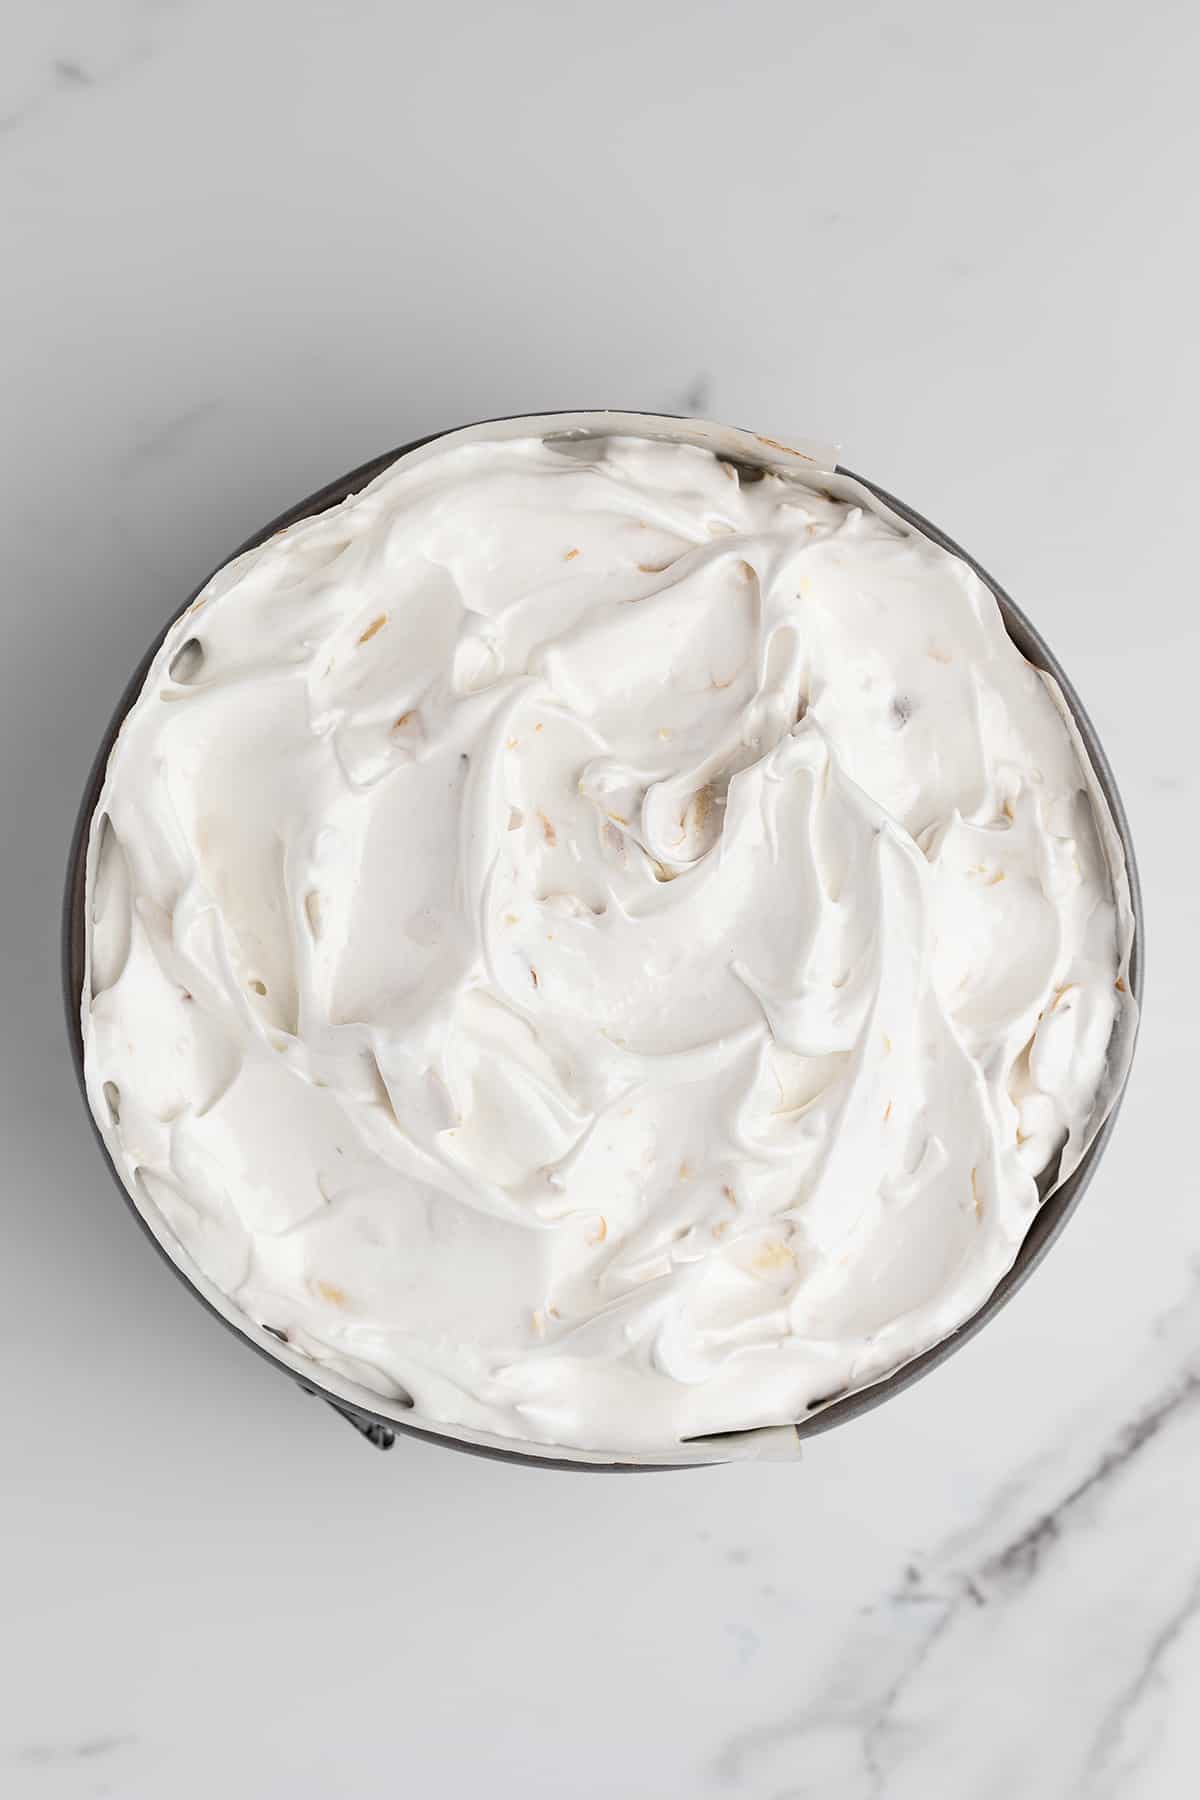
Place the first meringue layer on a cake board or a serving plate and pipe the mascarpone whipped cream in a spiral. Place the second meringue disk top-down, and spread a thin layer of the cream.
Smooth the surface evenly with a bent spatula, mask, and smooth the sides of the cake. Push the cream, making balls over the entire surface of the cake (photo 6).

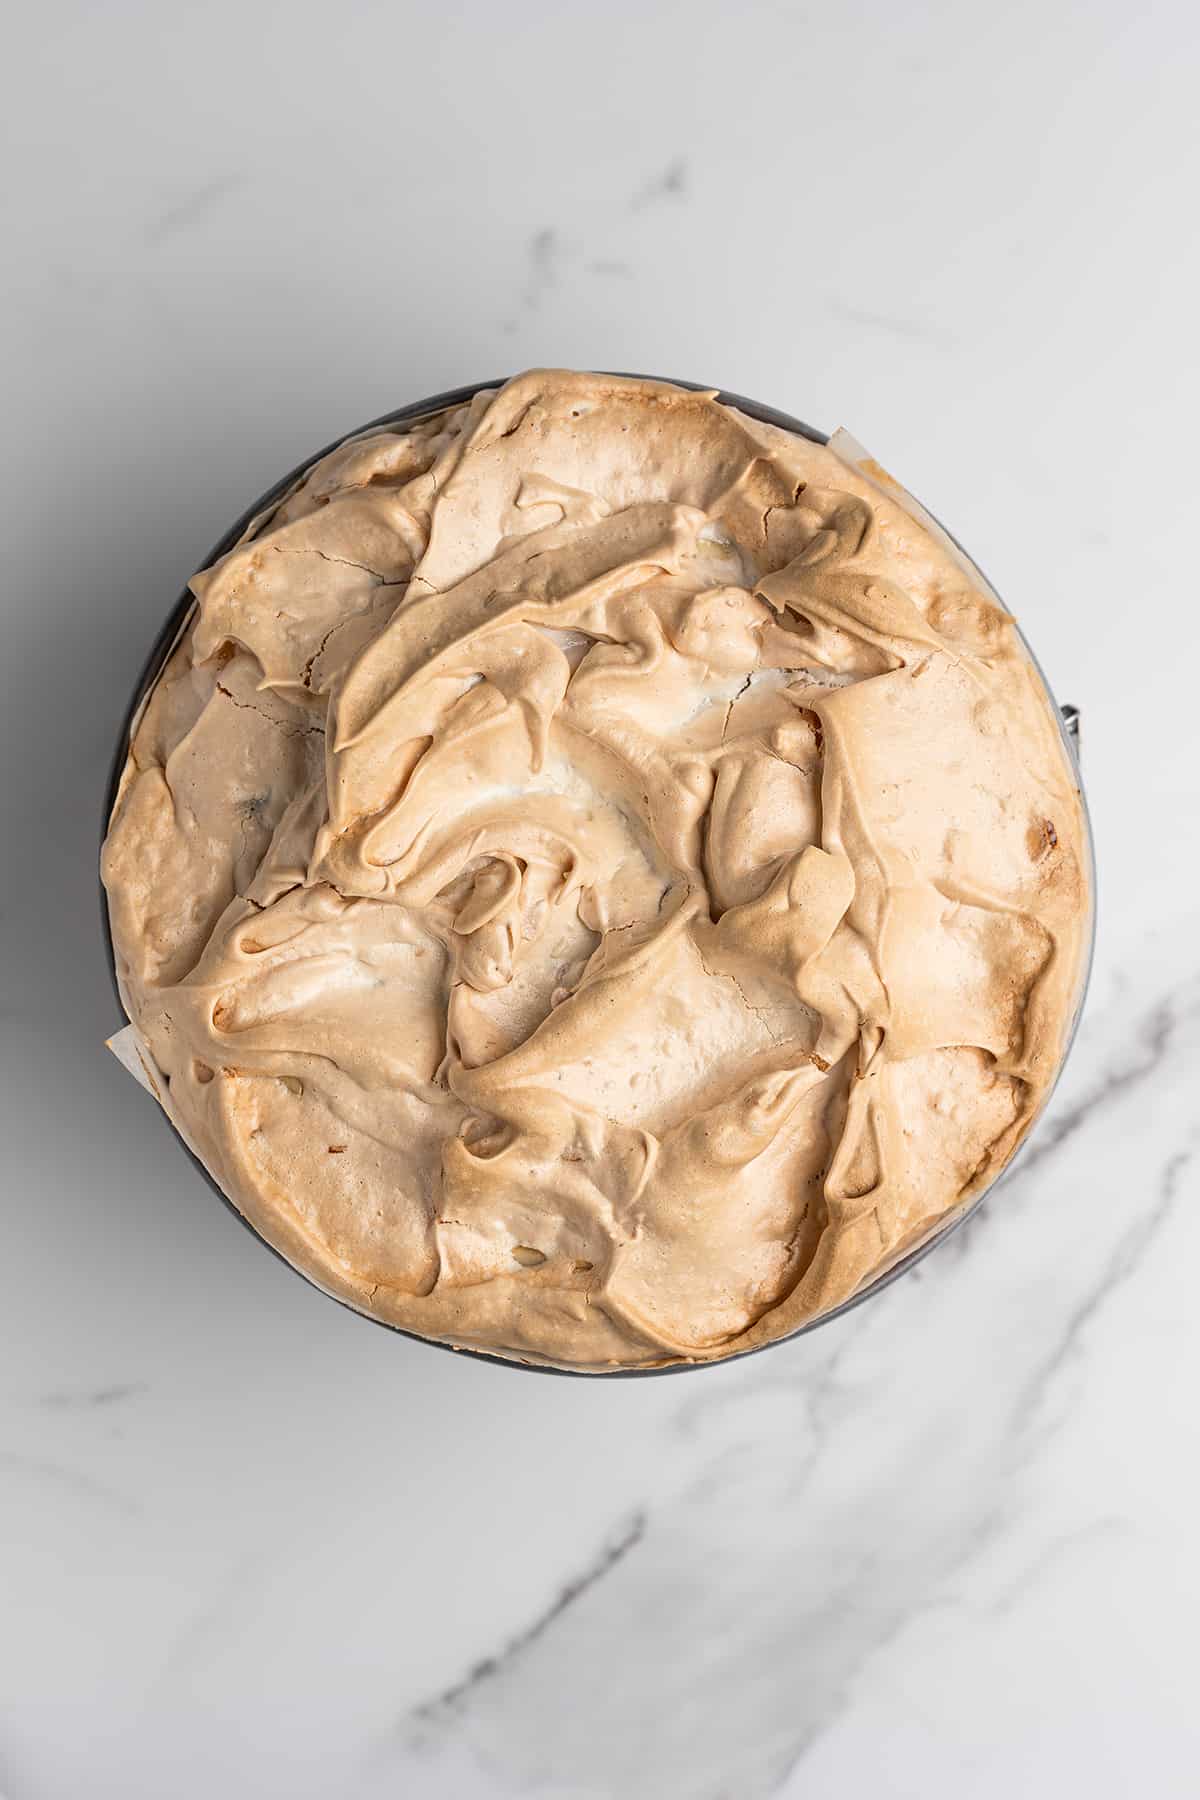
Cover the surface and sides of the cake with chocolate shavings and sprinkle the entire cake with confectioners' sugar and cocoa powder (photos 7-8). Refrigerate it for at least 4 hours before serving.

Expert Tips
- Create cute meringue kisses by piping the rest of the meringue around circles.
- Don't open the oven door during baking.
- Make-ahead option: Bake the meringue in advance, and store airtight, but assemble and serve the cake on the same day: mascarpone whipped cream tends to dry out.
Storing and freezing
Store the meringue cake under a cake dome in the refrigerator for 24 hours.
Can you freeze it? You can not freeze the assembled meringue cake, but you can freeze the meringue layers. Freeze each layer for 3 hours or more. Then, place them in a freezer-safe bag with parchment paper between each layer. Seal, label, and freeze for up to 3 months.
To thaw, bring the meringue to the kitchen counter for 2 to 3 hours. Then make the cream and assemble the cake.
Recipe FAQ
To achieve perfect meringues, bake it at a low oven temperature, around 90 to 110 C, for a long time, up to 2 hours.
You can bake the meringue and store it tightly wrapped in plastic or an airtight container for several days. Avoid humid days for storage.
You can store meringues, also Pavlova meringue shells, at room temperature for up to 3 weeks or freeze for up to 1 month.
The meringue doesn't need to be refrigerated. Instead, store it at room temperature or cool place for up to 3 weeks. Keep it in an airtight container, placing a sheet of parchment paper between layers.
Love classic cakes? Try these next!
- Cake Sans Rival
- Ottolenghi Carrot Cake
- Coconut Dacquoise Cake
- Strawberry Chantilly Cake
- Or browse all the cake recipes
Want more delicious and beautiful recipes? Subscribe to my newsletter and follow me on Facebook, Pinterest, and Instagram for my latest updates. If you make this recipe, please leave a star rating on the recipe card and comment below!
PrintRecipe card
French Meringue Cake Merveilleux

This crowd-pleasing French meringue cake Merveilleux is made by sandwiching two crispy meringues with a luscious coffee-flavored mascarpone whipped cream. The dessert covered with dark chocolate shavings is absolutely decadent and worth every bite.
- Total Time: 2 hours, 30 minutes (plus cooling time)
- Yield: 8 1x
- Category: Cakes
- Method: Baking
- Cuisine: French
Ingredients
For the meringue:
- ½ cup + ½ tablespoon (130 g) egg whites (see note #1)
- ½ cup + 1 ½ tablespoons (130 g) caster sugar
- 1 cup + 2 teaspoons (130 g) powdered (icing) sugar
- 1 pinch of salt
For the mascarpone whipped cream:
- 2 cups + 2 tablespoons (500 ml) heavy cream, 30% fat
- 3 ½ oz (100 g) mascarpone cheese
- 2 tablespoons (30 g) icing (powdered) sugar
- 5 teaspoons (10 g) powdered instant coffee
For the decoration:
- 4 tablespoons (20 g) cocoa powder
- 2 ½ tablespoons (20 g) confectioners' sugar
- 3 ½ oz (100 g) dark chocolate
* If needed, please refer to Baking Conversion Charts.
** Don't you have the correct baking pan on hand right now? Try this simple Cake Pan Converter!
Instructions
-
To make the meringue, preheat the oven to 210°F (100°C). Use a stainless steel circle or a plate 7 inches (18 cm) in diameter as a template, and draw two discs on two sheets of parchment paper. Turn them over and place them on two baking sheets.
-
In a large bowl, place egg whites with a good pinch of salt. Beat with an electric mixer at medium-high speed for 3-4 minutes. Switch the mixer speed to high, and gradually add caster sugar, about 2 tablespoons at a time. Whisk until sugar dissolves and stiff peaks form. Add the sifted powdered (icing) sugar and gently mix with a rubber spatula.
-
Place the meringue in a pastry bag with the cut end or Ateco plain pastry tip 809. Draw two spiral meringue disks on the parchment paper starting from the center of the circles. Alternatively, divide the meringue evenly between two 7-inch (18 cm) circles drawn on the prepared baking sheets. Use a spatula to spread it out. Bake the meringue layers for about 2 hours. Let them cool completely.
-
To make mascarpone whipped cream, place cold heavy cream, cold mascarpone, icing (powdered) sugar, and powdered instant coffee in the chilled bowl of a stand mixer with a whisk attachment. Whisk the cream until stiff peaks. Transfer the cream to a piping bag with the end cut about ½ inch (1 cm) or fitted with Ateco tip 809.
-
To make chocolate shavings, use a vegetable peeler, scraping across a chocolate bar, to get medium-sized delicate curls. Make large chocolate shavings by scraping the chocolate with a knife if desired.
-
To assemble the cake, place the first meringue layer on a cake board or a serving plate and pipe the mascarpone whipped cream in a spiral. Place the second meringue disk top-down, and spread a thin layer of the cream. Smooth the surface evenly with a bent spatula, mask, and smooth the sides of the cake. Push the cream, making balls over the entire surface of the cake.
- Cover the surface and sides of the cake with chocolate shavings and sprinkle the entire cake with confectioners' sugar and cocoa powder. Refrigerate it for at least 4 hours before serving.
Notes
- 130 g egg whites approximately equal to 4 fresh egg whites from large-size chicken eggs.
- Create cute meringue kisses by piping the rest of the meringue around circles.
- Don't open the oven door during baking.
- Make-ahead option: Bake the meringue in advance, and store airtight, but assemble and serve the cake on the same day: mascarpone whipped cream tends to dry out.
Nutrition
- Serving Size: 1 slice
- Calories: 456
- Sugar: 50 g
- Sodium: 81 mg
- Fat: 25.3 g
- Saturated Fat: 16.1 g
- Carbohydrates: 54.9 g
- Fiber: 1.2 g
- Protein: 6.3 g
- Cholesterol: 80 mg
The nutritional information has been calculated using an online recipe nutrition calculator such as Verywellfit.com and is intended for informational purposes only. These figures should be used as a general guideline and not be construed as a guarantee.
The recipe was adapted from https://www.femmeactuelle.fr. It was originally published on February 22, 2019. The recipe has been revised to include improved content and photos.