
• Skip to primary navigation
  • Skip to main content
  • Skip to primary sidebar

Baking Like a Chef logo

  • ABOUT
  • RECIPES
  • CLUB
  • SHOP
menu icon
go to homepage
  • Recipes
  • Basics
  • Printables
  • Subscribe
  • About
search icon
Homepage link
  • Recipes
  • Basics
  • Printables
  • Subscribe
  • About
×

Want to learn sourdough?

START

Home » Recipe Index

Syrniki Recipe (Fluffy Farmer's Cheese Pancakes)

Apr 9, 2023 · Leave a Comment

Syrniki served on a white plate and honey.

Quick Summary: Syrniki (also spelled sirniki) are soft, fluffy Eastern European pancakes made from farmer's cheese, egg, flour, and sugar, then pan-fried until golden. They are a staple breakfast in Ukraine, Russia, and Belarus, ready in about 30 minutes and served warm with sour cream, jam, honey, or fresh fruit.

Syrniki served on a white plate and honey

What are syrniki?

Syrniki (also sirniki; plural) are soft, fluffy cheese pancakes of Eastern European origin made from farmer's cheese. They make a staple breakfast in Ukrainian, Russian, and Belarusian cuisines.

They are also known by many different names, like European pancakes, Ukrainian syrniki, Ukrainian cheese pancakes, Russian cheese pancakes, Russian syrniki, cottage cheese pancakes, Russian cheese patties, and Russian cottage cheese pancakes.

Both syrniki and traditional American pancakes are thick pancakes, but they are different.

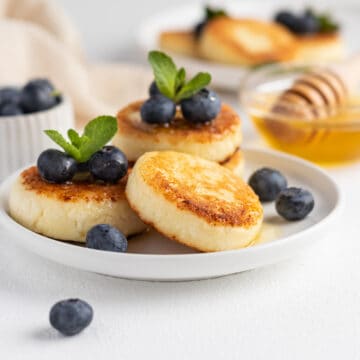
Sirniki topped with honey, blueberries, and mint leaves

How do you pronounce syrniki?

Syrniki is pronounced SEER-ni-kee. The alternate spelling sirniki is pronounced the same way, since both come from the Slavic word for cheese. You may also see it written as syrnyky, sirniki, or syrnki, but they all refer to the same farmer's cheese pancakes.

Where do syrniki come from?

Syrniki are of Eastern European origin and are a traditional breakfast in Ukrainian, Russian, and Belarusian cuisines. Because they are equally popular across the region, it is hard to pin their origin to a single country. They are traditionally served hot with sour cream and a whole-fruit preserve called varenye.

Where to buy farmer's cheese?

While farmer's cheese is widely sold in many supermarkets in Eastern Europe, it can be challenging to find internationally. Look for farmer's cheese in the dairy section, next to quark, cottage cheese, sour cream, or ricotta.

If there are specialized Polish, Russian, or Ukrainian grocery stores or an Eastern European grocery store nearby, you may be lucky to find the farmer's cheese there.

What kind of cheese can you use as an alternative? You can use well-drained ricotta, cottage cheese, Russian tvorog, or twaróg. But you need to remove excess liquid to shape your pancakes.

You can follow a farmer's cheese recipe to make your own tvorog at home with a few ingredients.

Why you'll love this recipe

  • Quick and simple. This sirniki recipe uses a few basic ingredients and comes together in about 30 minutes so that you can make a warm breakfast fast.
  • Soft, fluffy, and cheesy. Made with homemade farmer's cheese (tvorog), the pancakes are tender inside and golden brown.
  • Great any time of day. Serve syrniki for breakfast, as a snack, or for lunch with sour cream, jam, honey, or fresh fruit.
  • Naturally versatile. Add raisins, vanilla, or lemon zest, or pair them with other cheese classics like nalesniki (Polish crêpes).

Ingredients

Syrniki ingredients in pictures

For ingredients and detailed instructions, refer to the recipe card below.

  • Farmer's cheese (tvorog) with 9% fat is the main ingredient in a traditional syrniki recipe. Opt for store-bought or homemade farmer's cheese. It must be dry, so drain it in double layers of cottage cheesecloth over a colander for a few hours or overnight in the fridge. Avoid using non-fat farmer's cheese when making pancakes: it can cause an unpleasant sogginess while frying.

Pro tip: If the farmer's cheese is dry enough, purchase it and use it right away. If not, try squeezing it a bit to remove excess liquid by covering it with two layers of cheesecloth.

  • Egg: The recipe calls for a large egg at room temperature. Bring it to the counter about 30-60 minutes before you start.
  • Flour: Use all-purpose flour, or replace it with semolina. For a gluten-free option, replace it with cornstarch or white rice flour.
  • Sugar: Use granulated or caster sugar interchangeably.
  • Vanilla sugar is optional. It brings a rich vanilla flavor to your pancakes. You can replace it with vanilla extract if desired.
  • Salt enhances the flavors of sirniki.
  • Vegetable oil is used for frying farmer's cheese pancakes. You can replace it with grapeseed, canola, or non-refined coconut oil. But try to avoid olive oil, including light olive oil, due to its strong taste and flavor.

Equipment

You need only a few basic tools to make syrniki:

  • mixing bowl
  • fork or potato masher
  • fine-mesh sieve
  • frying pan or skillet
  • spatula

How to make syrniki

The key to great syrniki is dry farmer's cheese. You must drain it if it isn't dry enough or packed in water.

Step 1. Drain the farmer's cheese (if needed). Place two layers of cheesecloth over a colander, then put the farmer's cheese on top. Bundle the cloth around the cheese like a coin purse, then squeeze with your hands.

Pro tip: If not enough to remove the excess liquid, place the colander over a medium-sized bowl and refrigerate for 2-4 hours. If you use another type of cheese, a farmer's cheese substitute, make sure to strain it overnight.

Step 2. Place the farmer's cheese in a large bowl, and add egg, flour, salt, and sugar (photo 1).

Syrniki ingredients in a mixing bowl

Step 3. Mix the ingredients with a fork, spatula, or potato masher, then knead with your hands until the dough becomes sticky. It will be thick enough, much thicker than the regular pancake batter.

To test, take the pancake dough and slightly squeeze it in your palm to make a ball. If the dough holds its shape, it's the right consistency and ready (photo 2).

Syrniki dough in a bowl

Step 4. Sift a little flour on the working surface for coating (see my guide to sifting flour). There are three ways to shape syrniki pancakes. Choose one or another; it is your personal preference.

  • Shaping way #1. Take the dough or cheese mixture (about 2 oz./50 g) and, with damp hands (wet them in cold water or oil), shape a small ball. Place it on a floured surface and flatten it into a small patty about ½ inch (1.2-1.5 cm) thick. Roll in flour, coating the pancake on all sides. Set aside and continue with the remaining pancakes.
  • Shaping way #2. Use a quarter-cup cookie scoop or an ice cream scoop to portion your pancakes. Place the dough scoop on the lightly floured board and roll it up with your hand in a circular motion, gently pulling the ball along (like shaping a dinner roll). Pat the dough down with your hand, and cover it with flour.
  • Shaping way #3. Turn the dough onto a floured surface and gently shape it into a log, about 2 inches (5 cm) in diameter. Use a knife or bench scraper to cut the dough into even pieces ½ inch (1.2-1.5 cm) thick (photo 3). Cover each cut piece with enough flour, and shape each pancake using a glass or a round cookie cutter of a larger diameter. Or use your hand, the easiest way (photo 4). The shaped syrnik is round, resembling a "puck" or patty, and about ½ inch (1.2-1.5 cm) thick.
Cheese pancakes dough shaped like a log and cut into pieces

Pro tip: Don't add too much flour; otherwise, the pancakes will lose their fluffiness, cheesy taste, and flavor.

Shaped syrniki on a cutting board with parchment

Step 5. Pour the vegetable oil into a frying pan (opt for a nonstick skillet) and heat it. Next, transfer each syrnik to the pan using a spatula.

Fry syrniki (3-4 at a time) in a hot pan over medium-low heat for 3-4 minutes on each side, until golden brown. Use a flexible turner to help turn the pancakes. You may need to add more oil as you go. Be careful with turning your pancakes: the oil may splash!

Pro tip: The higher your syrnik, the less heat you should use and the longer it to fry. You may need to cover the pan with a lid and fry the second side (after it turns golden) for 1-1.5 minutes longer.

Step 6. Remove the fried syrniki from the pan and place them on a plate covered with a paper towel to absorb the excess oil. Then transfer them to a serving plate (photo 5).

Fried cheese pancakes on a serving plate

Serve cheese pancakes hot with a dollop of sour cream, whipped cream, sweetened condensed milk, jam preserves, or fresh fruit. You can eat them cold if desired.

Expert tips

  1. Make sure to coat the pancakes well with flour before frying. They should have a puck-like shape and be dredged in flour.
  2. Ensure your farmer's cheese is dry before you start. If it is too runny, add more flour, which will reduce the authentic taste of cheese-filled pancakes. To fix this, drain the farmer's cheese well.
  3. Use a food processor for a few seconds to crumble the farmer's cheese evenly. Then proceed with the recipe, mixing ingredients with a fork. Avoid using an immersion blender or a hand mixer to make the dough.
  4. To keep pancakes in a nice shape, place them in a single layer in the freezer for 5-10 minutes before frying.
  5. Do not add too much flour. Just enough to bind the dough keeps syrniki soft and tender inside; extra flour makes them dense.
  6. For extra lift, add a pinch of baking powder to the dough. It gives the cheese pancakes a lighter, fluffier texture.
Fried syrniki served with honey, fresh berries, and mint leaves

Recipe variations

  • Replace farmer cheese with other alternative types of cheese, such as well-drained cottage cheese, ricotta, tvorog, or twaróg.
  • Tweak the amount of sugar to find the perfect balance for your taste: from two to three tablespoons for just enough sweetness to sugar-free sirniki.
  • Add raisins or chopped dried fruit for an extra-special twist. And to intensify the flavor, add a pinch of ground cinnamon or lemon zest to your batter.
  • You can add some grated carrots. No one will ever guess they are there.

Storing & freezing

Serve your sirniki hot and fresh right from the frying pan. Don't let them sit at room temperature for more than 24 hours.

Store leftovers in an airtight container in the refrigerator for up to 4 days. With homemade farmer's cheese, store your pancakes for up to 3 days.

To reheat, use the microwave or a skillet over low heat with a bit of oil. Cover the pan with a lid for heating thoroughly.

Can you freeze syrniki?

Raw syrniki: You can freeze raw cheese pancakes for up to 2 months. Place them, shaped and flour-dusted, on a tray lined with baking paper, and freeze for 2-3 hours.

Once frozen, stack about 7 pancakes in a freezer bag, separate them with parchment paper, label the bag, and freeze. When ready to fry, there is no need to defrost them. For each side, fry your pancakes straight from the freezer over low heat for 4-5 minutes (maybe longer).

Fried syrniki: You can also freeze fried sirniki for 4 months. Let them cool, then stack 5-7 of them (no need to separate each with parchment). Cover pancakes with plastic wrap, then aluminum foil, and freeze. To thaw, refrigerate overnight, then reheat in the microwave.

How to serve syrniki

The most traditional Russian way to serve syrniki is to top them with sour cream, with or without fruit preserves. You can also use other favorite toppings, such as powdered sugar, Greek yogurt, whipped cream, honey or maple syrup, store-bought or homemade jam, fresh berries, Nutella, applesauce or apple juice reduction, or ice cream.

Recipe FAQ

Is it sirniki or syrniki?
Syrniki and sirniki are two spellings of the same Eastern European dish, farmer's cheese pancakes, pronounced SEER-ni-kee. Both are correct.

Where does syrniki originate from?
Syrniki are of Eastern European origin and are a staple breakfast in Belarusian, Russian, and Ukrainian cuisines.

Are syrniki Russian or Ukrainian?
Syrniki are served for breakfast in both Russian and Ukrainian cuisines, so it is hard to pin their origin to one country.

Can you make syrniki with cottage cheese?
You can replace farmer's cheese with well-drained cottage cheese to make these pancakes.

Can you make syrniki with feta cheese?
Feta can substitute for farmer's cheese, but it is not a typical ingredient in a traditional syrniki recipe.

Can you make syrniki with fresh cheese?
Fresh cheese or crème fraîche is not a great substitute. Its texture and flavor will not give authentic results.

Can you make syrniki with cream cheese?
Cream cheese is not the right ingredient here. Its rich, creamy texture does not work for this traditional dish.

What is syrniki eaten with?
Syrniki are best served with sour cream, fruit preserves, powdered sugar, honey, fresh fruit, or applesauce.

What is the syrniki tradition?
Traditionally in Eastern Europe, syrniki are made for breakfast and served hot with sour cream and a whole-fruit preserve called varenye.

What are the ingredients for syrniki?
Syrniki need just a few basic ingredients: dry farmer's cheese, an egg, flour, a little sugar, a pinch of salt, and optional vanilla. You fry them in a little oil until golden.

How many calories are in syrniki?
One syrnik has about 107 calories.

Love crepes and pancakes? Try these next!

  • Dutch Baby Pancake
  • French Crepes
  • Galette Bretonne (buckwheat crepes)
  • Beggar's Purses (aka crepe purses)

Want more delicious and beautiful recipes? Subscribe to my newsletter and follow me on Facebook, Pinterest, and Instagram for my latest updates. If you make this recipe, please leave a star rating on the recipe card and comment below!

Print

Recipe card

Syrniki Recipe (Farmer's Cheese Pancakes)

Syrniki served on a white plate and honey.
Print Recipe
Save Recipe Recipe Saved

5 Stars 4 Stars 3 Stars 2 Stars 1 Star

No reviews

Syrniki, also sirniki (plural), are soft and fluffy cheese pancakes of Eastern European origin made from farmer's cheese. Served with sour cream and fruit preserves, they make a delightful breakfast. 

  • Author: Irina Totterman
  • Prep Time: 10 minutes
  • Cook Time: 15 minutes
  • Total Time: 25 minutes
  • Yield: 9 1x
  • Category: Crepes and Pancakes
  • Method: Cooking
  • Cuisine: Eastern European

Ingredients

Scale
  • 14 oz. (400 g) farmer's cheese, well-drained
  • 1 large egg
  • 3 tablespoons all-purpose flour 
  • 1 tablespoon granulated sugar
  • 1 sachet (9 g) vanilla sugar (optional)
  • 1 pinch of salt
  • 3-4 tablespoons vegetable oil for frying

Instructions

  1. Place the farmer's cheese in a mixing bowl, and add egg, flour, salt, and sugar. Mix the ingredients with a fork, spatula, or potato masher, and stir until the batter (better called dough) becomes sticky. It will be thick enough, much thicker than the regular American pancake batter. To test, take the pancake dough in your hand and slightly squeeze it in your palm. If the dough holds its shape, it's the right consistency and ready.
  2. To shape syrniki, sift some flour on the working surface for coating. There are three ways to shape syrniki pancakes. #1 Take the dough (about 2 oz. / 50 g) with damp hands (wet your hands in cold water or oil) and shape it into a small ball. Place it on a floured surface and flatten it into a small patty about ½″ thick. Roll in flour, coating the pancake on all sides. Set aside and continue with the remaining pancakes. #2 Use a quarter-cup cookie scoop or an ice cream scoop to portion your pancakes. Place the dough scoop on the floured surface and roll it up with your hand in a circular motion, gently pulling the ball along (like shaping a dinner roll). Pat the dough down with your hand, and cover it with flour. #3: Turn the dough onto a floured surface and gently shape it into a log, like a thick sausage (2 inches/5 cm in diameter). Use a knife or bench scraper to cut the dough into even pieces ½ inch (1.2-1.5 cm) thick. Cover each piece with flour, then shape each pancake using a glass or a round cookie cutter with a larger diameter.
  3. To fry, pour the vegetable oil into a frying pan and heat it. Transfer each syrnik to the pan using a spatula. Fry syrniki (3-4 at a time) over medium-low heat for 3-4 minutes on each side, until golden. Use a flexible turner to help turn the pancakes. You may need to add more oil as you go. The higher your syrnik, the less heat you should use and the longer it takes to fry. You may need to cover the pan with a lid and fry the second side (after it turns golden) for 1-1.5 minutes longer.
  4. Remove the fried syrniki from the pan and place them on a plate lined with paper towels to absorb excess oil.
  5. Serve cheese pancakes hot with sour cream, whipped cream, sweetened condensed milk, jam preserves, or fresh fruit. You can eat them cold if desired.

Notes

  1. Make sure to coat the pancakes well with flour before frying. They should be puck-shaped and well coated in flour.
  2. Ensure your farmer's cheese is dry before you start. If it is too runny, you will need to use more flour, which will reduce the authentic taste of cheese-filled pancakes. To fix this, drain the farmer's cheese well.
  3. Use a food processor for a few seconds to crumble the farmer's cheese evenly. Then proceed with the recipe, mixing ingredients with a fork.
  4. To keep pancakes in a nice shape, place them in a single layer in the freezer for 10 minutes before frying.
  5. Store syrniki in an airtight container in the fridge for 3-4 days.
  6. The calorie count is calculated per 1 syrnik and does not include the frying oil since its amount will vary depending on the oil used, cooking time, and temperature. 

Nutrition

  • Serving Size: 1
  • Calories: 107
  • Sugar: 1.8 g
  • Sodium: 215 mg
  • Fat: 4,8 g
  • Saturated Fat: 2.6 g
  • Carbohydrates: 4.1 g
  • Fiber: 0.1 g
  • Protein: 9 g
  • Cholesterol: 37 mg

Thank you for following me on Pinterest, Facebook, and Instagram. Hashtag #bakinglikeachef so I can see your creations.

The nutritional information has been calculated using an online recipe nutrition calculator such as Verywellfit.com and is intended for informational purposes only. These figures should be used as a general guideline and not be construed as a guarantee.

Banana Nutella Crepes (Easy Recipe)

Apr 22, 2022 · 1 Comment

Banana Nutella crepes with Nutella drizzled on top.

Quick Summary: To make banana Nutella crepes, blend ripe bananas into a thin crepe batter, cook paper-thin crepes in a hot pan, then spread each with warm Nutella, add fresh banana slices, and fold. The mashed banana in the batter gives a soft texture and double banana flavor.

Banana and Nutella crepes with Nutella drizzled on top.

What are banana Nutella crepes?

Banana Nutella crepes are thin French-style crepes filled with Nutella, a chocolate-hazelnut spread, and fresh banana slices. In this version, mashed banana also goes into the batter, so the crepes taste of banana through and through.

They work for breakfast, brunch, or dessert, and are usually folded into triangles or rolled up and dusted with powdered sugar.

Banana Nutella crepes recipe

Once you have mastered basic crepes, banana crepes are the natural next step. Add Nutella to the mix, and you get a dessert that is pure comfort.

Think paper-thin crepes with crisp edges, layered with creamy chocolate-hazelnut spread and fresh banana slices. This is a classic you will spot at Parisian crepe stands. Like Proust's madeleines, one bite can bring back warm childhood memories.

Easy to make at home, they are perfect for breakfast, a sweet lunch, or a simple dessert. This timeless pairing of banana and Nutella turns an ordinary crepe into something special.

Why you'll love this recipe

  • Double banana flavor: mashed banana in the batter plus fresh slices in the filling.
  • Thin and soft: the batter cooks into paper-thin crepes with lightly crisp edges.
  • Simple filling: warm Nutella and sliced banana, then fold into a triangle.
  • Any time of day: serve them for breakfast, brunch, or an easy dessert.

Ingredients

For ingredients and detailed instructions, refer to the recipe card below.

Make sure all the crepe ingredients are at room temperature.

  • Bananas: Choose ripe yellow bananas with a few brown specks for sweetness, but avoid overripe brown bananas meant for banana bread. For garnish, choose fresh, firm ripe bananas.
  • Flour: Use all-purpose flour.
  • Milk: Use whole milk, or swap for low-fat. For thinner crepes, replace 3½ tablespoons (50 ml) of milk with water.
  • Eggs: Large eggs help bind the crepe batter.
  • Salt: Enhances and balances the flavors.
  • Butter: Adds rich flavor and prevents sticking. You won't need to grease the skillet between crepes.
  • Nutella: The classic chocolate-hazelnut spread for this recipe. You can try other chocolate spreads, but skip chocolate sauce as a filling (though it is perfect for drizzling).

Equipment

You need just a few basic tools to make banana Nutella crepes:

  • Blender
  • Mixing bowl
  • Hand whisk
  • Fine-mesh sieve
  • Crepe pan or non-stick pan
  • Ladle
  • Flexible turner

How to make banana Nutella crepes

Step 1. Blend peeled bananas, eggs, and a pinch of salt until smooth. Add half the milk, blend briefly, then transfer to a large bowl.

Step 2. Whisk the sifted flour, then add the remaining milk and water. Strain through a fine-mesh sieve if needed, then stir in melted, cooled butter. Rest the batter for 15-30 minutes.

Step 3. Heat a crepe pan over medium to medium-low heat. Pour in a small ladle of batter, swirl to coat the pan thinly, and cook 1-2 minutes per side. Repeat with remaining batter.

Step 4. For the filling, warm Nutella in the microwave until spreadable. Slice bananas thinly and sprinkle with lemon juice. Spread 1-2 tablespoons Nutella over half a crepe, arrange banana slices on top, fold into a half-moon, then fold again into a triangle.

Step 5. Serve 1-2 crepes per plate, dusted with powdered sugar or topped with chopped hazelnuts. Add a Nutella drizzle if you desire.

Expert tips

  1. Read all the tips and tricks in the post devoted to basic crepes.
  2. Warm up Nutella in a water bath instead of using the microwave.
  3. Rest the batter for 15 to 30 minutes so the bubbles settle and the gluten relaxes, which gives you more tender crepes.
  4. Do not flip too early: wait until the surface is no longer shiny and the edges start to brown, or the crepe will tear.
  5. Keep the pan at medium to medium-low heat so the crepes stay soft and pliable, not crispy.
  6. Wipe the pan with a paper towel between crepes so the butter does not burn.

Recipe variations

  • Add fresh red berries with bananas for extra color and flavor.
  • Try strawberry-banana Nutella crepes or experiment with other fruits.
  • Fill crepes with Nutella and bananas, then fold into a crepe purse and sprinkle with cinnamon.
  • Swap fresh bananas for caramelized ones (butter + brown sugar, fried for a few minutes).
  • Replace Nutella with peanut butter for a less sweet option.
  • Fill crepes with sugar-free preserves or homemade apple juice reduction.
  • Add crunch by topping with granola or crushed cookies for extra texture.
  • Roll instead of fold: spread Nutella and banana down the center, roll up, and place seam-side down.
  • Finish with a dollop of whipped cream or a drizzle of maple syrup.

Storing & freezing

Garnish as many crepes as needed to finish during the day. Then store leftover crepes, covered with plastic wrap, in the refrigerator for two days or in the freezer for two months.

Recipe FAQ

How do you make banana Nutella crepes?
Blend ripe bananas into a thin crepe batter, cook paper-thin crepes in a hot pan for 1 to 2 minutes per side, then spread each crepe with warm Nutella, add fresh banana slices, and fold.

Do you put banana in the crepe batter?
In this recipe, yes. Mashed banana goes into the batter for extra flavor and a soft texture, and more sliced banana goes into the filling.

What bananas work best for banana crepes?
Ripe, spotty bananas are best for the batter because they are sweeter and blend smoothly. For the filling, use firmer, just-ripe bananas so the slices hold their shape.

Can you make banana Nutella crepes ahead of time?
Yes. Cook and cool the plain crepes, then stack them with parchment between each one and store. Fill with Nutella and banana just before serving so the banana stays fresh.

Can I make strawberry banana Nutella crepes?
Yes. Add sliced strawberries alongside the banana, or swap the banana for strawberries entirely for a different fruit-and-Nutella crepe.

Can you make crepes without a blender?
Yes. Mash the banana well, then whisk the batter by hand. Pass it through a fine-mesh sieve before cooking for a smooth result.

What is the difference between crepes and pancakes?
Crepe batter has no leavening, so crepes are thin and flat and can be rolled or folded. Pancakes contain baking powder or soda, which makes them thick and fluffy.

Why are my crepes crispy instead of soft?
The pan was too hot or the crepes cooked too long. Keep the heat at medium to medium-low and cook just 1 to 2 minutes per side so they stay soft and pliable.

How many calories are in banana Nutella crepes?
Each filled crepe has about 265 calories, though the exact amount depends on how much Nutella and banana you use.

Love crepes? Try these next!

Find various crepe and pancake recipes on the blog: thin and delicious French crepes, Polish pancakes, crepes flambéed with Grand Marnier, or a spectacular Dutch baby pancake.

  • French Chocolate Crepes
  • Clatite (Romanian Pancakes)
  • Almond Milk Crepes
  • Crispy Crepes
  • Basic Crepes

Want more delicious and beautiful recipes? Subscribe to my newsletter and follow me on Facebook, Pinterest, and Instagram for my latest updates. If you make this recipe, please leave a star rating on the recipe card and comment below!

Print

Recipe card

Banana Nutella Crepes

Banana Nutella crepes with Nutella drizzled on top.
Print Recipe
Save Recipe Recipe Saved

5 Stars 4 Stars 3 Stars 2 Stars 1 Star

5 from 1 review

Banana Nutella crepes are thin crepes with mashed banana in the batter, filled with warm Nutella and fresh banana slices. An easy breakfast, brunch, or dessert.

  • Author: Irina Totterman
  • Prep Time: 1 hour
  • Cook Time: 30 minutes
  • Total Time: 1 hour, 30 minutes
  • Yield: 18 crepes 1x
  • Category: Crepes and Pancakes
  • Method: Cooking
  • Cuisine: French

Ingredients

Scale

For the crepe batter:

  • 2 medium bananas (230 g)
  • 5 large eggs, room temperature
  • 1 pinch of salt
  • 2 cups + 2 ½ tablespoons (500 ml) whole milk, room temperature
  • 4 tablespoons (60 ml) water, room temperature
  • 1 cup + 3 tablespoons (150 g) all-purpose flour
  • 3 tablespoons (40 g) butter, melted

For garnish:

  • 15.8 oz. (450 g) Nutella hazelnut spread
  • 6 fresh bananas
  • 1 oz. (30 g) toasted hazelnuts (optional)

Instructions

  1. To make the crepe batter, place peeled bananas, eggs, and a pinch of salt in a blender or a food processor and blend until homogeneous. Pour in half the milk and beat for a few seconds. Transfer the preparation to a large bowl.
  2. Add the sifted flour and mix with a hand whisk or an electric mixer. Finish with the rest of the milk and water and mix until no lumps remain. To remove lumps, if desired, pass the batter through a fine-mesh sieve. Add melted and cooled butter and let the batter rest for at least 15 minutes; better for half an hour.
  3. Cook crepes on a well-heated crepe pan. Pour a small ladle of the batter into the center of the pan. Immediately swirl the pan in a circular motion to spread the batter into a thin layer. Let the crepe cook for 1-2 minutes on the first side.
  4. Then, use a flexible turner to flip it over to the second side to finish cooking. Cooking time depends on the heat level (keep it medium or medium-low) and your taste. Place the crepe on a plate and continue with the remaining batter.
  5. To garnish crepes, place Nutella in a microwave-safe bowl and warm it in the microwave for 20-second intervals. Stir with a spoon until spreadable. Peel and slice bananas into thin slices, then sprinkle with lemon juice to prevent browning.
  6. Spread Nutella (1-2 tablespoons) over half of the crepe, and arrange slices from â…“ of the banana on top of the spread. Fold the crepe over the unfilled half to form a half-moon. Then fold in half again to form a triangle.
  7. Serve one or two on a dessert plate. Dust with powdered sugar or sprinkle with chopped toasted hazelnuts for extra flavor. Or make an easy Nutella drizzle if desired.

Notes

  1. Read all the tips and tricks in the post devoted to basic crepes.
  2. Warm up Nutella in a water bath instead of using the microwave.

Nutrition

  • Serving Size: 1 garnished crepe
  • Calories: 265
  • Sugar: 22.2 g
  • Sodium: 50 mg
  • Fat: 12.5 g
  • Saturated Fat: 4.9 g
  • Carbohydrates: 33.9 g
  • Fiber: 2.3 g
  • Protein: 5.5 g
  • Cholesterol: 59 mg

Thank you for following me on Pinterest, Facebook, and Instagram. Hashtag #bakinglikeachef so I can see your creations.

The nutritional information has been calculated using an online recipe nutrition calculator such as Verywellfit.com and is intended for informational purposes only. These figures should be used as a general guideline and not be construed as a guarantee.

Parisian Crepes Recipe (Crêpes Parisiennes)

Apr 20, 2022 · 1 Comment

Garnished Parisian crepes served on plates.

Quick Summary: To make Parisian crepes, whisk flour, salt, eggs, milk, melted butter, and a little water into a smooth, pourable batter, then let it rest. Cook thin crepes in a hot, buttered pan, swirling to coat. Fold or roll them around sweet or savory fillings and serve warm.

Garnished Parisian crepes served on plates.

What are Parisian crepes?

Parisian crepes, or crêpes à la Parisienne, are the thin French crepes you find at street stalls all over Paris, cooked large and lacy on a hot griddle and folded around a filling. They are made from a simple batter of flour, eggs, milk, melted butter, and a splash of water.

Unlike thick American pancakes, crepes parisiennes are barely a couple of millimeters thick, soft, and flexible. Sweet versions get sugar, jam, Nutella, or chocolate, while savory ones (called crepes salées) are filled with ham, cheese, eggs, or mushrooms.

The most delicious crêpes in the French capital come from two places: Paris crêperies and crêperies in the streets of Paris. You can get crêpes de froment (meaning wheat crepes) with different savory fillings.

You can also find other options like a real galette de sarrasin, or buckwheat pancake made with buckwheat flour, and salade aux crêpes, which means salad with crêpes.

Why you'll love this recipe

  • A taste of Paris at home. Thin, lacy French street-style crepes you can make without a plane ticket.
  • Simple ingredients. Just flour, eggs, milk, butter, and a splash of water, all pantry staples.
  • Sweet or savory. One batter covers dessert crepes with chocolate or jam and savory crepes with ham, cheese, or mushrooms.
  • Great for entertaining. Set up a crepe bar with different fillings and let everyone build their own.
  • Make-ahead friendly. The batter rests happily in the fridge, and cooked crepes reheat well for busy mornings.

Ingredients

For ingredients and detailed instructions, refer to the recipe card below.

Before you start, read about crepe ingredients.

  • French crepes: follow the foolproof recipe to make French crepes. The recipe makes about 16 crepes; you can scale it down to make half as many.
  • Mushrooms: the authentic Parisian crepes recipe calls for Parisian button mushrooms or champignon de Paris in French. Use champignons or shiitakes available in your grocery store.
  • Ham: use thin slices of turkey, pork, or truffled ham.
  • Shallot: to make your crepes authentic, use shallot or replace it with a more pungent onion.
  • Emmenthal cheese: use grated or thinly sliced Emmenthal cheese, or replace it with Gruyère or Comté.
  • Salt and pepper are essential to make the savory mushroom filling.
  • Olive oil: is used to brown the shallot and cook the mushrooms. You can replace it with butter if desired.

Equipment

You need just a few basic tools to make Parisian crepes at home:

  • crepe pan or nonstick frying pan
  • mixing bowl
  • whisk
  • ladle or measuring cup
  • flexible turner or spatula
  • frying pan for the filling

How to make Parisian crepes

Step 1. Follow the French crepe recipe to make savory-style crepes.

Step 2. To make the garnish, cut off the mushroom stems, wash and brush them, then cut them into pieces or strips. Let them dry on a paper towel.

Step 3. Peel the shallot, and chop it finely. Heat a frying pan with olive oil, and brown the shallot for a minute.

Step 4. Then add the mushrooms and sauté over medium-high heat for about 5-10 minutes, until the liquid is almost absorbed. Season with salt and pepper.

Step 5. Place a slice of ham, grated cheese, and mushrooms in the center of the crêpe and roll it.

Step 6. Or garnish ½ of each crêpe, cover with the other half, and fold again to make a triangle. Serve immediately.

Step 7. If serving later, reheat crepes in the oven at 355°F/180°C for a few minutes.

Step 8. Serve Parisian crepes hot with a dollop of whipped heavy cream (optional) and green salad.

Expert tips

  1. The key to wrapping the filling is making a thin crepe. Make sure the batter is thin and smooth.
  2. Pour it into the center of the hot skillet to form a thin layer of batter.
  3. Cook over medium-high heat until the crepe is slightly colored.
  4. Get the batter right. It should be smooth and pourable, about the consistency of heavy cream. Too thick and the crepes turn out doughy; too thin and they tear, so adjust with a splash more milk or a spoonful of flour.
  5. Rest the batter for at least 30 minutes (an hour is even better). This lets the flour absorb the liquid, and the gluten relax, giving you thinner, more tender crepes.
  6. For an extra-smooth batter, blend it for a few seconds in a blender or with an immersion blender, then let it rest.
  7. Aim for a Goldilocks pan temperature. Medium heat is usually right: too hot and the crepes brown unevenly, too cool and they will not develop that light golden color.
  8. Do not worry about the first crepe. It is almost always a practice one while the pan comes up to temperature, so snack on it and keep going.
  9. Keep them warm. Stack the cooked crepes on a plate under a clean towel or in a low oven to keep them soft until serving.
  10. Spread the batter thin. As soon as the batter hits the pan, tilt and swirl it in a circular motion to coat the base in a thin, even layer. In crêperie, cooks use a crêperiereader (rateau), but tilting the pan works just as well at home.

Recipe variations

The beauty of Parisian crepes is how easily you can dress them up. Here are ways to make them your own:

  • Flavor the batter. Add a little ground nutmeg or grated citrus zest for sweet crepes, or a pinch of chopped fresh herbs for savory ones.
  • Savory (crêpes salées). Try goat cheese with onion confit, baby spinach, nuts, and honey; smoked salmon with tzatziki; grilled bacon with pickled cucumber and Morbier; or ham with Burrata, dried tomatoes, and spinach.
  • Sweet. Fill or top with Nutella, homemade jam, salted butter caramel, melted dark chocolate and hazelnuts, caramelized apples with whipped cream, or simply butter, sugar, and a squeeze of lemon.
  • Classic finishes. Honey, chestnut cream, fresh fruit, maple syrup, or a scoop of ice cream all work well.
  • Build a crepe bar. Cook a big stack and set out bowls of fillings so everyone can fold their own, sweet or savory.

Storing & freezing

Parisian crepes are best served fresh and warm, but they keep well when stored unfilled. Let them cool completely, stack them with a piece of parchment between each one, and store the stack in an airtight container in the fridge for up to two days. Reheat gently in a warm pan or the microwave before adding your fillings.

To freeze, double wrap the cooled stack in cling film and freeze for up to two months. Let the crepes come back to room temperature for a couple of hours, or thaw them in the fridge overnight, then warm them through. Storing the crepes unfilled keeps them tender and ready for either sweet or savory toppings.

Recipe FAQ

What is a crêperie?
A crêperie is a restaurant or café that specializes in crêpes, serving both sweet and savory versions. Many crêperies also run stalls or street stands that sell crêpes as quick, on-the-go food.

Where to eat crepes in Paris?
You can eat crêpes in specialized crêperies, crêpe stands or kiosks, crêpe cafés, and fresh produce markets, for example, Marche des Enfants Rouges, if traveling to Paris.

What are the most famous crepes in Paris?
Wonderful crepes in Paris are sold at Breizh Café, Crêperie Le Pet, Crêperie Astel, La Droguerie du Marais, Chez Imogène, Brocéliande, Lulu la Nantaise, and La Crêperie Crêperielin. For a takeaway crêpe, Little Breizh Epicerie is the perfect place to visit, located at 111 rue Vieille du Temple.

How to eat savory crepes?
A small bowl of cider accompanies the most traditional way to eat savory crepes.

What is the difference between Parisian crepes and pancakes?
Crepes are much thinner and have no leavening, so they stay flat and flexible instead of rising. Pancakes are thick and fluffy from baking powder, while Parisian crepes are lacy, soft, and made to be folded or rolled around a filling.

Why are my crepes rubbery?
Rubbery crepes usually come from over-mixing the batter or skipping the rest. Whisk just until smooth, then let the batter rest so the flour hydrates and the gluten relaxes, which gives you tender, pliable crepes.

Can you make Parisian crepes gluten-free or dairy-free?
Yes. Use a cup-for-cup gluten-free flour blend (rest the batter a little longer), and swap the milk for an unsweetened plant-based milk and the butter for oil or vegan butter.

Do crepes need to be refrigerated?
Yes. Once cooled, store cooked crepes in an airtight container in the fridge and use them within a few days, or freeze them for longer storage.

What is the secret to great Parisian crepes?
The secret is a thin, pourable batter that has rested for at least 30 minutes, a hot pan set to medium-high heat, and a quick swirl to spread the batter into a thin, even layer. Resting relaxes the flour so the crepes turn out tender and lacy instead of rubbery.

How many calories are in Parisian crepes?
One serving of these Parisian crepes has about 258 calories, based on the recipe as written.

Love crepes? Try these next!

Crepes are a cultural tradition in France, where a crêpe day, La Chandeleur, is celebrated on February 2nd. French people also cook crepes on Mardi gras, but many generally eat crepes all year long.

  • Basic crepes
  • French chocolate crepes
  • Clatite (Romanian pancakes)
  • Nalesniki (Polish crepes)
  • Easy crepes with pancake mix

Want more delicious and beautiful recipes? Subscribe to my newsletter and follow me on Facebook, Pinterest, and Instagram for my latest updates. If you make this recipe, please leave a star rating on the recipe card and comment below!

Print

Recipe card

Parisian Crepes Recipe

Garnished Parisian crepes served on plates.
Print Recipe
Save Recipe Recipe Saved

5 Stars 4 Stars 3 Stars 2 Stars 1 Star

5 from 1 review

This Parisian crepes recipe makes thin, lacy French crepes at home. Fold or roll them around sweet fillings like chocolate and jam or savory ones like ham and cheese.

  • Author: Irina Totterman
  • Prep Time: 1 hour
  • Cook Time: 30 minutes
  • Total Time: 1 hour, 30 minutes (including making crepes)
  • Yield: 6 1x
  • Category: Crepes and Pancakes
  • Method: Cooking
  • Cuisine: French

Ingredients

Scale
  • 6 French crepes

For garnish:

  • 2 tablespoons (30 ml) olive oil 
  • 1 shallot
  • 10.6 oz. (300 g) champignons
  • 1 pinch of salt
  • black pepper to taste
  • 6 slices of cooked ham
  • 3.5 oz. (100 g) grated Emmenthal cheese

*If needed, please refer to Baking Conversion Charts.

Instructions

  1. Follow the recipe for French crepes to make savory-style crepes.
  2. To make the garnish, trim the mushroom stems, wash and brush them, then cut them into pieces or strips. Let them dry on a paper towel. Peel the shallot, and chop it finely. Heat a frying pan with olive oil, and brown the shallot for a minute. Then add the mushrooms and sauté over medium-high heat for about 5-10 minutes, until the liquid has almost evaporated. Season with salt and pepper.
  3. Place a slice of ham, grated cheese, and mushrooms in the center of the crepe and roll it. Or garnish ½ of each crêpe, cover with the other half, and fold again to make a triangle. Serve immediately.
  4. If serving later, reheat crepes in the oven at 355°F (180°C) for a few minutes. Serve Parisian crepes hot with a dollop of whipped heavy cream (optional) and green salad. 

Notes

  1. The key to wrapping the filling is making a thin crepe. So, make sure you have a thin, smooth batter.
  2. The key is to pour it into the center of the hot skillet to form a thin layer.
  3. Cook over medium-high heat until the crepe is slightly colored.

Nutrition

  • Serving Size: 1 crepe
  • Calories: 258
  • Sugar: 2.3 g
  • Sodium: 500 mg
  • Fat: 16.5 g
  • Saturated Fat: 6.5 g
  • Carbohydrates: 12.7 g
  • Fiber: 1.2 g
  • Protein: 14.4 g
  • Cholesterol: 82 mg

Thank you for following me on Pinterest, Facebook, and Instagram. Hashtag #bakinglikeachef so I can see your creations.

The nutritional information has been calculated using an online recipe nutrition calculator such as Verywellfit.com and is intended for informational purposes only. These figures should be used as a general guideline and not be construed as a guarantee.

How to Make Crepes with Pancake Mix (Easy Recipe)

Apr 12, 2022 · Leave a Comment

A stack of pancake mix crepes on a serving plate.

Quick Summary: To make crepes with pancake mix, whisk 1 cup pancake mix with about 1 ½ cups milk and 1 egg into a thin, pourable batter, then cook thin rounds in a hot non-stick pan for about a minute per side. The key is a thin batter (roughly 1 part mix to 2 parts liquid), so it spreads to cover the pan.

A stack of pancake mix crepes on a plate.

Can you make crepes from pancake mix?

Yes! While basic crepes are made with just flour, milk, eggs, and a pinch of salt, you can use store-bought pancake mix to make thin, tender crepes.

The challenge is that pancake mixes contain leavening agents like baking powder or baking soda, designed for fluffy pancakes, not thin crepes.

The trick is adjusting the batter's consistency, mainly the flour-to-milk ratio, so it spreads thinly in the pan.

Experts suggest about 1 part flour to 2 parts milk for the perfect finesse. You can also add a splash of acid, like lemon juice or vinegar, to balance the leavening if needed.

With these tweaks, your pancake mix can become a simple shortcut to fresh, homemade crepes.

Why you'll love this recipe

  • Fast: the batter comes together in minutes with pantry staples, no special flour needed.
  • Simple: you only need pancake mix, milk, and an egg to get started.
  • Thin and tender: a small ratio tweak turns fluffy pancake batter into thin crepes.
  • Versatile: serve them sweet or savory for breakfast, brunch, or dessert.

Ingredients

For ingredients and detailed instructions, refer to the recipe card below.

Also, read about crepe ingredients.

  • Pancake mix: This recipe uses Bob's Red Mill homestyle pancake mix, but most dry mixes work for thin crepes.
  • Milk: Use whole, low-fat, plant-based milk, or even sparkling water.
  • Egg: One large egg.
  • Oil: Vegetable oil prevents sticking; melted butter works too. If needed, lightly oil the pan with a silicone brush or use a cooking spray.

Equipment

You need just a few basic tools to make crepes with pancake mix:

  • Mixing bowl
  • Hand whisk
  • Fine-mesh sieve
  • Non-stick pan or crepe pan
  • Ladle
  • Flexible turner

How to make crepes with pancake mix

Step 1. Place the pancake mix in a large bowl, then add the egg and milk. Whisk until smooth. For thicker crepes, add a little more pancake mix; for thinner crepes, add a splash more milk.

Step 2. Pass the batter through a fine-mesh sieve, if needed, to remove lumps so the crepes cook evenly.

Step 3. Heat a non-stick pan over medium heat. Pour a small ladle of batter into the center, swirling the pan to spread it into a thin, even round.

Step 4. Cook until the edges curl and bubbles appear, then flip and cook briefly on the other side. Lightly spray the pan with cooking spray if the crepes stick.

Step 5. Stack the cooked crepes on a plate and keep warm. Serve with powdered sugar, fresh fruit, syrup, or your favorite toppings.

Expert tips

  1. Read on for the tips and tricks to make basic crepes.
  2. Don't overcook crepes: they should be just golden.
  3. Serve crepes dusted with powdered sugar and garnished with fresh fruit, maple syrup, homemade condensed milk, or other favorite toppings.

Recipe variations

Once you master the basic pancake mix crepes, try these easy variations:

  • Richer flavor: whisk in 1 teaspoon vanilla extract and a tablespoon of melted butter for softer, more flavorful crepes.
  • Blender method: blend the pancake mix, milk, and egg for about a minute for an extra-smooth, lump-free batter.
  • Sweet fillings: spread with Nutella, jam, whipped cream, or fresh berries and fold or roll.
  • Savory fillings: fill with ham and cheese, sauteed mushrooms, or spinach for a light meal.
  • Dairy-free: swap the milk for almond, oat, or soy milk. Check out these almond milk crepes.
  • Different mixes: Bisquick, Krusteaz, and Aunt Jemima all work; keep the batter thin and pourable.

Storing & freezing

To keep crepes fresh, place sheets of parchment paper between each crepe and wrap them in plastic film.

Store in the refrigerator for up to two days or freeze in an airtight container or Ziploc bag for up to two months.

To thaw, move frozen crepes to the fridge overnight, then reheat individual crepes in the microwave for a few seconds before serving.

Recipe FAQ

Are pancake mix and crepe mix the same?
No. Pancake mix contains leavening agents that make batter rise into fluffy pancakes, while crepe batter has no leavening, so it stays thin. You can still make crepes from pancake mix by thinning the batter with extra milk.

Can I use premade pancake mix for crepes?
Yes. Whisk the pancake mix with more liquid than the box calls for so the batter is thin and pourable, then swirl a small amount in the pan to make thin crepes.

Can you make crepes with Bisquick?
Yes. For each cup of Bisquick, whisk in 1 to 2 eggs and 1 to 2 cups of milk or water until the batter is smooth and thin.

Can you make crepes with Krusteaz or Aunt Jemima mix?
Yes. Both work the same way. Add extra milk and an egg, and keep the batter thin so it spreads to cover the pan.

What is the secret to thin crepes?
Use a thin, pourable batter (about 1 part mix to 2 parts liquid) and swirl the pan right after pouring so the batter spreads into a thin layer before it sets.

Can you make crepes with pancake mix without eggs?
You can, but the crepes will be more fragile. Replace each egg with a flax egg (1 tablespoon ground flaxseed plus 3 tablespoons water) and handle them gently when flipping.

How many calories are in pancake mix crepes?
Each crepe has about 81 calories, though the exact amount depends on your pancake mix and toppings.

Love crepes? Try these next!

While French crepes are a well-known classic, there is an entire world of thin, crispy crepe styles that you should try. These include Polish naleśniki or Romanian clatite, for example.

  • Authentic French Crepes
  • French Chocolate Crepes
  • Almond Milk Crepes
  • Galette Bretonne
  • Basic Crepes

Want more delicious and beautiful recipes? Subscribe to my newsletter and follow me on Facebook, Pinterest, and Instagram for my latest updates. If you make this recipe, please leave a star rating on the recipe card and comment below!

Print

Recipe card

Easy Crepes with Pancake Mix

A stack of pancake mix crepes on a serving plate.
Print Recipe
Save Recipe Recipe Saved

5 Stars 4 Stars 3 Stars 2 Stars 1 Star

No reviews

Learn how to make crepes with pancake mix. This easy recipe turns store-bought pancake mix into thin, tender crepes for breakfast, brunch, or dessert.

  • Author: Irina Totterman
  • Prep Time: 10 minutes
  • Cook Time: 20 minutes
  • Total Time: 30 minutes
  • Yield: 10 crepes 1x
  • Category: Crepes and Pancakes
  • Method: Cooking
  • Cuisine: French

Ingredients

Scale
  • 1 cup (130 g) pancake mix 
  • 1 ½ cup + 1 ½ tablespoon (370 ml) whole milk
  • 1 large egg
  • 2 tablespoons (30 g) vegetable oil

*If needed, please refer to Baking Conversion Charts.

Instructions

  1. To make the crêpe batter, place the pancake mix into a large mixing bowl. Add the egg and milk, then whisk with a hand whisk. If there are some lumps, pass the batter through a fine-mesh sieve. Extra tip: if the batter seems too thin for your liking, add a bit more pancake mix and whisk. The more pancake mix you add, the thicker your crepes will be.
  2. Heat a non-stick crepe pan over medium-high heat. Because of the added oil, you don't need to grease the pan. Using a small ladle, pour the batter into the center of the hot pan. Immediately swirl the pan to help the batter spread and cover the entire bottom of the pan. Extra tip: You might need to adjust the heat to medium because the batter doesn't spread well if the heat is too high.
  3. Bring the pan to the stovetop. Cook the crepe until the bubbles appear and the edges curl away from the pan. Using a rubber spatula, loosen the crepe's edges. Then, with a flexible turner, flip the crepe and cook the second side briefly. Extra tip: If the crepe sticks to the pan, spray the pan with non-stick cooking spray before each new crepe.
  4. Continue with the rest of the batter. Place cooked crepes on a serving plate covered with another plate, aluminum foil, or a clean kitchen towel to keep them warm. Serve crepes dusted with powdered sugar and garnished with fresh fruit, maple syrup, or other favorite toppings.

Notes

  1. Read on for the tips and tricks to make basic crepes.
  2. Don't overcook crepes: they should be just golden. 
  3. Serve crepes dusted with powdered sugar and garnished with fresh fruit, maple syrup, sweetened condensed milk, or other favorite toppings.
  4. Store in the refrigerator for up to two days or freeze in an airtight container or Ziploc bag for up to two months. 

Nutrition

  • Serving Size: 1 crepe
  • Calories: 81
  • Sugar: 2 g
  • Sodium: 104 mg
  • Fat: 5.1 g
  • Saturated Fat: 1.5 g
  • Carbohydrates: 6.5 g
  • Fiber: 0.2 g
  • Protein: 2.5 g
  • Cholesterol: 24 mg

Thank you for following me on Pinterest, Facebook, and Instagram. Hashtag #bakinglikeachef so I can see your creations.

The nutritional information has been calculated using an online recipe nutrition calculator such as Verywellfit.com and is intended for informational purposes only. These figures should be used as a general guideline and not be construed as a guarantee.

Clatite Recipe (Romanian Pancakes)

Apr 11, 2022 · Leave a Comment

Rolled Clatite on a white dessert.

Quick Summary: To make clatite (Romanian pancakes), whisk eggs, sugar, and salt, then beat in flour, milk, and sparkling water into a thin batter. Let it rest, then cook thin pancakes in a hot, buttered pan. Fill them sweet or savory and serve warm.

Rolled Clatite on a white dessert plate

What are clatite?

Clatite (clătite in Romanian, plural) are thin Romanian pancakes, close cousins of French crepes and Polish naleśniki. The name is pronounced kluh-TEE-teh, and a single one is a clatita.

What sets clatite apart is the batter. Along with eggs, flour, and milk, Romanian cooks often add sparkling or plain water, which makes the pancakes lighter and gives them their signature lacy, porous edges.

They sit somewhere between thin French crepes and fluffy American pancake: thin and flexible enough to roll or fold, yet tender. Serve them sweet with jam, cheese, or chocolate, or savory with a filling of your choice.

Two rolled Romanian pancakes on a plate

Why you'll love this recipe

  • Simple pantry ingredients. Eggs, flour, milk, and a splash of water are all you need; no special shopping trip required.
  • Light, tender texture. The sparkling-water batter gives you thin, lacy pancakes that never turn rubbery.
  • Sweet or savory. Fill them with jam, cheese, Nutella, fruit, or a savory filling, so one batter covers breakfast, brunch, or dessert.
  • Make-ahead friendly. The batter rests happily in the fridge, and cooked clatite reheat well for busy mornings.
  • Naturally crowd-pleasing. This classic Romanian recipe is kids and adults ask for again and again.

Ingredients

For ingredients and detailed instructions, refer to the recipe card below.

  • Eggs: the recipe calls for large eggs.
  • Flour: Use all-purpose flour.
  • Milk: whole milk is required to make these pancakes.
  • Water: the recipe calls for mineral water with mineral flavor. You can replace it with plain or sparkling water if desired.
  • Salt: a little salt is essential for pancakes. It enhances their flavor; salt-free pancakes are tasteless.
  • Butter: choose the fat you prefer (melted and cooled butter or vegetable oil). Adding it to the batter makes cooking pancakes much smoother without greasing a crepe pan.
  • Sugar: this ingredient is optional. You can make sweet pancakes by adding one tablespoon of granulated sugar or vanilla sugar to the batter.

Equipment

You only need a few basic tools to make clatite at home:

  • crepe pan or nonstick frying pan
  • mixing bowl
  • hand whisk
  • ladle or measuring cup
  • flexible turner or spatula

How to make clatite

Step 1. Melt the butter in the microwave and set it aside to cool. In a large bowl, lightly beat the eggs with a pinch of salt and the sugar until combined.

Step 2. Add the sifted flour to the egg mixture, alternating with the cold milk and sparkling water. Whisk well after each addition to keep the batter smooth and lump-free.

Step 3. Whisk in the cooled melted butter. If a few small lumps of butter form, do not worry; they will melt as the pancakes cook.

Step 4. Let the batter rest for about 30 minutes at room temperature. This relaxes the flour and gives you thinner, more tender clatite. If you are short on time, you can start cooking right away.

Step 5. Heat a crepe pan or nonstick pan over medium-high heat, using your largest burner for even heat. Lightly grease it with a little butter or oil and wipe away the excess.

Step 6. Lift the pan off the heat, pour in a small ladle of batter, and immediately swirl the pan so the batter coats the bottom in a thin, even layer.

Step 7. Return the pan to the heat and cook for about a minute, until the edges look golden and lacy and lift easily from the pan.

Step 8. Loosen the edges with a spatula, then flip the clatita with a flexible turner and cook the second side for about 30 seconds, until lightly golden.

Step 9. Slide each cooked pancake onto a plate and cover with another plate to keep them warm while you cook the rest. Grease the pan again only if the pancakes start to stick.

Step 10. For a sweet filling, mix the ricotta with icing sugar in a bowl. Peel the bananas, cut each in half, and sprinkle with a little lemon juice to keep them from browning.

Step 11. Spread each pancake with about a tablespoon of the sweet cheese filling, fold in the sides, lay half a banana on top, and roll it up.

Step 12. Just before serving, melt the dark chocolate in the microwave and drizzle it over the rolled clatite. Serve warm.

Sliced single clătită on a serving board

Expert tips

  1. Read more on how to make perfect crepes.
  2. Make the batter in advance and let it rest in the fridge for up to 24 hours. If the batter seems thick, dilute it with some cold milk the next day.
  3. For thicker pancakes, pour slightly more batter into the pan.
  4. Remember the easy cup ratio: 1 cup flour, 1 cup milk, and 1 cup sparkling water, plus eggs and a pinch of salt. No need to weigh anything.
  5. Do not skip the salt. Even though clatite are not sweet on their own, a pinch of salt rounds out the flavor and balances sweet fillings.
  6. Aim for a thin, pourable batter that spreads to the edges of the pan on its own. If it pools in the middle like a thick pancake, whisk in a splash more water or milk.
  7. Do not stress over the first one. The first clatita is almost always a test pancake while the pan comes up to temperature, so snack on it and keep going.
  8. Keep the pan hot. As you work through the batter, nudge the heat up toward medium-high so each pancake sets quickly with lacy edges.

Recipe variations

This is a classic Romanian clatite recipe, but the batter is easy to adapt to your taste:

  • Adjust the liquid. More sparkling water makes thinner, more porous pancakes, while more milk makes them softer and richer. Water only gives the lightest, lowest-fat version.
  • Egg swap. If you have fewer than three eggs, add an extra splash of milk or water to loosen the batter to the right consistency.
  • Add flavor. Stir vanilla sugar, vanilla extract, or lemon or orange zest into the batter for sweet clatite, or a pinch of chopped fresh herbs for a savory version.
  • Sweet fillings. Try jam, Nutella, sweetened ricotta, fresh fruit, or a simple sprinkle of cinnamon sugar.
  • Savory fillings. Fill them with soft cheese, ham, or sautéed mushrooms for a light lunch or dinner.
  • Serve your way. Roll them, fold them into triangles, or wrap them around the filling, then finish with a drizzle of melted chocolate or a dusting of icing sugar.

Storing & freezing

Let the clatite cool completely, then stack them with a small piece of parchment between each one so they do not stick. Store the stack in an airtight container in the fridge for up to three days, and reheat gently in a warm pan or the microwave before serving.

To freeze, layer the cooled pancakes with parchment, wrap the stack tightly, and freeze for up to two months. Thaw them in the fridge overnight, then warm through. Store clatite unfilled and add fresh fillings after reheating so they keep their texture.

Recipe FAQ

What do you need to make crepes?
You'll need a foolproof, correctly measured recipe, a mixing bowl, a hand whisk, and a nonstick crepe pan.

Can you make crepes ahead of time?
You can make crepes in advance and cover them with foil or plastic wrap for two days.

Can you make crepes with almond milk?
Almond milk is a great alternative to whole milk and works well for crepes. It is a popular option for those looking to reduce their calorie intake and still get that rich flavor and taste.

Can you make crepes without milk?
Replace some part of the milk with sparkling or plain water to make crepes. You may also want to try replacing all the dairy with water.

Can you make crepes without a crepe pan?
You can make crepes in just about any nonstick frying pan. You don't need to buy a special crepe pan, though it does help if you have one handy.

What is the difference between clatite and crepes?
They are nearly the same. Clatite are the Romanian version of thin pancakes, close to French crepes, but the batter often includes sparkling water for extra lightness. Both are thin, flexible, and filled sweet or savory.

How do you pronounce clatite?
Clatite is pronounced "kluh-TEE-teh" (clătite). The singular is clatita.

What can you fill clatite with?
Fill them sweet with jam, Nutella, sweetened ricotta, fresh fruit, or a sprinkle of cinnamon sugar, or savory with cheese, ham, or mushrooms. Roll or fold them over the filling.

Can you make the batter in a blender?
Yes. Blend the eggs, flour, milk, sparkling water, sugar, and salt for about 20 seconds until smooth, then rest the batter before cooking.

Can you make clatite gluten-free?
Yes. Swap the all-purpose flour for a gluten-free flour blend and adjust the liquid a little, adding a splash more water or milk if the batter turns out too thick.

Why is my clatite batter too thick?
The batter should be a thin, pourable liquid that spreads to the edges of the pan on its own. If it pools in the middle like a pancake, whisk in a little more water or milk a tablespoon at a time until it flows easily.

How many calories are in clatite?
One clatita has about 184 calories, based on the recipe as written.

Love crepes? Try these next!

  • Basic crepes
  • Nalesniki (Polish crepes)
  • French chocolate crepes
  • Apple cinnamon crepes
  • Yeasted blini

Want more delicious and beautiful recipes? Subscribe to my newsletter and follow me on Facebook, Pinterest, and Instagram for my latest updates. If you make this recipe, please leave a star rating on the recipe card and comment below!

Print

Recipe card

Clatite (Romanian Pancakes)

Rolled Clatite on a white dessert.
Print Recipe
Save Recipe Recipe Saved

5 Stars 4 Stars 3 Stars 2 Stars 1 Star

No reviews

A simple clatite recipe makes about two dozen thin, delicious Romanian pancakes or crepes perfect for breakfast, brunch, and dinner.

  • Author: Irina Totterman
  • Prep Time: 30 minutes
  • Cook Time: 30 minutes
  • Total Time: 60 minutes (plus resting time)
  • Yield: 20 pancakes 1x
  • Category: Crepes and Pancakes
  • Method: Cooking
  • Cuisine: Romanian

Ingredients

Scale

For the batter:

  • 3 large eggs
  • 2 cups (250 g) all-purpose flour
  • 1 ½ cups (350 ml) whole milk
  • 1 ½ cups (350 ml) mineral water
  • 4 tablespoons (60 g) unsalted butter, melted
  • 1 pinch of salt

For the filling (optional):

  • 21.2 oz. (600 g) ricotta cheese
  • 4 teaspoons icing sugar
  • 10 medium bananas
  • lemon juice to sprinkle on the bananas
  • meted chocolate for decoration

*If needed, please refer to Baking Conversion Charts.

Instructions

  1. Melt butter in the microwave and let it cool. Lightly beat eggs with a pinch of salt in a large bowl using a hand whisk.  Add the sifted flour to the egg mixture, alternating with the cold milk. Mix well after each addition of dry and wet ingredients.
  2. At this point, add flavors if desired. Then add the mineral water and mix the batter vigorously with a hand whisk or wooden spoon.
  3. If there are some lumps, strain the batter through a fine-mesh sieve. The batter should be lump-free and thin enough. Add melted butter and gently mix. If the butter makes small lumps, it is okay: they will melt in the pan. Extra tip: if you have a blender, add all the ingredients to the bowl and mix until smooth. Let the batter rest for 30 minutes. If you are short on time, start cooking pancakes right away.
  4. Heat a crepe pan well on high or medium-high heat. Use the largest burner on the stove for even heat distribution. Extra tip: Heating the pan well ensures that even the first crepe (pancake) will be perfect. If you are right-handed, take the hot pan in your left hand and pour the batter into the pan with a small ladle or a cup.  At the same time, rotate the pan so that the batter is evenly distributed. It should cover the entire surface of the pan (sometimes even some edges).
  5. Bring the pan over the heat and cook the pancake for about a minute. When the pancake edges start to turn golden, it's time to flip it.  Peel off the edges of the pancake with a spatula, then flip it with a flexible turner. You can also use a wooden spatula or flip the pancake from the wrist (if you have this skill). You will see the brown spots on the flipped pancake. Cook the second side for half the time as the first side. Continue with the remaining batter. Stack the pancakes on a serving plate and cover with another plate to keep them warm.
  6. For the filling, mix ricotta cheese with icing powder in a medium bowl. Peel bananas, cut each into two parts, and sprinkle with lemon juice to prevent them from darkening. Spread each pancake with 1 tablespoon of sweet cheese filling, fold the sides inward, place half a banana, and roll it into a roll.
  7. Once ready to serve, melt dark chocolate in the microwave and drizzle over the pancakes.

Notes

  1. Read more on how to make perfect crepes.
  2. Make the batter in advance and let it rest in the fridge for up to 24 hours. If the batter seems thick, dilute it with 50 ml of cold milk the next day.
  3. If you want thicker pancakes, pour slightly more batter into the pan.

Nutrition

  • Serving Size: 1 filled pancake
  • Calories: 184
  • Sugar: 8.7 g
  • Sodium: 65 mg
  • Fat: 6.4 g
  • Saturated Fat: 3.7 g
  • Carbohydrates: 25.9 g
  • Fiber: 1.9 g
  • Protein: 6.8 g
  • Cholesterol: 42 mg

Thank you for following me on Pinterest, Facebook, and Instagram. Hashtag #bakinglikeachef so I can see your creations.

The nutritional information has been calculated using an online recipe nutrition calculator such as Verywellfit.com and is intended for informational purposes only. These figures should be used as a general guideline and not be construed as a guarantee.

Nalesniki Recipe (Polish Crepes and Pancakes)

Apr 7, 2022 · 1 Comment

Rolled nalesniki arranged in a pyramid on a marble board.

Quick Summary: Nalesniki are thin Polish crepes made from a simple batter of flour, eggs, milk, and sparkling water. The sparkling water keeps them light and tender. This recipe makes 10 crepes and works with sweet fillings like farmer's cheese or jam, as well as savory ones.

Rolled Polish crepes arranged in a pyramid on a marble board.

What are nalesniki?

Naleśniki (pronounced naleshneekey) are thin Polish crepe-like pancakes, served with sweet or savory fillings for breakfast, brunch, or dessert.

Similar to blintzes, palacsinta, and clătite, they date back to 1871 when egg whites were folded into the batter. Today, Polish crepes are made with whole eggs and updated for modern tastes.

Interestingly, the terms Polish crepes and Polish pancakes are used interchangeably. They both mean naleśniki. But thanks to the addition of sparkling water, they're lighter than typical pancakes.

Why you'll love this recipe

  • Light and tender: sparkling water makes the batter airier than regular pancakes.
  • Simple pantry batter: flour, eggs, milk, and water are all you need.
  • Sweet or savory: fill with farmer's cheese and jam, or ham and mushrooms.
  • Make-ahead and freezer-friendly: the crepes keep in the fridge and freeze well.
  • A Polish classic: naleÅ›niki are a traditional breakfast, brunch, and dessert across Poland.

Ingredients

For ingredients and detailed instructions, refer to the recipe card below.

Read about crepe ingredients before you start.

  • Flour: Use all-purpose. If using measuring cups, sift the flour after measuring it.
  • Sugar & flavoring: Vanilla sugar, granulated sugar, or a few drops of vanilla extract for sweet crepes. Omit for savory crepes.
  • Salt: Enhances flavor.
  • Eggs: Large, at room temperature.
  • Milk: Whole milk, or low-fat/plant-based milk (almond, oat, etc.).
  • Sparkling water: Makes pancakes lighter. You can use plain water instead.
  • Butter/oil: Melted butter makes batter pliable. You can use vegetable or coconut oil as a substitute.

Equipment

A few basic tools make Polish crepes easier to prepare:

  • Crepe pan or nonstick skillet
  • Large mixing bowl
  • Flour sifter
  • Hand whisk or blender
  • Fine-mesh sieve
  • Ladle or small measuring cup
  • Flexible turner or crepe spatula

How to make nalesniki

Step 1. Sift the flour into a large bowl. Add a pinch of salt and optional vanilla sugar, then whisk to combine.

Step 2. Add the eggs and whisk, then gradually mix in the milk and sparkling water until the batter is thin, like heavy cream.

Step 3. Strain the batter through a fine-mesh sieve, cover, and let it rest for 30 minutes. If you are short on time, cook right away.

Pro tip: Check the batter's consistency by lifting a spoonful and letting it run off. It should coat the back of the spoon smoothly.

Step 4. Heat a crepe pan over medium-high heat. Stir the batter, pour a small ladle into the center, and tilt the pan to spread it evenly.

Step 5. Cook for 40-50 seconds until the edges brown, then flip and cook the other side for a few seconds.

Step 6. Remove the crepe and repeat with the remaining batter, stacking the cooked crepes and keeping them covered to stay warm.

Expert tips

  1. Read about basic crepes to learn all the tips and tricks.
  2. To make the batter, use a blender: blend for a few minutes until smooth. 
  3. Make sure to heat the pan well, since the first crepe is often unsuccessful due to poor heat spread over the pan.
  4. If you plan to make Polish croquettes (krokiety in Polish), pour a little more batter into the pan to cook thicker pancakes. 

Recipe variations

This batter is easy to adapt to how you like your naleśniki:

  • NaleÅ›niki z serem (with cheese): the classic filling is sweetened farmer's cheese or twaróg mixed with sugar, an egg yolk, and a little vanilla, rolled up and pan-fried in butter.
  • Dairy-free: use almond or oat milk and vegetable or coconut oil in place of milk and butter.
  • Extra light: replace some of the milk with more sparkling water or seltzer for an airier crepe.
  • Savory krokiety: pour a little more batter for thicker pancakes, fill with meat or mushrooms, then bread and fry them.
  • Sweet toppings: serve with jam, fruit, sweetened whipped cream, or a dusting of powdered sugar.

How to serve Polish naleśniki

Naleśniki are best eaten warm. Typical fillings for Polish crepes include twaróg cheese, which resembles farmer's cheese. Such pancakes are also called Polish blintzes or naleśniki z serem (Polish crepes with cheese).

Sweet options include jam, fruit, Nutella, homemade condensed milk, sweetened whipped cream, applesauce, maple syrup, or ice cream. Savory fillings include smoked salmon, ham, mushrooms, spinach, and feta.

For an authentic touch, fold filled crepes into triangles (half, then half again) and pan-fry in butter or clarified butter until golden.

Storing & freezing

Store Polish crepes in the fridge, covered with plastic wrap or in an airtight container, for 2-3 days.

To freeze, separate each crepe with parchment and wrap in cling film and foil for up to 3 months, or freeze filled crepes individually for 1 month.

Thaw overnight in the fridge, then reheat in a 355°F (180°C) oven for 5-10 minutes or in the microwave in 20-second intervals.

Recipe FAQ

What are nalesniki?
Naleśniki are thin Polish crepes, sometimes called Polish pancakes. They are made from a light batter and served with sweet or savory fillings for breakfast, brunch, or dessert.

What is the difference between Polish crepes and Polish pancakes?
In Poland, the two terms are used interchangeably, and both mean naleśniki. They are thinner than American pancakes because the batter has no leavening and often includes sparkling water.

What is the difference between nalesniki and French crepes?
They are very similar, but Polish naleśniki often use sparkling water for a lighter texture and are traditionally filled with sweet farmer's cheese. French crepes, by contrast, tend to use butter and sugar.

What cheese is used in naleśniki z serem?
The classic filling is twaróg, a Polish farmer's cheese, sweetened with sugar and vanilla. Ricotta or a well-drained cottage cheese make good substitutes outside Poland.

Why do you add sparkling water to the batter?
Sparkling water adds tiny bubbles that make the crepes lighter and more tender. You can use plain water instead, but the texture will be slightly denser.

Can you freeze Polish crepes?
Yes. Stack plain crepes with parchment between them, wrap well, and freeze for up to 3 months. Thaw overnight in the fridge and reheat before filling.

How many calories are in one nalesnik?
Each crepe has about 158 calories, based on the recipe as written.

Love crepes or pancakes? Try these next!

  • Basic Crepes
  • Authentic French Crepes
  • Clatite (Romanian Pancakes)
  • Banana Nutella Crepes
  • Galette Bretonne
  • Vanilla Dutch Baby

Want more delicious and beautiful recipes? Subscribe to my newsletter and follow me on Facebook, Pinterest, and Instagram for my latest updates. If you make this recipe, please leave a star rating on the recipe card and comment below!

Print

Recipe card

Nalesniki (Polish Crepes and Pancakes)

Rolled nalesniki arranged in a pyramid on a marble board.
Print Recipe
Save Recipe Recipe Saved

5 Stars 4 Stars 3 Stars 2 Stars 1 Star

5 from 1 review

Nalesniki are thin Polish crepes, also called Polish pancakes, made light and tender with sparkling water. This easy recipe uses a few simple ingredients and works with sweet fillings like farmer's cheese or jam, or savory ones.

  • Author: Irina Totterman
  • Prep Time: 15 minutes
  • Cook Time: 30 minutes
  • Total Time: 45 minutes (plus resting time)
  • Yield: 10 1x
  • Category: Crepes and Pancakes
  • Method: Cooking
  • Cuisine: Polish

Ingredients

Scale

For the batter:

  • ¾ cup + 2 tablespoons (110 g) all-purpose flour
  • 1 teaspoon vanilla sugar (optional)
  • 1 pinch of salt
  • 2 large eggs, room temperature
  • â…” cup + 3 tablespoons (200 ml) whole milk
  • â…“ cup + 1 ½ tablespoons (100 ml) sparkling water
  • 1 ½ tablespoon (25 g) unsalted butter, melted

*If needed, please refer to Baking Conversion Charts.

Instructions

  1. To make the batter, sift the flour into a large mixing bowl. Add a pinch of salt and vanilla sugar (optional) and mix with a hand whisk. Place eggs in the center of the dry ingredients and whisk until combined. Gradually add the milk and water, stirring well. The pancake mixture will be thin, resembling the consistency of heavy cream. Check the batter's consistency by lifting a spoonful and letting it run off. It should smoothly cover the surface of the spoon.
  2. Pass the batter through a fine-mesh sieve, cover the bowl with plastic wrap, and let it rest for 30 minutes. If you are short on time, cook pancakes immediately after mixing the ingredients.
  3. Heat a crepe pan well: set it over medium to high heat for even heat distribution. Stir the batter. Lift the pan over the burner and, with a ladle in the other hand, pour the batter into the center of the hot skillet.
  4. Immediately move the pan to let the dough spread over the entire surface. Next, bring the pan over the heat and cook the pancake for about 40-50 seconds. Once the pancake edges become brown, use a flexible turner to flip it.
  5. Cook the other side for a few seconds. Pro tip: The first crepe or pancake is often unsuccessful because the heat doesn't spread evenly across the pan. Don't worry: the next pancakes will get the desired texture, color, and taste.
  6. Proceed with the remaining batter in the same way until it is used up. Place the cooked pancakes on top of the other on a serving plate. Cover the crepes with another plate, a lid, or foil to prevent them from drying out and keep them warm.

Notes

  1. Read about basic crepes to learn all the tips and tricks.
  2. To make the batter, use a blender: blend for a few minutes until smooth. 
  3. Make sure to heat the pan well, since the first crepe is often unsuccessful because heat doesn't spread evenly across the pan.
  4. Store in the fridge, covered with plastic wrap or in an airtight container, for 2-3 days. 

Nutrition

  • Serving Size: 1
  • Calories: 158
  • Sugar: 5 g
  • Sodium: 203 mg
  • Fat: 7.3 g
  • Saturated Fat: 4.1 g
  • Carbohydrates: 13.8 g
  • Fiber: 0.7 g
  • Protein: 8.9 g
  • Cholesterol: 58 mg

Thank you for following me on Pinterest, Facebook, and Instagram. Hashtag #bakinglikeachef so I can see your creations.

The nutritional information has been calculated using an online recipe nutrition calculator such as Verywellfit.com and is intended for informational purposes only. These figures should be used as a general guideline and not be construed as a guarantee.

Almond Milk Crepes Recipe (Dairy-Free)

Mar 27, 2022 · 1 Comment

Almond milk crepes with fresh fruit.

Quick Summary: Almond milk crepes are thin, dairy-free French crepes made with almond milk instead of regular milk. The batter needs just 6 basic ingredients, rests briefly, then cooks in minutes in a hot nonstick pan. They work for both sweet and savory fillings.

Almond milk crepes with fresh fruit

What are almond milk crepes?

Can you make crepes with almond milk? Yes. Swapping regular milk for almond milk gives you soft, light, dairy-free crepes with the same thin, lacy texture as the classic French version.

Almond milk makes the crepes naturally fragrant and slightly sweet, so they taste great plain or with just a dusting of powdered sugar. They suit both breakfast and dessert and work with sweet or savory fillings.

A quick note: The aroma and golden color of crepes come from the Maillard reaction, the browning that happens when the batter meets the hot pan.

Folded crepes with fruit and icing sugar

Why you'll love this recipe

  • Naturally dairy-free. Almond milk stands in for regular milk, so the crepes suit anyone with a dairy sensitivity or allergy without changing the classic result.
  • Simple pantry ingredients. Aside from the almond milk, everything else stays the same as basic crepes, so you likely have most of it at home already.
  • Mild, slightly sweet flavor. Almond milk adds a subtle sweetness and a smooth texture that works with both sweet and savory fillings.
  • Endlessly customizable. Serve them plain, dust with powdered sugar, or fill them with fresh fruit coulis, vanilla sauce, or savory options.
  • No special equipment. A nonstick frying pan is all you need, so you don't need a crepe pan to get thin, even crepes.

Ingredients

For ingredients and detailed instructions, refer to the recipe card below.

  • Flour: the recipe calls for all-purpose flour, but you can try a combination of whole wheat and plain white flour.
  • Salt: as always, salt enhances the flavors.
  • Eggs: use large eggs at room temperature.
  • Almond milk: this is the key ingredient to make this easy almond milk crepes recipe. Use fresh or thawed almond milk.
  • Vanilla extract: optional. Add it or omit it, as desired. Or replace it with another flavor extract, for example, almond extract, orange extract, etc.
  • Butter: it brings the butter flavor and taste to crepes. Also, you don't need to grease a crepe pan, which saves time while cooking crepes. To make dairy-free crepes, replace the regular butter with a plant-based alternative. You can use vegetable oil (or olive oil) as 80% of the butter amount.

Equipment

You only need a few basic tools to make these dairy-free crepes:

  • mixing bowl
  • hand whisk
  • blender
  • fine-mesh sieve
  • nonstick frying pan
  • ladle

How to make almond milk crepes

Step 1. Melt the butter in the microwave in 30-second intervals. Let it cool.

Step 2. Sift flour and a pinch of salt into a large bowl using a flour sifter. Make a well and crack the eggs into it. Mix using a wooden spoon or hand whisk.

Step 3. Gradually pour in the almond milk while whisking. Add vanilla extract. Pass the batter through a fine-mesh sieve. Add the melted butter and mix. You will get a runny batter; this is key to thin crepes (photo 1).

Step 4. Cover the bowl with plastic wrap and let the batter rest at room temperature for 30 minutes.

Step 5. Cook crepes in a hot pan (a crepe pan or a 9-inch (23 cm) nonstick skillet) without greasing. Keep the heat medium-high.

Step 6. Pour a ladle of the batter into the center of the pan, swirling it in a circular motion right away. Cook for about 1-2 min per crepe (photo 2).

Almond milk crepe batter in a mixing bowl

Photo 1

Almond crepe on a pan

Photo 2

Flip the crepe when its edges start to brown, and it comes off the pan.

Step 7. Use a flexible turner or thin spatula to flip the crepe. Continue with the remaining batter (photo 3).

Step 8. Place crepes on a serving plate, garnish with fresh berries, and dust with powdered sugar if desired (photo 4).

Cooked almond milk crepe.

Photo 3

Served almond milk crepes on a plate.

Photo 4

Expert tips

  • Warm the almond milk. Warm the almond milk before mixing. Lukewarm liquid blends into the flour more evenly and helps the batter come together without lumps.
  • Aim for a runny batter. The batter should be thin and pourable, close to heavy cream. If it seems thick, whisk in a little more almond milk one tablespoon at a time.
  • Use a blender for a smooth batter. Blending the ingredients for a few seconds removes lumps quickly and gives you an even, pourable batter without extra sifting.
  • Heat the pan properly. Cook over medium-high heat in a hot nonstick pan. A well-heated pan is what makes each crepe thin and evenly browned.
  • Do not worry about the first crepe. The first one often cooks unevenly while the pan settles to temperature. It is normal, and the rest will turn out well.
  • Keep the crepes warm. Stack the cooked crepes on a plate and cover them, or keep them in a low oven, so they stay soft and warm while you finish the batch.

Recipe variations

  • Lighter crepes. Replace half the almond milk with water or beer for a thinner, lighter batter.
  • Flavored batter. Stir in orange flower water, rum, or coffee liqueur, or add sugar and a pinch of cinnamon for sweet crepes.
  • Chocolate crepes. Swap 1 ounce (30 g) of the flour for the same amount of unsweetened cocoa powder.
  • Sweet toppings. Finish with strawberry sauce, maple syrup, honey, chocolate chips, chopped nuts, caramelized apples, or fruit jam.
  • Savory fillings. Fill the crepes with scrambled eggs, bacon, ham, mushrooms, or cheese.
  • Crepe cake. Stack the crepes with whipped cream and fresh fruit between the layers for a simple crepe cake.

Storing & freezing

To store almond milk crepes, keep them covered at room temperature if you plan to serve them the same day, or wrap them in plastic film and refrigerate for up to two days.

To freeze, stack the crepes with wax or parchment paper between each one, wrap the stack in plastic and foil, then place it in an airtight container for up to 3 months. Thaw at room temperature for a few hours or in the fridge overnight, and reheat in the microwave in 20-30 second bursts.

Recipe FAQ

Can you make crepes with almond milk?
Yes. Almond milk works as a direct, one-to-one swap for regular milk in crepe batter. It keeps the crepes thin and light while making them dairy-free, and it adds a mild, naturally sweet flavor.

What is the difference between crepe and pancake batter?
Crepe batter has no raising agent such as baking powder or baking soda, so it stays thin and pourable. Pancake batter uses a leavening agent, which makes it thicker and fluffier.

Can you use other types of milk to make crepes?
Yes. Coconut milk, oat milk, or soy milk all work in place of almond milk if you want a different dairy-free option.

Does almond milk change the taste of crepes?
A little. Almond milk gives the crepes a subtle nutty note and a touch of natural sweetness, but the flavor stays mild and pairs well with both sweet and savory fillings.

How do you make crepe batter smooth?
Pass the batter through a fine-mesh sieve or blend it for a few seconds. Both methods remove lumps and give you an even, pourable batter.

Does crepe batter need to rest?
Resting helps the gluten relax and lets the flour absorb the liquid, which gives tender crepes. If you are short on time, use warm milk and start cooking right away.

Why is the first crepe always the worst?
The first crepe usually cooks unevenly because the pan is not yet at a steady temperature. Once the pan is fully and evenly heated, the rest turn out well.

Can you make almond milk crepes gluten-free?
Yes. Swap the all-purpose flour for a one-to-one gluten-free flour blend. The batter may need a little extra resting time to thicken properly.

How many calories are in almond milk crepes?
One almond milk crepe has about 100 calories.

Love crepes? Try these next!

  • Crepe Recipe
  • Authentic French Crepes
  • Crispy Crepe Recipe (Crêpes Croustillantes)
  • French Chocolate Crepes

Want more delicious and beautiful recipes? Subscribe to my newsletter and follow me on Facebook, Pinterest, and Instagram for my latest updates. If you make this recipe, please leave a star rating on the recipe card and comment below!

Print

Recipe card

Almond Milk Crepes Recipe

Almond milk crepes with fresh fruit.
Print Recipe
Save Recipe Recipe Saved

5 Stars 4 Stars 3 Stars 2 Stars 1 Star

5 from 1 review

These almond milk crepes are thin, dairy-free French crepes made with just 6 basic ingredients. Serve them for breakfast or dessert with sweet or savory fillings.

  • Author: Irina Totterman
  • Prep Time: 10 minutes
  • Cook Time: 30 minutes
  • Total Time: 40 minutes (plus resting time)
  • Yield: 16 crepes 1x
  • Category: Crepes and Pancakes
  • Method: Cooking
  • Cuisine: French

Ingredients

Scale
  • 1 ½ cup + 1 ½ tablespoon (200 g) all-purpose flour
  • 1 pinch of salt
  • 4 large eggs, room temperature
  • 2 cups + 2 tablespoons (500 ml) almond milk, room temperature
  • 1 tablespoon vanilla extract
  • 3 tablespoons (40 g) plant-based butter, melted

* If needed, please refer to Baking Conversion Charts.

Instructions

  1. Melt the butter in the microwave in 30-second intervals. Let it cool. Sift flour and a pinch of salt into a large bowl using a flour sifter. Make a well and crack the eggs into it. Mix using a wooden spoon or hand whisk. Gradually pour in the almond milk while whisking. Add vanilla extract. Pass the batter through a fine-mesh sieve. Add the melted butter and mix.
  2. Cover the bowl with plastic wrap and let the batter rest at room temperature for 30 minutes. Cook crepes in a hot pan (a crepe pan or a 9-inch (23 cm) nonstick skillet) without greasing. Keep the medium-high heat. Pour a ladle of batter into the center of the pan, then swirl it in a circular motion right away. Cook for about 1-2 min per crepe.
  3.  Use a flexible turner or thin spatula to flip the crepe. Continue with the remaining batter. Place crepes on a serving plate, garnish with fresh berries, and dust with powdered sugar if desired.

Notes

  1. If the crepe batter seems thick, add a bit of almond milk or water.
  2. With a little practice, learn how to flip a crepe without a spatula.

Nutrition

  • Serving Size: 1 crepe
  • Calories: 100
  • Sugar: 1.7 g
  • Sodium: 45 mg
  • Fat: 4.1 g
  • Saturated Fat: 2.1 g
  • Carbohydrates: 11.3 g
  • Fiber: 0.3 g
  • Protein: 3.9 g
  • Cholesterol: 55 mg

Thank you for following me on Pinterest, Facebook, and Instagram. Hashtag #bakinglikeachef so I can see your creations.

The nutritional information has been calculated using an online recipe nutrition calculator such as Verywellfit.com and is intended for informational purposes only. These figures should be used as a general guideline and not be construed as a guarantee.

Crepe Recipe (How to Make Basic Crepes)

Mar 26, 2022 · 3 Comments

Freshly made basic crepes stacked high on a plate.

Quick Summary: To make basic crepes, whisk flour, eggs, milk, water, melted butter, and a pinch of salt into a thin, smooth batter, rest it for about 30 minutes, then cook thin rounds in a hot buttered pan for about a minute per side. This easy crepe recipe makes about 15 crepes for sweet or savory fillings.

A tall stack of thin, golden basic crepes on a simple plate.

What are crepes?

Crepes are very thin French pancakes made from a simple batter of flour, eggs, milk, and butter. Unlike regular pancakes, the batter has no leavening, so crepes cook up thin and flat, ready to fold or roll.

They can be sweet or savory: fill sweet crepes with fruit, jam, or chocolate spread, and savory crepes with cheese, ham, or eggs.

Why you'll love this recipe

  • This basic crepe recipe is super simple: just flour, eggs, milk, a pinch of salt, and a little melted butter.
  • No need to grease the pan, and the crepes won't stick. It's the perfect base for sweet or savory fillings.
  • You can make them anytime; no special occasion needed.

Ingredients

For ingredients and detailed instructions, refer to the recipe card below.

  • Flour: All-purpose flour gives crepes their structure.
  • Salt: Adds flavor to the batter and cooked crepes.
  • Eggs: Use large eggs for best results.
  • Milk: Whole milk works best. You can use plant-based milk, but note that its texture will differ.
  • Butter: Adds flavor and prevents sticking. Yes, you don't need to grease the pan.
  • Sugar (optional): Add a little for sweet crepes. Try granulated, vanilla, or brown sugar.

Note: Room-temperature crepe ingredients make the difference when making crepes.

Equipment

  • Use a kitchen scale (best) or measuring cups and spoons.
  • Mix the batter in one bowl with a hand whisk, then strain it through a fine-mesh sieve.
  • For extra smooth batter, use a blender.
  • Cook crepes on a non-stick pan or, even better, a crepe pan with low edges.
  • If you make crepes often, a good crepe pan, like the one from Cuisinart, is a great investment.

How to make crepes

Step 1. Melt the butter in the microwave and let it cool slightly.

Step 2. Sift flour and salt into a large bowl. Make a well, add eggs, and mix with a spoon. Gradually add milk, stirring until smooth. Strain the batter through a sieve to remove lumps, then mix in the cooled butter (it's okay if it solidifies a bit).

Step 3. Cover and let the batter rest at room temperature for 30-60 minutes, or refrigerate overnight. This helps relax the gluten and makes better crepes.

Step 4. Heat a crepe pan or a 9-inch (23 cm) non-stick skillet over medium-high heat. Pour a ladle of batter into the pan and swirl to coat the bottom.

Step 5. When the edges turn golden, loosen them with a turner and flip them over. If you are skilled, flip with a wrist motion.

Step 6. Repeat with the remaining batter and serve warm.

Expert tips

  • For a lighter batter, swap half the milk with water or beer.
  • If the batter is too thick, add a little more milk.
  • Don't skip the resting time. It helps make soft, tender crepes.
  • Cook over medium to medium-high heat (adjust for your stove).
  • Preheat the pan well so even the first crepe turns out great.

Recipe variations

  • Flavor the batter: Add vanilla, dark rum, Calvados, or Grand Marnier. Try lemon or orange zest for extra zing.
  • Chocolate twist: Mix in cocoa powder to make chocolate crepes.
  • Crepe cake: Stack crepes with whipped cream and fruit for a special dessert.
  • Crêpes Suzette: Flambé in orange sauce for a restaurant-style treat.

Get creative with toppings:

  • Sweet: fruit, whipped cream, Nutella, lemon curd, chocolate sauce, maple syrup, caramelized peaches, or condensed milk.
  • Savory: ham, cheese, mushrooms, scrambled eggs, tomatoes, or basil.

Fun folds: Try triangle, roll, pocket, purse, or cone shapes to change it up.

Storing & freezing

Crepes are best enjoyed warm, but you can keep them at room temperature for the same day. To keep them warm, place on a foil-lined plate over a saucepan with hot water (on low heat).

Store leftovers in the fridge, tightly wrapped in plastic wrap or foil, for up to 2 days. Place parchment paper between them to prevent sticking.

Yes, you can freeze them. Stack with parchment or cling film between each, wrap well, and freeze for up to 3 months. Thaw in the fridge or at room temperature, then reheat briefly in the microwave.

Recipe FAQ

How runny should the crepe batter be?
The batter should be about the consistency of heavy cream, thin enough to coat the back of a spoon and spread easily in the pan.

Can you make crepe batter in advance?
Yes. Make the batter and keep it covered in the fridge for up to 48 hours. Let it come to room temperature and stir before cooking.

Can you freeze crepe batter?
Yes. Freeze the batter for up to 2 months. Pour it into a bottle, leaving space at the top, and thaw it in the fridge overnight before using.

Can you make crepes without eggs?
Yes, but the crepes will be more fragile. Replace each egg with a flax egg (1 tablespoon ground flaxseed plus 3 tablespoons water) and handle them gently.

Can you make crepes in the microwave?
You can warm or reheat cooked crepes in the microwave for a few seconds, but the batter itself needs to be cooked in a hot pan to set and brown properly.

Are crepes sweet or savory?
Both. The same basic batter works for sweet fillings like fruit, jam, or chocolate spread and for savory fillings like cheese, ham, or eggs.

How many calories are in a crepe?
Each plain crepe has about 102 calories, though the exact amount depends on any fillings and toppings you add.

Looking for crepe recipes? Try these next!

  • Authentic French Crepes
  • French Chocolate Crepes
  • Beggar's Purses (Apple Cinnamon Crepes)
  • Galette Bretonne
  • Banana Nutella Crepes

Want more delicious and beautiful recipes? Subscribe to my newsletter and follow me on Facebook, Pinterest, and Instagram for my latest updates. If you make this recipe, please leave a star rating on the recipe card and comment below!

Print

Recipe card

Basic Crepes

Freshly made basic crepes stacked high on a plate.
Print Recipe
Save Recipe Recipe Saved

5 Stars 4 Stars 3 Stars 2 Stars 1 Star

5 from 1 review

This basic crepe recipe makes a stack of thin, tender homemade crepes for breakfast, lunch, or dinner. Use a crepe pan or nonstick pan, and fill them with sweet or savory fillings.

  • Author: Irina Totterman
  • Prep Time: 30 minutes
  • Cook Time: 30 minutes
  • Total Time: 60 minutes (plus resting time)
  • Yield: 15 crepes 1x
  • Category: Crepes and Pancakes
  • Method: Cooking
  • Cuisine: French

Ingredients

Scale
  • 1 â…“ cup + 1 ½ tablespoon (180 g) all-purpose flour
  • 1 pinch of salt
  • 3 large eggs, room temperature
  • 2 cups + 2 tablespoons (500 ml) whole milk, room temperature
  • 3 ½ tablespoons (50 g) unsalted butter, melted

* If needed, please refer to Baking Conversion Charts.

Instructions

  1. To make the crepe batter, melt the butter in a small bowl in the microwave and let it cool slightly. Using a flour sifter, sift flour and salt in a large bowl.
  2. Make a well, add eggs, and mix with a wooden spoon. Once the mixture thickens, add the milk little by little. Work the batter well with a spoon or hand whisk to aerate it, then pass it through a fine-mesh sieve. You will obtain a very smooth batter. Add cooled, melted butter and mix to combine. If the butter starts to solidify, it is okay.
  3. Cover the bowl with plastic wrap and let the batter rest at room temperature for 30 to 60 minutes. Refrigerate it if you let it rest overnight. Resting the crepe batter lets the gluten relax, and the flour absorb the liquid. This step is the key to making perfect crepes.
  4. To cook crepes, heat a crepe pan or a 9-inch (23 cm) non-stick skillet over medium-high heat. To test, sprinkle it with water; it is ready when the drops jump across the pan. Gently pour a ladle of crepe batter into the center of the pan. Immediately, tilt the pan to coat the bottom with a thin layer of batter.
  5. Watch the edges of the crepe: once they are golden brown, the crepe is ready to flip. Once you have loosened up the edges with a flexible turner, shake the pan back and forth to release the crepe.
  6. Then, using the turner or spatula, flip the crepe.  Cook the second side. Continue with the remaining batter until it is used up. Serve crepes warm on a large plate.


Notes

  1. For a lighter batter, swap half the milk with water or beer.
  2. If the batter is too thick, add a little more milk.
  3. Don't skip the resting time. It helps make soft, tender crepes.
  4. Cook over medium to medium-high heat (adjust for your stove).
  5. Preheat the pan well so even the first crepe turns out great.

Nutrition

  • Serving Size: 1 crepe
  • Calories: 102
  • Sugar: 1.9 g
  • Sodium: 40 mg
  • Fat: 4.9 g
  • Saturated Fat: 2.7 g
  • Carbohydrates: 10.8 g
  • Fiber: 0.3 g
  • Protein: 3.6 g
  • Cholesterol: 48 mg

Thank you for following me on Pinterest, Facebook, and Instagram. Hashtag #bakinglikeachef so I can see your creations.

The nutritional information has been calculated using an online recipe nutrition calculator such as Verywellfit.com and is intended for informational purposes only. These figures should be used as a general guideline and not be construed as a guarantee.

Authentic French Crepes Recipe

Aug 9, 2021 · 66 Comments

Folded French crepes topped with fresh fruit on a grey plate.

Quick Summary: French crepes are thin, unleavened pancakes made from a simple batter of flour, eggs, milk, and butter. Resting the batter for an hour is the key to an authentic, tender texture. This recipe makes 16 crepes and works with both sweet and savory fillings.

Folded French crepes topped with fresh fruit on a serving plate.

This authentic French crepe recipe uses just a few basic ingredients to make thin, tender crepes for breakfast, brunch, or dinner. In France, February 2 marks La Chandeleur, or crêpe day, when families gather to flip and share crepes for good luck.

French cuisine is known for its pastries, and crepes sit right alongside madeleines as an everyday classic. Round out a French dessert spread with apple Tarte Tatin and Ile Flottante.

What is a crepe?

A crepe (crêpe in French, pronounced krep) is a large, very thin pancake made with no leavening agent, so it stays flat and light rather than puffing up like an American pancake. The name comes from the Latin crispa, meaning curled or crinkled.

Crepes come in two main styles: sweet crepes made with wheat flour (crêpes sucrées), and savory buckwheat galettes (galettes de sarrasin) from Brittany. This recipe is for the classic sweet-and-savory wheat crepe.

This video of chef Raymond Oliver making French crepes (crêpes françaises) is worth a watch. He famously flavors his batter with rum, beer, pastis, and a splash of white wine.

Why you'll love this recipe

  • Just a few ingredients: flour, eggs, milk, butter, and a pinch of salt are all you need.
  • Sweet or savory: the same batter works for dessert crepes or savory galette-style fillings.
  • Authentic method: resting the batter for an hour gives tender, lump-free crepes the traditional way.
  • Make-ahead friendly: the batter and finished crepes both keep well so that you can prep in advance.
  • Crowd-pleaser: one batch makes 16 crepes, perfect for a family breakfast or brunch.

Ingredients

For ingredients and detailed instructions, refer to the recipe card below.

Read more about crepe ingredients before you start.

  • Flour: Use all-purpose flour for classic French crepes. Resting the batter for up to an hour lets the flour absorb liquid, and the gluten relax.
  • Salt: Enhances both flavor and sweetness.
  • Eggs: Use large eggs for structure and moisture.
  • Milk: Whole milk is the most popular choice. Skim milk makes a lighter version. To make dairy-free crepes, replace whole milk with almond milk.
  • Rum: Adds fruity flavor. Swap with Cointreau, Grand Marnier, Kirsch, or fruit juice for a non-alcoholic option.
  • Butter: Melted butter adds flavor and aids cooking, so no greasing is needed.

Equipment

A few basic tools make French crepes easier:

  • Crepe pan or nonstick skillet (a carbon-steel de Buyer crepe pan is a French favorite)
  • Large mixing bowl
  • Hand whisk
  • Fine-mesh sieve
  • Ladle or small measuring cup
  • Flexible turner or crepe spatula

How to make French crepes

Step 1. To make the crepe batter (pâte à crêpes in French), sift all-purpose flour with a pinch of salt into a large mixing bowl.

Step 2. Make a well in the middle, add eggs, and mix with a hand whisk (photo 1).

Step 3. Add half of the cold milk and whisk. Add the remaining milk and pass the batter through a fine-mesh sieve (photo 2).

Pro tip: Most French crepe recipes, including Julia Child's crepes, insist on using a food processor, electric mixer, or blender to mix up all the ingredients. But using a hand whisk and getting the batter through a fine-mesh sieve makes a smooth batter and provides the best texture of crepes.

Flour and eggs mixture with a hand whisk in a bowl.

PHOTO 1

Crepe batter in a bowl.

PHOTO 2

Step 4. Flavor the batter with dark rum, add water, and whisk. Cover the batter with a plastic film and let it rest for one hour at room temperature.

Step 5. Just before cooking crepes, melt unsalted butter in a crepe pan (a nonstick pan), add it to the batter, and whisk. Wipe the pan with a paper towel.

Step 6. Place a crepe pan over medium-high heat (do not grease the pan). Pour the batter into a thin layer (adjust to fit your pan size) and tilt the pan to cover the bottom (photo 3).

Step 7. Once the edge of the crepe turns brown, flip the crêpe with a flexible turner (photo 4).

Poured batter into a crepe pan.

PHOTO 3

Flipped crepe in a pan.

PHOTO 4

Step 8. Cook the second side until golden. Repeat with the remaining batter and stack the crepes on a plate. Serve crepes warm.

Julia Child's crepe method vs. this recipe

Many classic French crepe recipes, including Julia Child's crepe recipe in Mastering the Art of French Cooking, blend the batter in a food processor or blender for a few seconds until smooth. It is fast and gives a lump-free batter.

This recipe uses a hand whisk and then passes the batter through a fine-mesh sieve instead. It takes a minute longer, but it avoids over-mixing the gluten and gives crepes a slightly more tender texture. Either method works, so use whichever tool you have on hand.

Expert tips

  1. Rest the batter: let it sit for at least an hour so the flour hydrates and the gluten relaxes, which is the key to tender, authentic crepes.
  2. Strain for smoothness: pass the batter through a fine-mesh sieve to catch any lumps.
  3. Get the pan hot: heat the crepe pan over medium-high before adding batter, and use just enough to coat the bottom in a thin layer.
  4. Butter the batter, not the pan: whisking melted butter into the batter means you do not need to grease the pan between crepes.
  5. The first crepe is a tester: if it sticks or tears, adjust the heat and batter thickness before continuing.
  6. Stack to keep warm: pile cooked crepes on a plate; if serving the same day, skip the parchment between them.

Recipe variations

This crepe batter is easy to adapt. Here are a few ways to change it up:

  • Sweeten it: add a tablespoon of sugar, plus vanilla extract, orange flower water, or a little orange or lemon zest.
  • Swap the alcohol: replace the rum with Grand Marnier, Cointreau, or Kirsch, or use fruit juice or water for a kid-friendly, non-alcoholic version.
  • Dairy-free: use almond or oat milk in place of whole milk.
  • Lighter crepes: replace part of the milk with beer, cider, or water for an airier texture.
  • Buckwheat galettes: use buckwheat flour for the savory Breton-style galettes de sarrasin.

Traditional French crepe fillings

One classic way to enjoy crêpes à la Française is to sprinkle white or vanilla sugar over half a warm crêpe, then fold it into quarters. You can also try a variety of sweet or savory fillings, but don't mix more than three ingredients while creating your original topping.

Savory crepe fillings:

  • ham and cheese
  • bacon and eggs
  • crème fraîche and grated Emmenthal
  • small grilled mushrooms
  • sauteed vegetables
  • diced tomatoes

Sweet crepe fillings:

  • sugar-free whipped cream and fresh fruit
  • Nutella and banana
  • slow cooker apple butter
  • chocolate and strawberries
  • lemon curd with whipped cream
  • ice cream
  • hazelnut praline paste
  • peach compote
  • homemade condensed milk
  • caramel sauce
  • toasted or candied nuts

Storing & freezing

Crepes are best eaten warm, but you can make them up to 2 days ahead. Store in the fridge, with parchment between each crepe, in a zip-top bag or covered with cling film.

For longer storage, freeze stacks with parchment and plastic wrap for up to 2 months. Defrost in the fridge overnight or at room temperature for 1-2 hours. Reheat in the microwave in 15-30 second bursts or gently over a bain-marie.

Recipe FAQ

What is the difference between a crepe and a pancake?
Crepes are much thinner than American pancakes and use no leavening agent, so they stay flat and thin instead of rising. The batter is thinner and richer in eggs.

Do French crepes need to be sweet or savory?
Both. The same wheat-flour batter works for sweet fillings like sugar, jam, or Nutella, and for savory ones like ham and cheese or eggs.

Why do you rest crepe batter?
Resting lets the flour fully hydrate, and the gluten relax, which gives smoother, more tender crepes. An hour at room temperature is ideal.

What if I do not have time to rest the batter?
If you are short on time, warm the milk slightly before mixing it in, and you can cook right away. The texture is best after resting, though.

How do I make lighter crepes?
Reduce the milk and replace part of it with beer, cider, or water. This lightens the batter and gives an airier crepe.

How long does crepe batter last?
Crepe batter keeps in the fridge for up to two days. It is best made fresh, as the flavor and consistency change over time.

How do you fold crepes?
It depends on the filling. You can fold a crepe in half, into quarters, roll it, or shape it into a pocket or cone.

How many calories are in a French crepe?
Each crepe has about 86 calories.

Love crepes and pancakes? Try these next!

  • Chocolate French crepes
  • Crepes Suzette
  • Vanilla Dutch Baby
  • Beggar's Purses
  • Farmer's Cheese Pancakes
  • Or browse all the crepe and pancake recipes

Want more delicious and beautiful recipes? Subscribe to my newsletter and follow me on Facebook, Pinterest, and Instagram for my latest updates. If you make this recipe, please leave a star rating on the recipe card and comment below!

Print

Recipe card

Authentic French Crepes (Crepes Francaise)

Folded French crepes topped with fresh fruit on a grey plate.
Print Recipe
Save Recipe Recipe Saved

5 Stars 4 Stars 3 Stars 2 Stars 1 Star

5 from 26 reviews

Authentic French crepes made with just a few basic ingredients: flour, eggs, milk, and butter. Thin, tender, and ready for sweet or savory fillings for breakfast, brunch, or dinner.

  • Author: Irina Totterman
  • Prep Time: 15 minutes
  • Cook Time: 25 minutes
  • Total Time: 40 minutes (plus resting time)
  • Yield: 16 1x
  • Category: Crepes
  • Method: Cooking
  • Cuisine: French

Ingredients

Scale
  • 1 cup + 5 tablespoons (165 g) all-purpose flour
  • 1 pinch of salt
  • 4 large eggs, room temperature
  • 13.5 fl oz (400 ml) cold whole milk
  • 1.7 fl oz (50 ml) water
  • 1 tablespoon (15 ml) dark rum
  • 1.4 oz (40 g) unsalted butter, melted

* If needed, please refer to Baking Conversion Charts.

Instructions

  1. To make a crepe batter, sift all-purpose flour with a pinch of salt into a large mixing bowl. Make a well in the middle, add eggs, and mix with a hand whisk.
  2. Add half of the cold milk and whisk. Add the remaining milk and pass the batter through a fine-mesh sieve. Flavor the batter with dark rum, add water, and whisk. Cover the batter with plastic film and let rest for one hour at room temperature.
  3. Just before cooking crepes, melt unsalted butter in a crepe pan (a nonstick pan), add to the batter, and whisk. Wipe the pan with a paper towel.
  4. Place a crepe pan over medium-high heat (do not grease the pan). Pour the batter into a thin layer, adjusting to fit your pan size, and tilt the pan to cover the bottom.
  5. Once the edge of the crepe turns brown, flip the crepe with a flexible turner. Cook the second side until golden. Repeat with the remaining batter.

Notes

  1. Sugar is optional: add one tablespoon of sugar if desired.
  2. To make crepes kid-friendly, replace rum with the same amount of water or another flavoring.
  3. Don't skip the resting time: it's key to making authentic French crepes.
  4. For recipe variations, add sugar, orange flower water, vanilla extract, or even orange or lemon zest.
  5. If serving crepes the same day, skip the parchment when stacking.
  6. To store, place parchment paper between each crepe and keep them in a zip-top bag or cover them with cling film in the fridge.

Nutrition

  • Serving Size: 1 crepe
  • Calories: 86
  • Sugar: 1.3 g
  • Sodium: 54 mg
  • Fat: 3.8 g
  • Saturated Fat: 2 g
  • Carbohydrates: 9.2 g
  • Fiber: 0.3 g
  • Protein: 3.3 g
  • Cholesterol: 48 mg

Thank you for following me on Pinterest, Facebook, and Instagram. Hashtag #bakinglikeachef so I can see your creations.

The nutritional information has been calculated using an online recipe nutrition calculator such as Verywellfit.com and is intended for informational purposes only. These figures should be used as a general guideline and not be construed as a guarantee.

The recipe was originally published on February 08, 2018. It has been revised to include improved content and photos.

Yeasted Blini Recipe

May 10, 2021 · 24 Comments

A batch of yeasted blini with some folded in four on a marble board.

Quick Summary: Yeasted blini are traditional Russian pancakes leavened with yeast, giving them a lacy, airy texture and a lightly tangy taste. You dissolve yeast in warm milk and water, whisk in flour, egg, and a little sugar and salt, then let the batter proof once before cooking small, thick blinis. Serve them sweet with jam or honey, or savory with smoked salmon and caviar.

A batch of yeasted blini with some folded in four on a marble board

What are blini?

Blini are thin, yeast-leavened pancakes from Eastern Europe. They are similar to crepes but a little thicker, with a lacy, airy texture and a lightly tangy taste that comes from the yeast in the batter.

Blini are a beloved dish across the East Slavic countries, with deep roots in Russian, Ukrainian, and Belarusian cooking. In Ukraine, they are often called mlyntsi, and each cuisine has its own traditions, yet they share the same simple idea: a yeasted batter cooked into round, golden pancakes.

Historically, blini were tied to the pre-Lenten festival of Maslenitsa (Butter Week), where their round, golden shape symbolized the return of the sun. Today the term covers both pan-sized thin blini and the small, bite-sized blini often served with caviar.

Folded yeast blini on top of the batch on a marble and wooden board

Why you'll love this recipe

  • Authentic and foolproof. This easy method gives you traditional Russian yeasted blinis with a lacy, airy texture every time.
  • Full of flavor. The yeast gives the blinis a signature tangy taste that keeps everyone reaching for more.
  • Quick single proof. The batter needs just one proof (fermentation), so you save time compared with recipes that use a separate sponge.
  • Sweet or savory. Serve them with jam and honey, or go savory with smoked salmon and caviar, or even as a party appetizer.

Ingredients

For ingredients and detailed instructions, refer to the recipe card below.

  • Milk and water: liquids used to dissolve the baking yeast. Use whole milk or low-fat milk if desired. Warm up the liquids to 113°F (45°C).  
  • Baking yeast: use SAF instant yeast. Red Star is another good option. You can use instant and active dry yeast interchangeably. Read more about types of yeast and how to choose the right one.
  • Flour: the recipe calls for all-purpose flour.
  • Salt and sugar: both balance the flavor of blinis.
  • Vegetable oil: use it to make the batter and to cook blini. You can replace it with grapeseed or sunflower oil if desired.
  • Egg: use a large whole egg at room temperature.
  • Vanilla extract: the recipe calls for Madagascar vanilla extract. Omit this ingredient if you serve blini with savory toppings.

Equipment

You need only a few basic tools to make yeasted blini:

  • small saucepan
  • cooking thermometer
  • fine-mesh sieve or flour sifter
  • hand whisk
  • ladle
  • crepe pan or nonstick skillet

How to make blinis

Step 1. To make the blini batter, pour milk and water into a small saucepan and heat over medium-high heat to 113°F (45°C) (use a cooking thermometer to check the temperature).

Step 2. Remove from the heat and transfer to a large heatproof bowl. Add the baking yeast, salt, and sugar; mix with a hand whisk, then rest for about 5 minutes for the yeast to activate.

Step 3. Sift the flour with a flour sifter, add it to the main mixture, and mix. Beat the egg for an omelet and add it to the mixture. Pour in the vanilla extract and oil, then combine (photo 1).

Step 4. Cover the bowl with plastic film and place it in a warm, draft-free place to rest for 30 to 45 minutes. The batter will approximately double (photo 2).

Photo 1: Blini batter in a metal bowl Photo 2: Proofed batter in a bowl
PHOTO 1 PHOTO 2

Step 5. To cook blini, gently mix the batter with a hand whisk. Heat a crepe pan over medium heat and brush it with oil using a silicone brush.

Step 6. Pour one ladle of batter into the pan, and swirl to coat the entire surface.

Step 7. Cook until bubbles appear on the surface and the bottom becomes golden brown, about 1 to 2 minutes (photo 3).

Step 8. Flip the blini and cook on the second side for about 1 to 2 minutes (photo 4). Transfer blini to a warm plate.

Photo 3: Batter poured onto a crepe pan Photo 4: Cooked flipped blini in a skillet
PHOTO 3 PHOTO 4

Step 9. Repeat the process until the batter is used up, brushing the skillet before adding the batter.

Yeasted blini with the folded one on top featuring lace appearance: Close up

Expert tips

Keep these tips in mind for airy, tender blinis every time:

  • Check your liquid temperature. Warm the milk and water to about 113°F (45°C) with a cooking thermometer. If you don't have one, the liquid should feel warm, not hot, to the touch so the yeast stays alive.
  • Aim for a smooth batter. Whisk until smooth before resting. If lumps remain, pass the batter through a fine-mesh sieve.
  • Help the batter proof. To speed up proofing, place the covered bowl in an oven with only the light on (heat off).
  • Stir while cooking. Stir the batter now, and then so the flour stays evenly distributed.
  • Serve them warm. Blinis are best served warm right off the pan, or kept covered with a tea towel in a warm oven until ready.

Recipe variations

This traditional recipe is a great base to make your own. Here are a few ways to change up the batter:

  • Buckwheat blini. Swap part of the all-purpose flour for buckwheat flour for the earthy, nutty flavor of classic Russian blini, ideal under caviar.
  • Tangier flavor. Replace the milk with plain kefir, or a mix of sour cream with milk or water, for a more pronounced sourdough-like tang.
  • Extra creamy. Mix the whole milk with a little cream for richer, more tender blinis.
  • Lighter blini. Omit the milk and use just water for a lighter, airier result.
  • Sweet or savory batter. Add a touch more sugar for dessert blinis, or keep it plain for savory toppings like smoked salmon and caviar.

How to serve blini

Blinis are traditionally served warm, either sweet or savory, and both styles are equally at home on the table.

For savory blinis, the classic pairing is smoked salmon or caviar with a dollop of crème fraîche or sour cream, a tradition that goes back centuries in Russia. Other savory toppings include:

  • crème fraîche or sour cream with fresh dill
  • smoked salmon, trout, or hot-smoked fish
  • red or black caviar
  • crab or smoked chicken salad
  • poached eggs
  • avocado cream, or goat cheese and brie for canapés

For sweet blinis, the most classic Russian way is simply butter and jam. You can also top them with:

  • honey
  • jam or fruit preserves
  • sweetened sour cream
  • sweetened condensed milk
  • sweetened cottage cheese

For a party, serve small, bite-sized blinis as canapés and set out a spread of toppings so guests can build their own. However you serve them, blinis are best enjoyed warm and topped just before eating so they stay tender.

Storing & freezing

Store cooled blinis covered with plastic wrap in the refrigerator for up to 2 days. To serve, bring them back to room temperature or warm them in the microwave for 1 to 2 minutes, and add your toppings fresh.

Blinis freeze well for up to 2 months. Stack the cooled blinis with a sheet of parchment paper between each one, wrap the batch in a double layer of plastic wrap and aluminum foil, and place it in an airtight container. To serve, defrost them at room temperature for a couple of hours or overnight in the fridge, then reheat in the microwave for a few minutes until warm.

Recipe FAQ

How do you pronounce blini?
Break the word into sounds: BLEE-nee. Blini is technically the plural; a single one is a blin.

What is a yeasted blini?
A yeasted blini is a traditional Russian pancake leavened with baker's yeast rather than baking powder. The yeast gives it a lacy, airy texture and a lightly tangy, fermented flavor.

Are blinis the same as crepes?
No. Crepes are paper-thin and made without yeast, while blinis are thicker, fluffier, and made with yeast. Blini batter proofs for about an hour, whereas crepe batter only needs a short rest. This is also why some people search for yeast crepes when they mean blini.

What is the difference between a pancake and a blini?
They differ in both texture and ingredients. A pancake is thicker and fluffier and is raised with a chemical leavener (baking powder), while a blini is raised with baker's yeast, which gives it its signature tang.

What is a buckwheat blini?
A buckwheat blini uses buckwheat flour in place of some of the wheat flour for an earthy, nutty flavor. This is the most traditional Russian style and pairs especially well with caviar and crème fraîche.

Can you make blini batter in advance?
Not really. The yeast loses activity over time, so blini batter is best cooked after its single proof of 45 to 60 minutes. You can, however, cook the blinis ahead and reheat them.

What toppings go with blini?
For savory blinis, try smoked salmon, caviar, crème fraîche, or crab. For sweet blinis, use jam, honey, sweetened sour cream, or condensed milk. Butter and jam are the classic Russian way.

How are blinis traditionally served?
Traditionally, blinis are served warm with savory sides such as smoked salmon or caviar, or with sweet toppings like fruit jam, sweetened condensed milk, or honey.

Should you serve blinis hot or cold?
Serve blinis warm or at room temperature. Once topped, eat them right away so they don't turn soggy.

How do you reheat blinis?
Cover them with aluminum foil and warm in the oven for 10 to 15 minutes at 350°F (175°C). You can also microwave them on high for 1 to 2 minutes.

How many calories are in a blini?
One yeasted blini has about 126 calories.

Love crepes and pancakes? Try these next!

  • Syrniki (Russian Farmer's Cheese Pancakes)
  • Nalesniki (Polish Crepes and Pancakes)
  • Clatite (Romanian Pancakes)
  • Authentic French Crepes
  • French Buckwheat Galettes
  • Browse all the Crepe and Pancake Recipes

Want more delicious and beautiful recipes? Subscribe to my newsletter and follow me on Facebook, Pinterest, and Instagram for my latest updates. If you make this recipe, please leave a star rating on the recipe card and comment below!

Print

Recipe card

Yeasted Blini Recipe

A batch of yeasted blini with some folded in four on a marble board.
Print Recipe
Save Recipe Recipe Saved

5 Stars 4 Stars 3 Stars 2 Stars 1 Star

5 from 11 reviews

Yeasted blini are traditional Russian pancakes leavened with yeast, giving them a lacy, airy texture and a lightly tangy taste. Serve these easy yeast blinis sweet with jam or honey, or savory with smoked salmon and red or black caviar.

  • Author: Irina Totterman
  • Prep Time: 15 minutes
  • Cook Time: 30 minutes
  • Total Time: 45 minutes (plus resting time)
  • Yield: 10 blinis 1x
  • Category: Crepes and Pancakes
  • Method: Cooking
  • Cuisine: Russian

Ingredients

Scale
  • 1 â…” cups + 1 teaspoon (400 ml) milk 
  • â…” cup + 1 tablespoon (175 ml) water 
  • 1 ½ teaspoon SAF instant yeast 
  • 1 â…” cups + 2 tablespoons (225 g) all-purpose flour
  • ¼ teaspoon kosher salt
  • 1 tablespoon granulated sugar
  • 2 teaspoons vegetable oil, plus more for cooking
  • 1 large egg
  • ½ teaspoon vanilla extract

* If needed, please refer to Baking Conversion Charts.

Instructions

  1. To make the blini batter, pour milk and water into a small saucepan and heat over medium-high heat to 113°F (45°C) (use a cooking thermometer to check the temperature). Take off the heat and transfer to a large heatproof bowl. Add the baking yeast, salt, and sugar; mix with a hand whisk, then rest for about 5 minutes to activate the yeast. Sift the flour, add it to the main mixture, and mix. Beat the egg for an omelet; add it to the mixture. Pour in the vanilla extract and oil, then combine. Cover the bowl with plastic film and let it rest in a warm, draft-free place for 30 to 45 minutes. The batter will approximately double.
  2. To cook blini, gently mix the batter with a hand whisk. Heat a crepe pan over medium heat and brush it with oil using a silicone brush. Pour one ladle of batter into the pan, swirl to coat the entire skillet, and cook until bubbles appear on the surface and the bottom becomes golden brown, about 1 to 2 minutes. Flip the blini and cook on the second side for about 1 to 2 minutes. Transfer blini to a warm plate. Repeat until the batter is used up, brushing the skillet before adding each batch.

Notes

  1. Check the temperature of liquids with a cooking thermometer. If you don't have one, the milk-and-water mixture should be warm to the touch.
  2. Make sure the blini batter is smooth before letting it rest. If there are flour lumps in the batter, pass the batter through a fine-mesh sieve to remove them.
  3. To speed up the yeast proofing, place the bowl with the batter, covered with plastic wrap or a tea towel, in the oven with the light on (heat off).  
  4. Stir the blini batter throughout cooking so the flour is evenly distributed.
  5. Serve blinis warm as soon as they are cooked, or keep them covered with a tea towel in the warm oven until ready.

Nutrition

  • Serving Size: 1 blini
  • Calories: 126
  • Sugar: 3.5 g
  • Sodium: 86 mg
  • Fat: 2.5 g
  • Saturated Fat: 0.9 g
  • Carbohydrates: 21 g
  • Fiber: 0.7 g
  • Protein: 4.5 g
  • Cholesterol: 22 mg

Thank you for following me on Pinterest, Facebook, and Instagram. Hashtag #bakinglikeachef so I can see your creations.

The nutritional information has been calculated using an online recipe nutrition calculator such as Verywellfit.com and is intended for informational purposes only. These figures should be used as a general guideline and not be construed as a guarantee.

The recipe was originally published on March 18, 2018. It has been updated and may differ from what was originally published. It was revised to include improved content and photos. 

Mango Crepe Cake Recipe

Oct 12, 2020 · 9 Comments

Cake decorated with mango curls on a marble board with white dishes in the background.

Quick Summary: A mango crepe cake is a no-bake French Mille crepe dessert made by layering thin crepes with whipped cream and fresh honey mango. You make the crepes ahead, stack them with cream and mango, chill for 1 to 2 hours, then decorate with mango curls and lime zest.

Sliced Mille crepe cake on a white marble board: Close up

What is a crepe layer cake?

A crepe layer cake, also called a Mille crepe cake, is a French no-bake dessert built from many thin crepes stacked with whipped cream and, in this case, fresh mango. Unlike a baked sponge cake, it has delicate paper-thin layers that stay light and soft.

Over time, I tested different creams and fruit varieties, as well as different approaches to stacking crepes (with and without a mold). I even tried layering crepes as-is, and they cut perfectly, with neat edges.

I suggest cutting the crepes to the desired size on a plate or a cake ring. And I also recommend using a mousse cake mold or ring to stack crepes. You will end up with a neat cake, with each crepe perfectly layered.

However, if you are in a hurry, you can stack crepes, keeping their natural lacy-looking edges. If you do not have a mold, you can still make this crepe cake.

Finally, I created this mango crepe cake recipe inspired by a mille crepe dessert served at T Xuan in Paris.

It is a unique Chinese tea room in the center of Paris, founded by Yuelin Cui and Pierre-Henri Boissavy, that offers a wide variety of Chinese desserts.

Decorated mango layer cake on a marble board with dishes in the background

The best cream for a crepe cake

The best cream for a Mille crepe cake is whipped cream. Homemade tastes better than store-bought, and you can flavor it in many ways:

  • Stiff peaks: whip the cream until stiff so the crepes do not slip while you stack them.
  • Stabilizer: add a whipped cream stabilizer to help homemade cream hold its shape (use one 0.35 oz/10 g package per 1 cup of cold cream).
  • Vanilla: flavor it with ½ to 1 teaspoon vanilla extract for vanilla whipped cream.
  • Orange flower water: add 1 teaspoon to the orange-flavored cream used in these Banoffee Pie Cups.
  • Rose water: stir in 1 teaspoon rose water for a floral note.
  • For adults: add 1 teaspoon dark rum or fruit brandy.
  • Sugar swap: replace granulated white sugar with golden brown sugar.
  • Chocolate cream: try white chocolate or milk chocolate whipped cream.
Sliced mango cake served on a marble board: Close up

Why you'll love this recipe

  1. It is easy: make French crepes in advance, then assemble the cake within one hour (chilling time not included).
  2. It is a great alternative to a birthday cake: if you have never made a crepe birthday cake, this is your chance to try one.
  3. It suits a crepe party: a crepe cake is another fun option to serve when guests gather.
  4. It is a great upgrade for crepe lovers: simple crepes turn into a special layered dessert.

Ingredients

For ingredients and detailed instructions, refer to the recipe card below.

  • Crepes: Make thin crepes using the French crepe recipe. The thinner the crepes, the neater the cake. If your crepes are thick, use fewer of them than the recipe suggests.
  • Whipping creates at least a crepe recipe. To stabilize it, add a whipped cream stabilizer, though it is optional.
  • Sugar: Use granulated white sugar, or replace it with golden brown sugar.
  • Mango: Honey mangoes work best because they have a small seed and a high flesh-to-seed ratio. You can also use other seasonal mango varieties available in your area.
  • Flaked almonds: Use store-bought toasted flaked almonds, or toast them yourself at 300°F (150°C) for 10 to 15 minutes.
  • Lime: Use organic, untreated lime and make fresh zest with a zester.

Equipment

  • Mousse cake mold: the same diameter as your crepes (about 7 inches (18 cm)), plus an acetate cake collar to line it
  • Electric mixer to whip the cream to stiff peaks
  • Rubber spatula to spread the cream and make decorative waves
  • Mandoline slicer or a vegetable peeler to cut very thin mango slices
  • Zester grater to make fresh lime zest
  • Food processor and a fine-mesh sieve if you want to make a smooth mango puree
Cake decorated with mango curls, lemon zest and sprinkled with toasted flaked almonds

How to make a mango crepe cake

Step 1. Follow the recipe for French crepes to make thin crepes. Let them cool. Then use a plate and cut the crepes into 7-inch (18 cm) (photo 1).

Step 2. To make the whipped cream, beat 1 â…” cups + 1 tablespoon (400 g) cold whipping cream with 2 â…” tablespoons (40 g) sugar in an electric mixer until stiff peaks (photo 2).

Photo 1: Cut crepes on a cutting board Photo 12: Whipped cream in a metal bowl
PHOTO 1 PHOTO 2

Step 3. Slice up mangoes into thin slices.

Step 4. To assemble the cake, adjust a mousse cake mold to the same diameter as crepes, place it on a serving platter, and line the mold with an acetate cake collar.

Step 5. Place the first crepe in the mold, spread a thin layer of the whipped cream, and place another crepe. Spread another layer of the cream, place another crepe, and cover with the cream again.

Step 6. Arrange mango slices over the entire surface of the crepe (photo 3). Repeat these steps with all 12 crepes to mount the cake, adding mango slices for every three crepes.

Step 7. Finish with the last crepe, cover the mold with plastic film, and refrigerate for 1 to 2 hours.

Step 8. To decorate the cake, whip ⅓ cup + 1 ½ tablespoons (100 g) whipping cream with ⅔ tablespoon (10 g) sugar until soft peaks form. Take the cake out of the fridge, remove the mold and acetate film. Garnish the top of the cake with the whipped cream, mixing with a rubber spatula.

Step 9. Sprinkle sides of the cake with toasted flaked almonds.

Step 10. Slice the remaining mangoes very thinly with a mandoline (the thinner the slices, the easier they are to curl). Use a sharp knife to cut each oval slice in half.

Step 11. Twist mango slices into spirals and arrange them over the top of the cake. Using a zester, grate fresh lime zest and sprinkle it over mango curls (photo 4).

Photo 3: Cream topped with fruit slices in a mold  Photo 4: Cake on a board
PHOTO 3 PHOTO 4

Expert tips

  1. Be sure to make firm whipped cream to spread between crepes: it helps keep the crepes from slipping and sliding when you unmold the cake.
  2. To decorate the cake, whip the cream until firm, then pipe it over the top as desired.
  3. If you do not have a mandoline slicer, carve off the mango's cheek, place it on a flat surface with the flat side down, peel the skin with a vegetable knife to cut very thin slices, then cut each slice in half. To decorate the top of the cake, twist each slice into a spiral.
  4. Make a mango puree in a food processor, then strain it through a fine-mesh sieve, and pour it over each slice while serving (optional).

Storing and freezing

Keep the cake covered in the refrigerator for up to 2 days. The cream stays firmest on the first day.

You can freeze plain crepes, stack them between sheets of parchment, place them in an airtight bag, and freeze for up to 1 month; thaw before assembling.

Freezing the finished cake is not recommended, as the whipped cream and fresh mango lose their texture once thawed.

Recipe variations

This crepe cake is easy to adapt. Here are a few ways to change it then it through

  • Different fruit: swap mango for strawberries, raspberries, or peas, or a layered crepe cake.
  • Mango coconut: fold a little coconut cream into the whipped cream and sprinkle toasted coconut on the sides for a mango coconut crepe cake.
  • Chocolate crepe cake: Use chocolate crepes or white or milk chocolate whipped cream.
  • Flavored cream: flavor the whipped cream with vanilla, orange flower water, rose water, or a spoonful of rum for adults.
  • Gluten-free: make crepes with a gluten-free flour blend so the whole cake is gluten-free.

Recipe FAQ

Can you make a mango crepe cake in advance?
You can make the crepes in advance and even freeze them, but assemble the cake on the day you serve it. Whipped cream made without a stabilizer is not stable enough to hold stacked crepes in place for long.

What crepes can you use to make this cake?
Use homemade or store-bought thin crepes (not pancakes). The thinner the crepes, the neater the cake. You can also use gluten-free crepes or chocolate crepes.

How do you cut a Mille Crepe cake?
Warm a long chef's knife in hot water and dry it with a paper towel. Cut the cake, then wash and wipe the blade between each slice to keep it clean.

What is the difference between a crepe cake and a regular cake?
A regular cake is baked with layers of sponge, while a crepe cake is no-bake and built from many thin crepes stacked with cream. The result is lighter, with delicate paper-thin layers.

How many calories are in a mango crepe cake?
One slice of this mango crepe cake has about 406 calories, based on 10 servings. The exact number depends on your crepes, the amount of cream, and the mango you use.

Is it cheaper to buy or make a mango crepe cake?
Making it at home is usually cheaper than buying one from a bakery, since crepes, cream, sugar, and a few mangoes cost less than a store-bought layered crepe cake.

How do you serve a mango crepe cake?
Serve it chilled, cut into thin slices with a warm knife. It pairs well with tea or coffee, and you can add a spoonful of mango puree to each plate.

Love crepes? Try these next!

  • French Chocolate Crepes
  • Basic Crepes Recipe
  • Banana Nutella Crepes
  • Crepes Suzette Flambe
  • Crispy Crepes
  • Vanilla Baby Dutch Pancake
  • Beggar's Purses With Caramelized Apples
  • Browse all the Crepe and Pancake Recipes

Want more delicious and beautiful recipes? Subscribe to my newsletter and follow me on Facebook, Pinterest, and Instagram for my latest updates. If you make this recipe, please leave a star rating on the recipe card and comment below!

Print

Recipe card

Mango Crepe Cake Recipe

Cake decorated with mango curls on a marble board with white dishes in the background.
Print Recipe
Save Recipe Recipe Saved

5 Stars 4 Stars 3 Stars 2 Stars 1 Star

5 from 5 reviews

This mango crepe cake is a no-bake French Mille crepe cake made with thin crepes layered with whipped cream and fresh honey mango, then decorated with mango curls and lime zest.

  • Author: Irina Totterman
  • Prep Time: 1 hour
  • Cook Time: 0 minutes
  • Total Time: 1 hour (plus chilling time)
  • Yield: 10 1x
  • Category: crepes
  • Method: No-Bake
  • Cuisine: French

Ingredients

Scale
  • 12 thin crepes

For the whipped cream:

  • 2 cups + 3 tablespoons (500 g) whipping cream
  • 3 ½ tablespoons (50 g) granulated sugar

For assembling:

  • 7 honey mangoes
  • 2 oz (60 g) toasted flaked almonds
  • ½ lime, zest

*Don't you have the correct baking pan on hand right now? Try this simple Cake Pan Converter!

** If needed, please refer to Baking Conversion Charts.

Instructions

  1. Follow the recipe for French crepes to make thin crepes. Let them cool. Then use a plate and cut the crepes into 7-inch (18 cm) pieces.
  2. To make the whipped cream, beat 1 â…” cups + 1 tablespoon (400 g) cold whipping cream with 2 â…” tablespoons (40 g) granulated sugar using an electric mixer until stiff peaks.
  3. Slice up mangoes into thin slices.
  4. To assemble the cake, adjust a mousse cake mold to the same diameter as crepes, place it on a serving platter, and line the mold with an acetate cake collar. Place the first crepe in the mold, spread a thin layer of the whipped cream, and place another crepe. Spread another layer of the cream, place another crepe, and cover with the cream again. Arrange mango slices over the entire surface of the crepe. Repeat these steps with all 12 crepes to mount the cake, adding mango slices for every three crepes. Finish with the last crepe, cover the mold with plastic film, and refrigerate for 1 to 2 hours.
  5. To decorate the cake, whip ⅓ cup + 1 ½ tablespoons (100 g) whipping cream with ⅔ tablespoon (10 g) sugar until soft peaks form. Take the cake out of the fridge, remove the mold and acetate film. Garnish the top of the cake with the whipped cream, making waves with a rubber spatula.
  6. Sprinkle sides of the cake with toasted flaked almonds.
  7. Slice the remaining mangoes very thinly using a mandoline (the thinner the slices, the easier they are to curl). Use a sharp knife to cut each oval slice in half. Twist mango slices into spirals and arrange them over the top of the cake. Using a zester, grate fresh lime zest and sprinkle it over mango curls. 

Notes

  1. Make firm whipped cream to spread between crepes; it helps keep the crepes from slipping and sliding when you unmold the cake.
  2. To decorate the cake, whip the cream until firm, then pipe it over the top as desired. 
  3. If you do not have a mandoline slicer, carve off the mango's cheek, place it on a flat surface with the flat side up, and peel the skin with a vegetable peeler. Use a sharp knife to cut very thin slices, then cut each slice into two. To decorate the top of the cake, twist each slice into a spiral.
  4. Make a mango puree in a food processor, then strain it through a fine-mesh sieve, and pour it over each slice while serving (optional). 

Nutrition

  • Serving Size: 1 slice
  • Calories: 406
  • Sugar: 29.8 g
  • Sodium: 83.8 g
  • Fat: 23.7 g
  • Saturated Fat: 12.5 g
  • Carbohydrates: 43.3 g
  • Fiber: 3.6 g
  • Protein: 7.6 g
  • Cholesterol: 113.6 g

Thank you for following me on Pinterest, Facebook, and Instagram. Hashtag #bakinglikeachef so I can see your creations.

The nutritional information has been calculated using an online recipe nutrition calculator such as Verywellfit.com and is intended for informational purposes only. These figures should be used as a general guideline and not be construed as a guarantee.

Galette Bretonne (French Galette) Recipe

Sep 11, 2020 · 28 Comments

Folded French galettes with a savory filling, pecans, and slices of pear on a grey plate.

Quick Summary: Galette bretonne is a savory French buckwheat crepe from Brittany, traditionally filled with ham, egg, and cheese (the galette complète). Whisk a simple batter of buckwheat flour, water, egg, and salt; let it rest, then cook thin galettes and add your fillings. The batter is naturally gluten-free and takes about 25 minutes to cook, plus resting time.

Folded French galettes with a savory filling, pecans, and slices of pear on a grey plate

What is galette bretonne?

Galette bretonne, also called French galette, is a thin, savory pancake made from just three ingredients: buckwheat flour, water, and salt. Unlike sweet crepes, it has an earthy, nutty flavor and a lacy, slightly crisp edge, and it is naturally gluten-free.

It is the signature dish of Brittany (Bretagne), a coastal region in northwest France. That is why these crepes are also known as Brittany crepes, or crêpes bretonnes and galettes bretonnes in French.

In Brittany, they are traditionally cooked on a billig, a flat, round, rimless cast-iron griddle about forty centimeters wide. Because authentic galettes are hard to spread in a regular crepe pan, many home recipes add a little all-purpose flour, giving an easier, adapted version for the home kitchen.

In French, they also go by crêpes de blé noir, crêpes de sarrasin, or galettes de sarrasin, where galette means "flat cake" and blé noir and sarrasin both mean buckwheat. Buckwheat arrived in France in the 14th century and peaked in the 19th, thriving in regions with poor soil such as Brittany, Limousin, and Auvergne.

A batch of buckwheat crepes with pecans and blue cheese on a marble board

French galette vs. crepe

In France, crepes made with wheat flour are called crêpes de froment, meaning "wheat crepes." They are usually thin, tender, and served with sweet fillings.

Crepes made with buckwheat flour are called galettes, or galettes de sarrasin (also crêpes de sarrasin). They are heartier, gluten-free, and served savory rather than sweet.

The French are very particular about this difference: a galette is never called a crepe, and a crepe is never called a galette.

Why you'll love this recipe

  • Naturally gluten-free. The batter is made with buckwheat flour, so galettes are a great option if you avoid gluten.
  • Simple ingredients. You need just buckwheat flour, water, egg, and salt for the batter, all easy pantry staples.
  • Quick and easy. Once the batter has rested, the galettes cook in minutes, even on a busy weekday.
  • Endlessly customizable. Fill them with the classic ham, egg, and cheese, or any savory topping you like.
  • Perfect for entertaining. Galettes are a fun idea for a crepe bar or a savory brunch spread.

Ingredients

For ingredients and detailed instructions, refer to the recipe card below.

  • Buckwheat flour: Use fresh, organic buckwheat flour. The buckwheat gives you an earthy, nutty flavor that will keep you feeling full and energized all day.
  • All-purpose flour: Add to help the crepes cook. Since it contains gluten, it helps make the galettes more forgiving.
  • Eggs: The recipe calls for large eggs at room temperature.
  • Milk: Use either 2% reduced-fat milk or semi-skimmed milk (1.7% fat).
  • Salted butter adds the necessary salt to the batter. If you use unsalted butter, add a pinch of salt.

Equipment

You need only a few basic tools to make galette bretonne:

  • crepe pan or carbon steel skillet
  • crepe spreader
  • ladle
  • electric mixer
  • offset spatula

How to make galette bretonne

Step 1. To make the buckwheat crepe batter, place the two flours in a large mixing bowl, mix them, and make a well in the center. Use an egg separator and separate egg whites and yolks.

Step 2. Add the yolks to the flour mixture and mix with a hand whisk, gradually pouring in the cold milk (photo 1).

Step 3. Melt butter in a pan until lightly golden, add it to the batter, and continue whisking.

Step 4. Use an electric mixer and beat the egg whites until stiff. Gently fold the whites into the batter, being careful not to deflate them (photo 2).

Step 5. Cover the bowl with a tea towel, and let the batter rest for 1 hour.

Photo 1: Flour/egg yolks/milk mixture in a glass bowl Photo 2: Ready batter
PHOTO 1 PHOTO 2

Pro tip: Buckwheat crepe batter is thicker than classic wheat crepe batter. To test, pass a ladle through the batter, turn it, and pass your finger across it. The mark must hold for a few seconds.

Step 6. To cook galettes, heat a carbon steel crepe pan or a nonstick crepe pan (skillet) over medium-high heat. Grease the pan base with a small amount of oil.

Step 7. Mix the batter well, pour it into the center of the pan, and swirl it in a circular motion to get an even, thin layer.

Step 8. Cook the galette on a hot pan for about 2 minutes (photo 3); flip it and cook the second side for another minute (photo 4). Continue with the remaining batter.

Photo 3: Poured batter in a pan Photo 4: Flipped galette in a pan
PHOTO 3 PHOTO 4

Step 9. To make the blue cheese filling, place sour cream, crumbled cheese, and butter in a saucepan (photo 5) and bring to a simmer over low heat, stirring regularly (photo 6).

Photo 5: Blue cheese and sour cream in a saucepan Photo 6: Filling in a pan
PHOTO 5 PHOTO 6

Step 10. To serve, fold the galettes, top with blue cheese filling and pecans, and serve with pear slices on the side.

Buckwheat galettes served with blue cheese filling, pecans, sliced pear on a grey plate

Expert tips

  1. Preheat the pan well before cooking crepes, and brush it with oil between each crepe. Discard the first crepe; it seasons the pan and confirms it is hot.
  2. Stir the batter while frying crepes since the flour tends to sink to the bottom of the bowl.
  3. Replace Gorgonzola cheese made from cow's milk with another type of blue cheese, such as French sheep's milk cheese Roquefort.
  4. Use raw or candied pecans, or replace them with freshly cracked walnuts.

Recipe variations

  • Galette complète. The most traditional filling: crack an egg in the center, add cooked ham and grated Emmental or Gruyère, then fold the edges around a runny yolk.
  • Galette forestière. Fill with sautéed mushrooms, béchamel, and cheese for a heartier, vegetarian-friendly version.
  • Goat cheese and honey. Add creamy goat cheese, a drizzle of honey, and a handful of greens or walnuts.
  • Spinach and egg (Florentine). Wilt spinach and top with an egg for a lighter, meat-free galette.
  • Sweet galette. Skip the savory fillings and add butter and sugar, salted caramel, or jam for a dessert version.

How to serve galette bretonne

Galette bretonne is endlessly versatile, and savory fillings can be anything from cheese and vegetables to eggs, meat, or fish.

The most traditional way to serve it is the galette complète, a Breton classic topped with a fried egg, a slice of ham, and grated cheese (usually gruyère or comté). Regional favorites include the galette forestière with mushrooms, and, in Rennes, the galette saucisse wrapped around a hot grilled sausage.

For a crowd, host a crepe party: set out a spread of fillings so guests can build their own savory galette (crêpe salée) or sweet crepe (crêpe sucrée).

Choose one or two of these savory toppings:

  • gruyère cheese, Swiss cheese, or goat cheese
  • ham,
  • bacon lardons,
  • cooked leeks,
  • spinach leaves,
  • cooked mushrooms,
  • cooked potatoes,
  • fresh tomatoes,
  • smoked fish,
  • peanut butter, or even
  • ratatouille.

Although buckwheat galettes are traditionally savory, they also make a wonderful dessert. Simply dust them with icing (powdered) sugar or finish with one of these sweet toppings:

  • chestnut cream,
  • salted butter caramel spread,
  • chocolate hazelnut spread Nutella,
  • honey,
  • maple syrup,
  • caramelized apples,
  • sugar-free whipped cream, or
  • pistachio ice cream with fresh raspberries.

Storing & freezing

Store cooked Breton galettes in an airtight container in the refrigerator for up to 3 days. Keep any filling separate and assemble just before serving so the crepes stay tender.

Plain galettes freeze well for up to 2 months. Stack them with a sheet of parchment paper between each crepe, wrap the batch tightly in a double layer of plastic wrap and then aluminum foil, and freeze. Thaw overnight in the refrigerator, then reheat in the oven at 350°F (175°C) or in the microwave until warm, and add fresh fillings.

Recipe FAQ

What is galette bretonne?
Galette bretonne is a savory French crepe from Brittany made with buckwheat flour. It is thin with crisp edges and is usually filled with savory ingredients like ham, egg, and cheese.

What is a galette complète?
The galette complète is the classic version: a buckwheat galette filled with ham, a cracked egg, and grated cheese, with the edges folded around a runny yolk.

Are galettes bretonnes gluten-free?
Yes. When made with 100% buckwheat flour, galettes bretonnes are naturally gluten-free. Check that any fillings and toppings you add are gluten-free too.

What are galette bretonne fillings?
Traditional fillings include ham, egg, and cheese (galette complète), mushrooms and béchamel (forestière), goat cheese, or spinach. You can also make a sweet version with butter and sugar or salted caramel.

Why do you rest the batter?
Resting the buckwheat batter lets the flour fully hydrate, giving the galettes a smoother texture and helping them cook evenly with crisp edges.

Which pan should you use for galettes?
A carbon steel crepe pan is ideal because it can be heated aggressively and retains heat well, though it needs seasoning like cast iron. A nonstick crepe pan also works and skips the seasoning step.

How do you serve galette bretonne?
Serve galettes warm, often with a side salad and a bowl of hard apple or pear cider, in the traditional Breton style. They make a great breakfast, lunch, or light dinner.

How many calories are in galette bretonne?
One galette bretonne has about 214 calories.

Love crepes? Try these next!

  • Authentic French Crepes
  • Crispy Crepes
  • French Chocolate Crepes
  • Grand Marnier Crepes (Crepes Suzette Flambé)
  • Parisian Crepes
  • Browse all the Crepe and Pancake Recipes

Want more delicious and beautiful recipes? Subscribe to my newsletter and follow me on Facebook, Pinterest, and Instagram for my latest updates. If you make this recipe, please leave a star rating on the recipe card and comment below!

Print

Recipe card

Galette Bretonne (French Buckwheat Galettes)

A folded batch of buckwheat crepes with pecans and blue cheese on a board.
Print Recipe
Save Recipe Recipe Saved

5 Stars 4 Stars 3 Stars 2 Stars 1 Star

5 from 12 reviews

Galette bretonne is a savory French buckwheat crepe from Brittany with crisp edges. This gluten-free galette is filled here with a savory cheese filling, perfect for breakfast, brunch, or a light lunch.

  • Author: Irina Totterman
  • Prep Time: 10 minutes
  • Cook Time: 15 minutes
  • Total Time: 25 minutes (plus resting time)
  • Yield: 9-10 galettes 1x
  • Category: Crepes and Pancakes
  • Method: Cooking
  • Cuisine: French
  • Diet: Gluten Free

Ingredients

Scale

For batter:

  • ½ cup + 2 tablespoons (75 g) buckwheat flour
  • â…“ cup (40 g) all-purpose flour
  • 2 large eggs, room temperature
  • 1 ½ cups (350 ml) 2% reduced-fat milk
  • 1.4 oz (40 g) salted butter
  • canola oil for greasing

For the blue cheese filling:

  • 6.4 oz (180 g) sour cream
  • 2.5 oz (70 g) Gorgonzola cheese 
  • 2 teaspoons (10 g) unsalted butter

For serving (optional):

  • 1 fresh pear, core removed and finely sliced 
  • 15 pecans

* If needed, please refer to Baking Conversion Charts.


Instructions

  1. To make the crepe batter, place the two flours in a large bowl, mix them, and make a well in the center. Use an egg separator and separate egg whites and yolks. Add the yolks to the flour mixture and mix with a hand whisk, gradually pouring cold milk.
  2. Melt butter in a pan until lightly golden, add it to the batter, and continue whisking. Use an electric mixer to beat the egg whites until stiff. Gently fold the beaten whites into the batter, being careful not to deflate them. Cover the bowl with a tea towel and let the batter rest for 1 hour.
  3. To cook galettes, heat an iron cast or a carbon steel skillet over medium-high. Grease it with a small amount of oil. Mix the batter well, then pour it and swirl the pan to get a thin, even layer. Cook the galette for about 2 minutes; flip it and cook for another minute. Continue with the remaining batter.
  4. To make the blue cheese filling, place the sour cream and crumbled cheese in a saucepan and heat over low heat until the cheese melts.
  5. To serve, fold the galettes, top with the blue cheese filling and pecans, and set aside slices of pear.

Notes

  1. Preheat the pan well before cooking crepes and brush it with oil between each crepe-making. Discard the first crepe; it seasons the pan and ensures it is hot.
  2. Stir the batter while frying crepes since the flour tends to sink to the bottom of the bowl.
  3. Replace Gorgonzola cheese made from cow's milk with another type of blue cheese, such as French sheep's milk Roquefort. 
  4. Use raw or candied pecans, or replace them with freshly cracked walnuts.

Nutrition

  • Serving Size: 1 galette
  • Calories: 214
  • Sugar: 3.6 g
  • Sodium: 153 mg
  • Fat: 15.5 g
  • Saturated Fat: 7.3 g
  • Carbohydrates: 14.3 g
  • Fiber: 2 g
  • Protein: 6.5 g
  • Cholesterol: 65 mg

Thank you for following me on Pinterest, Facebook, and Instagram. Hashtag #bakinglikeachef so I can see your creations.

The nutritional information has been calculated using an online recipe nutrition calculator such as Verywellfit.com and is intended for informational purposes only. These figures should be used as a general guideline and not be construed as a guarantee.

The recipe was adapted from https://www.academiedugout.fr. It was originally published on February 20, 2018. The recipe has been revised to include improved content and photos. 

Crispy Crepe Recipe (Crêpes Croustillantes)

May 15, 2020 · 14 Comments

Stacked French crispy crepes with whipped cream are served on a black dessert plate.

Quick Summary: These crispy crepes (crêpes croustillantes) are thin French crepes baked low and slow until golden and crunchy, then stacked into a light mille crepe dessert. You make a simple crepe batter, cook the crepes, dry them in a low oven until crisp, and layer them. The whole recipe takes about 40 minutes.

Crispy crepes sandwiched with whipped cream, topped with caramelized nuts, and served on a black plate

What are crispy crepes?

Crispy crepes, or crêpes croustillantes, are paper-thin French crepes cooked until golden, then dried in the oven until crisp and able to hold their shape. Unlike soft crepes, these keep a satisfying crunch, which makes them ideal for stacking.

The batter itself is a classic French crepe batter. The trick is to spread it into a very thin layer, cook the crepes, cut them into disks, and dry them low and slow until crisp. You do not need any special equipment, just a bowl, a whisk, a spatula, and a crepe pan or nonstick skillet.

This particular version comes from French chef Pierre Augé, winner of Top Chef 2014 and owner of the restaurant La Maison de Petit Pierre. He stacked crisp crepe disks with whipped cream and fresh fruit into a light mille crepe tower.

A single crepe dessert made of French crispy crepes is served on a black serving platter

Why you'll love this recipe

  • Easy to make. You can use homemade crepes or store-bought ones (pancakes do not work for this recipe).
  • Make-ahead friendly. Crisp the crepe disks in advance, then pipe on cream and add toppings whenever you are ready to serve.
  • A showpiece dessert. The stacked mille crepe presentation looks special and works for any gathering or dinner party.
  • Easy to scale. Double or triple the recipe to feed a crowd with these piled-high crepes.
  • Fun for kids. Little helpers love adding the toppings and assembling the layers.

Ingredients

For ingredients and detailed instructions, refer to the recipe card below.

  • French crepes: follow the recipe to make traditional French crepes. To serve crepes for six people, you will need only six crepes. It is up to you to make a few crepes or make a whole batch (you will have some extra crepes then).
  • Nuts: To make caramelized nuts, use a mix of pecans, pistachios, hazelnuts, flaked or slivered almonds, or other nuts of your choice.
  • Orange flower water: it brings an unbeatable flavor to the dessert, although it is optional. Omit the orange flower water, or replace it with â…“ teaspoon orange zest if preferred.
  • Whipping cream: it must be cold to beat it ideally.
  • Mascarpone: you don't need to bring it to room temperature in advance; use it cold.
  • Sugar: the recipe calls for granulated sugar and icing (powdered) sugar.

Equipment

You need just a few basic tools to make these crispy crepes:

  • crepe pan or nonstick skillet
  • baking sheet
  • parchment paper
  • round cookie cutter
  • piping bag
  • electric mixer

How to make crispy crepes

Step 1. Make crepes by following the recipe for authentic French crepes. Let the batter rest, then cook the crepes in a hot pan over medium-high heat.

Step 2. To make crispy crepes, preheat the oven to 230°F (110°C).

Step 3. Using a 3 ½-inch/9 cm cookie cutter, cut three crepe disks from one crepe. Repeat with the remaining crepes (photo 1).

Step 4. Arrange the crepe circles on a baking sheet lined with parchment paper (photo 2), then bake for 30 minutes.

Photo 1: Crispy crepe disks on a board Photo 2: Crepe disks on parchment paper
PHOTO 1 PHOTO 2

Step 5. To caramelize nuts, place nuts and powdered (icing) sugar in a frying pan (photo 3) and heat over medium heat, stirring constantly. Once the sugar starts to caramelize, coat nuts with caramel.

Step 6. Transfer caramelized nuts to the parchment paper and let them cool (photo 4). Then chop nuts into medium-sized pieces.

Photo 3: Nuts sprinkled with icing sugar in a pan Photo 4: Caramelized nuts on parchment
PHOTO 3 PHOTO 4

Step 7. To make the orange whipped cream, whisk the whipping cream, mascarpone, and orange flower water until firm.

Step 8. To assemble the dessert, place the first crepe disk on a dessert plate. Then, using a pastry bag with a tip, pipe the whipped cream on top of the crepe, and sprinkle with chopped caramelized nuts (photo 5).

Step 9. Place the second crepe disk, repeat the process, and finish with a crispy disk.

Photo 5: Disk topped with cream, nuts; other crepes on parchment Photo 6: Two finished desserts
PHOTO 5 PHOTO 6

Step 10. Sprinkle with powdered (icing) sugar and chopped nuts (photo 6). Serve immediately.

Stacked crispy crepes with whipped cream in between served on a black dessert plate: Close up

Expert tips

  1. Place a bit of cream on a dessert plate so the stacked crispy crepes stay in place.
  2. For the crispiest results, bake the crepe disks low and slow until they are golden and dry. Rushing them at a higher temperature can brown them before they crisp through.
  3. Make the crepes as thin as possible. A thin, lacy crepe dries out and crisps up far better than a thick one.
  4. Cool the baked disks completely on a rack before stacking. They keep crisping as they cool, and any trapped steam would soften them.
  5. Assemble just before serving. Once the cream touches the crepes, they slowly soften, so layer them at the last minute for maximum crunch.

Recipe variations

Once you master the basic crispy crepes, there are easy ways to change them up:

  • Honey-caramelized crepes. Brush the crepe disks with a mix of three tablespoons honey and two tablespoons (30 g) semi-salted butter, then bake them until crisp and lightly caramelized.
  • Beer-batter crispy crepes. Add lager beer (at least 25% of the milk) to the batter for a lacy, honeycombed texture and extra crunch. See the French chocolate crepes recipe for this method.
  • Savory crispy crepes. Skip the sweet toppings and make larger crisp crepes to serve with savory fillings, the way Vietnamese Banh Xeo crepes are served.
  • Different fillings. Layer the crisp disks with mascarpone cream, lemon curd, or caramelized apples instead of plain whipped cream.

How to serve crispy crepes

Serve crispy crepes as a light stacked dessert. Pipe or spread cream between the crisp disks just before serving so they keep their crunch, then finish with your favorite toppings. A few ways to serve them up:

  • Whipped cream. Whisk cream with a tablespoon of powdered (icing) sugar and pipe it between the disks for a simple version.
  • Mascarpone cream. Beat cream with mascarpone, flavor it with orange flower water or maple syrup, and sprinkle with chopped caramelized nuts.
  • Fresh fruit. Top each layer with clementine, orange, or kiwi slices for a fresh finish.
  • Lemon and raspberry. Spread a thin layer of lemon curd, add fresh raspberries, and dust with powdered sugar.
  • Caramel apple. Layer caramelized apples with whipped cream or cream cheese between the crepes.
  • Rose and praline. Add a few drops of rose water to the cream and sprinkle with crushed pink praline or edible rose petals.

To keep the presentation neat, place a small dab of cream on the plate first so the stacked crepes stay in place. A little imperfection is part of the charm, so do not worry if the tower leans slightly.

Serve the dessert with "Coat Albret", a cider from Loïc and Morgan Berthelot or another apple cider.

Storing & freezing

Crispy crepes are best assembled and eaten right away, while the disks are still crunchy. If you have leftovers, refrigerate the assembled dessert in an airtight container for up to 24 hours, though the crepes will gradually soften once the cream touches them. To stay ahead, keep the baked disks unassembled in an airtight container at room temperature and fill them just before serving.

Freezing the assembled dessert is not recommended, since the cream and crisp texture do not hold up. You can, however, freeze plain crepes: stack them between parchment, wrap in plastic, and freeze for up to two months. Thaw them, then crisp the disks in the oven when you are ready to assemble.

Recipe FAQ

What are crispy crepes?
Crispy crepes, or crêpes croustillantes, are thin French crepes baked in a low oven until they turn golden and crunchy. They are often stacked with cream into a light mille crepe dessert.

How do you make crepes crispy?
Cut the cooked crepes into disks, arrange them on a lined baking sheet, and bake them low and slow until they dry out and turn crisp. Keeping the crepes thin and cooling them on a rack helps them stay crunchy.

Why are my crepes not crispy?
Crepes stay soft when the batter is too thick, the oven is too hot, or the crepes are stacked while still warm. Make thin crepes, bake them at a low temperature, and cool them completely before assembling.

Can you use store-bought crepes?
Yes. You can crisp up store-bought crepes the same way, which makes this dessert even quicker. Regular pancakes will not work, as they are too thick to crisp.

How far in advance can you make crispy crepes?
Bake the crispy crepe disks up to a day ahead and keep them in an airtight container at room temperature. Assemble with cream and toppings just before serving to keep them crunchy.

How do you keep crispy crepes crunchy?
Store the baked disks unassembled in an airtight container at room temperature, away from moisture. Once you add the cream, they soften within a few hours, so fill them at the last minute.

Can you freeze crispy crepes?
It is not recommended to freeze the assembled dessert. You can, however, freeze plain crepes, wrapped in plastic, for up to two months, then crisp them in the oven when needed.

What makes crepes crispy?
Crepes crisp up when the batter is thin, and the crepes lose moisture during cooking. Adding a little beer, rice flour, or cornstarch to the batter and letting it rest gives lacier, crunchier edges. To keep crepes crisp and hold their shape, dry the cooked crepes in a low oven, as in this recipe.

What is the difference between crispy crepes and regular crepes?
Regular French crepes are soft and foldable, while crispy crepes are cooked or oven-dried until golden and crunchy. Crispy crepes hold their shape, which is what makes them ideal for stacking into a mille crepe dessert.

How many calories are in crispy crepes?
One serving of these crispy crepes has about 272 calories.

Love crepes? Try these next!

  • Authentic French Crepes Recipe
  • Grand Marnier Crepes (Crepes Suzette Flambé)
  • French Chocolate Crepes
  • Banana Nutella Crepes
  • Parisian Crepes Recipe
  • Browse all the Crepe & Pancake Recipes

Want more delicious and beautiful recipes? Subscribe to my newsletter and follow me on Facebook, Pinterest, and Instagram for my latest updates. If you make this recipe, please leave a star rating on the recipe card and comment below!

Print

Recipe card

Crispy Crepe Recipe (Crêpes Croustillantes)

Stacked French crispy crepes with whipped cream are served on a black dessert plate.
Print Recipe
Save Recipe Recipe Saved

5 Stars 4 Stars 3 Stars 2 Stars 1 Star

5 from 7 reviews

This crispy crepe recipe (crêpes croustillantes) makes thin French crepes baked until golden and crunchy, then stacked with orange whipped cream and caramelized nuts into a light mille crepe dessert. Serve it for breakfast, brunch, or dinner.

  • Author: Irina Totterman
  • Prep Time: 20 minutes
  • Cook Time: 20 minutes
  • Total Time: 40 minutes
  • Yield: 6 1x
  • Category: Crepes
  • Method: Cooking
  • Cuisine: French

Ingredients

Scale

6 French crepes

For the whipped cream:

  • â…” cup + 3 ½ tablespoons (200 g) whipping cream
  • 2.8 oz. (80 g) mascarpone
  • 2 ½ tablespoons (35 g) granulated sugar
  • ½ teaspoon orange flower water

For caramelized nuts:

  • 30 g nuts (pecan, pistachios, hazelnuts, slivered almonds)
  • 3 ½ tablespoons (25 g) powdered (icing) sugar

For the decoration: 

  • powdered (icing) sugar
  • chopped caramelized nuts

* If needed, please refer to Baking Conversion Charts.

Instructions

  1. Make French crepes by following the recipe for authentic French crepes.
  2. To make crispy crepes, preheat the oven to 230°F (110°C). Using a 3 ½-inch/9 cm cookie cutter, cut three crepe disks from one crepe. Repeat the same with the other crepes. Arrange the crepe circles on a baking sheet lined with parchment paper, then bake for 30 minutes.
  3. To caramelize nuts, place nuts and powdered (icing) sugar in a frying pan and heat over medium heat, stirring constantly. Once the sugar starts to caramelize, coat nuts with caramel. Transfer caramelized nuts to the parchment paper and let them cool. Then chop nuts into medium-sized pieces.
  4. To make the orange whipped cream, whisk the whipping cream, mascarpone, and orange flower water until firm.
  5. To assemble the dessert, place the first crepe disk on a dessert plate. Using a pastry bag with a tip, pipe the whipped cream onto the crepe, then sprinkle with chopped caramelized nuts. Place the second crepe disk, repeat the process, and finish with a crispy disk. Sprinkle with powdered (icing) sugar and chopped nuts. Serve immediately.

Notes

  1. Place a bit of the cream on a dessert plate so the stacked crispy crepes stay in place.
  2. Serve it with "Coat Albret", a cider from Loïc and Morgan Berthelot, or another apple cider.

Nutrition

  • Calories: 272
  • Sugar: 10.6 g
  • Sodium: 77 mg
  • Fat: 18.7 g
  • Saturated Fat: 10 g
  • Carbohydrates: 20.8 g
  • Fiber: 0.7 g
  • Protein: 6.4 g
  • Cholesterol: 92 mg

Thank you for following me on Pinterest, Facebook, and Instagram. Hashtag #bakinglikeachef so I can see your creations.

The nutritional information has been calculated using an online recipe nutrition calculator such as Verywellfit.com and is intended for informational purposes only. These figures should be used as a general guideline and not be construed as a guarantee.

The recipe was originally published on April 20, 2018. It has been revised to include improved content and photos. 

Vanilla Dutch Baby Recipe (Puffed Pancake)

May 9, 2020 · 30 Comments

Puffed vanilla Dutch baby pancake topped with Nutella and flaked almonds in the oven.

Quick Summary: A vanilla Dutch baby is a large, puffed pancake baked in a hot oven in a cast-iron skillet. The batter blends eggs, milk, flour, sugar, and vanilla, then rises tall and golden in about 30 minutes. Serve it warm, dusted with powdered sugar or topped with fruit, Nutella, and nuts.

Puffed vanilla Dutch baby pancake topped with Nutella and flaked almonds in the oven

What is a Dutch baby?

A Dutch baby, also called a Dutch pancake, German pancake, Bismarck, or Dutch puff, is a large oven-baked pancake that puffs up dramatically at the edges as it bakes. It sits somewhere between a pancake, a crepe, and a popover, with crisp, tall sides and a soft, custardy center.

Despite the name, the recipe is American. It grew out of the German Pfannkuchen (from Pfanne, "pan," and Kuchen, "cake") and was popularized in the early 1900s by Manca's Cafe, a family-run restaurant in Seattle. The owner's daughter reportedly could not pronounce "Deutsch," and "Dutch baby" stuck.

As the batter hits the hot skillet and bakes, it rises high and forms a golden, pillowy shell, which is why it is often described as a "golden cloud."

Dutch baby with Nutella and almonds on top in a skillet, in the oven

Why you'll love this recipe

  • Simple ingredients. The batter comes together from pantry staples like flour, milk, eggs, and vanilla, with no special skills required.
  • Fast, hands-off baking. Active time is about 10 minutes; the oven does the rest while the pancake puffs up tall and golden.
  • A breakfast or brunch showpiece. It rises dramatically in the skillet, so it looks like a treat even on a busy morning.
  • Kid-approved. Children love watching it puff and choosing their own toppings, which makes it a favorite for sleepovers.
  • Endlessly customizable. Dress it up sweet with Nutella, fruit, and powdered sugar, or go savory with cheese and herbs.

Ingredients

For ingredients and detailed instructions, refer to the recipe card below.

  • Flour: the recipe calls for all-purpose flour. Make sure to sift it using a flour sifter.
  • Milk: use low-fat or whole milk, but skim milk and milk alternatives are not recommended. It is simple: the higher the fat content of the milk, the tastier the pancake.
  • Eggs: use large eggs at room temperature.
  • Butter: top-quality unsalted butter is great for this recipe. You can replace it with margarine, though.
  • Vanilla extract: I recommend Madagascar Bourbon pure vanilla extract because it has a rich, full flavor. You can use an alcohol-free vanilla flavor if preferred. You can also experiment with other flavorings, such as orange blossom water, rose water, or almond extract. Alternatively, replace the vanilla extract with the same amount of dark rum or Grand Marnier.
  • Sugar: use granulated sugar or caster sugar.
  • Salt: a pinch of salt enhances the flavors of the pancake batter and the final puffed pancake.

Equipment

You only need a few basic tools to make this puffed pancake:

  • cast-iron skillet
  • blender or mixing bowl and whisk
  • fine-mesh sieve
  • oven mitts

A 9-inch (23 cm) cast-iron skillet is ideal because it retains and spreads heat evenly, which is the key to a tall, even puff. A smaller pan gives extra rise and fluffiness, while a larger 10-inch skillet rises higher but sets thinner once it settles.

Dutch baby pancake with Nutella spread and almonds in a skillet: Close up

How to make vanilla Dutch baby

Step 1. To make the batter, place sifted flour, milk, eggs, sugar, vanilla extract, and salt in a blender and process on medium-high speed for about 10-15 seconds.

Using a rubber spatula, scrape down the sides and process for another 10-15 seconds. You will get a very smooth, thin batter (photo 1).

Step 2. If you notice some lumps, pass the batter through a fine-mesh sieve. Then, let it rest for 30 minutes in the blender or a large bowl.

Step 3. Place a 9-inch/23 cm oven-safe skillet in the oven and heat the oven to 425°F/218°C.

Step 4. Carefully remove the hot skillet from the oven (use an oven mitt to remind yourself it's hot).

Step 5. Add the butter and swirl the pan to melt it, coating the pan's bottom and sides.

Step 6. Pour all the batter into the center of the hot pan (photo 2) and bring the skillet to the oven.

Photo 1: Batter in a bowl Photo 2: Batter poured over melted butter in a skillet
PHOTO 1 PHOTO 2

Step 7. Bake for about 15 to 20 minutes until the pancake is puffed and golden brown on the sides (photo 3).

Step 8. At the end of baking, add chocolate Nutella, sprinkle the pancake with flaked almonds, and bake for another minute. Keep an eye on it: it burns quickly! Take the pancake out of the oven; again, don't forget your oven mitts (photo 4).

Photo 3: Pancake in a skillet in the oven Photo 4: Pancake with Nutella and almonds
PHOTO 3 PHOTO 4

Serve Dutch baby immediately in the pan or on a pie plate.

Expert tips

  1. To make the batter, use a food processor with the blade attachment, a blender, or whisk it with a hand whisk.
  2. Blend the eggs on their own for about 45 seconds until frothy before adding the other ingredients. This adds air and helps the pancakes rise higher.
  3. Use room-temperature eggs and milk. Bringing them to room temperature before mixing helps the batter rise higher and puff more evenly in the oven.
  4. Ensure the batter is smooth and lump-free: pass it through a fine-mesh sieve if needed.
  5. Do not skip heating a skillet in the oven; this is essential to help the pancake puff.
  6. Add a pinch of ground nutmeg or cinnamon to the batter if desired.
  7. Use a smaller skillet (8 inches/20 cm) to increase the pancake's puffiness.
  8. Don't open the oven door while baking; the drop in the oven temperature will deflate the pancake.
  9. Drizzle the pancake with chocolate Nutella and sprinkle with flaked toasted almonds before serving instead of adding these ingredients while baking.
  10. Add a little lemon zest to the batter for brightness. It will not make the pancake taste like lemon, but it keeps the flavor from tasting flat.

Recipe variations

  • Gingerbread. Add warm spices to the batter for a Christmas-inspired version that fits any holiday breakfast.
  • Chocolate. Whisk unsweetened cocoa powder into the batter for a rich, chocolate Dutch baby.
  • Berry. Scatter fresh raspberries or blueberries across the bottom of the pan before pouring in the batter.
  • Lemon. Stir lemon zest into the batter and serve with lemon wedges for a bright, citrus twist.
  • Savory. Top with cheese, bacon bits, or cremini mushrooms for a Dutch puff that works at any meal.
  • Mini. Bake the batter in a muffin pan for little bites that fit right into a lunchbox.

How to serve vanilla Dutch baby

Serve the Dutch baby right away, while it is hot and still tall from the oven, either in the skillet or on a serving plate. Cut it into wedges like a pie. The classic way is to squeeze fresh lemon juice and dust with confectioners' sugar.

From there, add any toppings you like:

  • fresh fruit
  • whipped cream
  • Nutella
  • jams and preserves
  • ice cream
  • maple syrup
  • lemon curd
  • peanut butter
  • hazelnut praline paste

For a change, try caramelized apples, sweetened ricotta with jam, or lemon sugar with berry compote. On a savory note, top it with smoked salmon, ham, cheese, avocado, tomatoes, sour cream, and fresh herbs.

Storing & freezing

This showy and golden puffed pancake is best served warm, straight from the oven. You can keep the leftovers in the refrigerator for up to 1 day.

Can you freeze baby Dutch? Yes, you can freeze the leftover pancake wrapped in plastic for up to 2 months. However, the pancake's texture and taste will be affected when it's thawed.

Recipe FAQ

What is a puffed pancake?
A puffed pancake is another name for a Dutch baby. It is a single large pancake baked in a hot oven, where the batter puffs up dramatically around the edges before settling into a soft, custardy center.

What does a Dutch baby taste like?
A Dutch baby tastes like a cross between a crepe and a pancake, with crisp, golden edges and a soft, eggy, custard-like middle.

Why does a Dutch baby deflate?
A Dutch baby deflates as it cools because the steam that puffed it up in the oven escapes. This is normal, so serve it right away for the tallest look.

What oven temperature is best for a Dutch baby?
Bake a Dutch baby in a hot oven at 425°F (218°C). The high heat and a preheated skillet are what make the batter rise tall and golden.

Can you make a Dutch baby in advance?
You can make the batter the night before, cover it, and refrigerate it overnight. The next day, heat the skillet, pour in the batter, and bake.

Can you make a Dutch baby without a cast-iron skillet?
Yes. Use any ovenproof skillet or a cake pan. Preheat it in the oven until very hot before adding the batter, and use oven mitts when handling it.

How do you eat a Dutch baby?
Slice the pancake into wedges and add your favorite toppings. You can eat it with your hands, or use a fork and knife.

Can you reheat a Dutch baby?
Yes. Reheat it in the oven or a toaster oven at 300°F (150°C) for a few minutes.

What makes a Dutch baby puff up?
A Dutch baby has no baking powder or baking soda. The rise comes from steam: the eggs and milk turn to steam in the hot oven and push the batter up the sides of the pan, much like a soufflé. That is why a hot skillet and room-temperature batter matter.

Why is my Dutch baby not puffing?
The most common reasons are a cold pan, cold batter, or opening the oven door too early. Preheat the skillet until it is very hot, use room-temperature eggs and milk, and keep the door closed until the pancake has risen and set.

How many calories are in a vanilla Dutch baby?
One serving of vanilla Dutch baby has about 273 calories.

Love crepes? Try these next!

  • Authentic French Crepes Recipe
  • Crispy Crepe Recipe (Crêpes Croustillantes)
  • French Chocolate Crepes Recipe
  • Beggar's Purses (Apple Cinnamon Crepes)
  • Browse all the Crepe & Pancake Recipes.

Want more delicious and beautiful recipes? Subscribe to my newsletter and follow me on Facebook, Pinterest, and Instagram for my latest updates. If you make this recipe, please leave a star rating on the recipe card and comment below!

Print

Recipe card

Vanilla Dutch Baby (Puffed Pancake)

Puffed vanilla Dutch baby pancake topped with Nutella and flaked almonds in the oven.
Print Recipe
Save Recipe Recipe Saved

5 Stars 4 Stars 3 Stars 2 Stars 1 Star

5 from 13 reviews

This vanilla Dutch baby is a puffed pancake baked in a hot cast-iron skillet until tall and golden. Serve it warm with powdered sugar, fresh fruit, or Nutella and almonds for an easy breakfast or brunch.

  • Author: Irina Totterman
  • Prep Time: 10 minutes
  • Cook Time: 20 minutes
  • Total Time: 30 minutes (plus resting time)
  • Yield: 4 1x
  • Category: Crepes & Pancakes
  • Method: Baking
  • Cuisine: American

Ingredients

Scale

For the batter:

  • ½ cup (120 g) whole milk, room temperature
  • ½ cup + 1 tablespoon (70 g) all-purpose flour
  • 2 large eggs, room temperature
  • 1 ½ tablespoons (20 g) granulated sugar
  • 1 teaspoon vanilla extract
  • 1 pinch of salt
  • 2 teaspoons (10 g) unsalted butter

For serving:

  • 1 tablespoon Nutella
  • 0.7 oz (20 g) flaked toasted almonds

*Don't you have the correct baking pan on hand right now? Try this simple Cake Pan Converter!

** If needed, please refer to Baking Conversion Charts.

Instructions

  1. To make the batter, place sifted flour, milk, eggs, sugar, vanilla extract, and salt in a blender and process on medium-high speed for about 10 to 15 seconds. Using a rubber spatula, scrape down the sides and process for another 10 to 15 seconds. The batter has to be smooth and thin. If you notice some lumps, pass the batter through a fine-mesh sieve. Let it rest in the blender for 30 minutes.
  2. Place a 9-inch (23 cm) oven-safe skillet in the oven and preheat to 425°F (218°C). Carefully remove the hot pan from the oven (use an oven mitt to remind yourself it's hot). Add butter and swirl the pan to melt the butter, coating the bottom and sides of the pan.
  3. Pour all the batter into the center of the hot pan and bring the skillet to the oven. Bake for about 15 to 20 minutes until the pancake is puffed and golden brown on the sides. At the end of baking, add chocolate Nutella, sprinkle the pancake with flaked almonds, and bake for another minute. Keep an eye on it: it burns quickly!
  4. Take the pancake out of the oven; again, don't forget your oven mitts. Serve Dutch baby immediately in the pan or on a serving platter.


Notes

  1. To make the batter, use a food processor fitted with the blade attachment, a blender, or a hand whisk.
  2. Ensure the batter is smooth and lump-free; pass it through a fine-mesh sieve if needed.
  3. Do not skip heating a skillet in the oven; this is essential to help the pancake puff.
  4. Add a pinch of ground nutmeg or cinnamon to the batter if desired.
  5. Use a smaller skillet (8 inches/20 cm) to increase the pancake's puffiness.
  6. Don't open the oven door while baking; the drop in the oven temperature will deflate the pancake.
  7. Drizzle the pancake with chocolate Nutella and sprinkle with flaked toasted almonds before serving instead of adding these ingredients while baking.

Nutrition

  • Serving Size: 1 slice
  • Calories: 273
  • Sugar: 9.6 g
  • Sodium: 155 mg
  • Fat: 16.5 g
  • Saturated Fat: 7.7 g
  • Carbohydrates: 23.3 g
  • Fiber: 1.2 g
  • Protein: 7.3 g
  • Cholesterol: 120 mg

Thank you for following me on Pinterest, Facebook, and Instagram. Hashtag #bakinglikeachef so I can see your creations.

The nutritional information has been calculated using an online recipe nutrition calculator such as Verywellfit.com and is intended for informational purposes only. These figures should be used as a general guideline and not be construed as a guarantee.

The recipe was originally published on May 09, 2020. The recipe has been revised to include improved content and photos. 

Grand Marnier Crepes (Crepes Suzette Flambé)

Apr 22, 2020 · 10 Comments

Crepes Suzette with orange slices in a skillet.

Quick Summary: Grand Marnier crepes, also known as crepes Suzette, are thin French crepes served in a warm orange butter sauce and flambéed with Grand Marnier at the table. Make the crepes, simmer the orange sauce, fold the crepes into the pan, then add the liqueur and light it for a quick, showy dessert.

Crepes Suzette with orange slices in a skillet

What are Grand Marnier crepes?

Grand Marnier crepes are the classic French dessert better known as crepes Suzette. They are thin crepes served in Suzette butter (beurre Suzette), an orange sauce of caramelized sugar, butter, orange juice, and orange zest, finished with a splash of Grand Marnier that is flambéed at the table.

The dish is often credited to a 14-year-old assistant waiter, Henri Charpentier, who set the crepe sauce alight by accident. Another story names the chef Auguste Escoffier, who is said to have created an orange butter with Curaçao liqueur, without any flambé at all.

Either way, the pairing of orange sauce and orange liqueur is what defines the dish. Grand Marnier is the traditional choice, though Cointreau or curaçao work just as well.

Crêpes suzette with orange sauce in a non-stick pan

Why you'll love this recipe

  • A rich, classic dessert. Thin crepes soak up a warm orange butter sauce for a French treat that feels special.
  • Dinner-party drama. Flambé the sauce with Grand Marnier in front of guests to turn dessert into a show.
  • Easy to make ahead. Cook the crepes in advance, then make the sauce, flambé, and serve the next day.

Ingredients

Crepes Suzette ingredients in pictures

For ingredients and detailed instructions, refer to the recipe card below.

  • Flour: The recipe calls for all-purpose (aka plain) flour.
  • Sugar: Use white sugar, granulated, or caster sugar.
  • Salt enhances the flavors of crepes.
  • Eggs: Use large eggs at room temperature.
  • Milk: Use whole or low-fat milk.
  • Vanilla extract brings a wonderful flavor to the crepe batter.
  • Citrus zest: Use organic lemon and orange to make fresh zest with a citrus zester. To make the orange peel without a citrus peeler, peel the fruit with a vegetable peeler and cut the peel into thin strips.
  • Butter: Use unsalted butter with 82% fat content for a delicious caramelized sauce.
  • Orange juice: Use freshly homemade or store-bought orange juice, or replace it with tangerine juice if desired.
  • Grand Marnier is used to make crêpes Suzette, but you can substitute Curaçao or Cointreau. To make crepes kid-friendly, replace alcohol with the same amount of orange juice. You will surely omit igniting the sauce.

Equipment

You need a few basic tools to make and flambé crepes Suzette:

  • crepe pan or nonstick skillet
  • large frying pan for the sauce
  • citrus zester or vegetable peeler
  • whisk and mixing bowl
  • ladle
  • long-handled lighter or long match

How to make crepes Suzette

Step 1. To make the crepe batter, place flour, sugar, salt, eggs, vanilla extract, lemon and orange zest, Grand Marnier, and melted butter in a large mixing bowl (photo 1) and mix with a hand whisk (photo 2).

Photo 1: Crepe ingredients in a metal bowl Photo 2: Halfway ready batter in a bowl
PHOTO 1 PHOTO 2

Step 2. Add half the milk, then gradually add the remaining milk and water, and mix to a smooth batter (photo 3). Cover the bowl with plastic film and let it rest at room temperature for one hour.

Step 3. Heat a crêpe pan over medium-high heat. Pour the crêpe batter into the pan in a thin layer; no need to grease. Cook one side for about 1 minute (photo 4).

Photo 3: Ready crepe batter in a bowl Photo 4: Crepe in a crepe pan
PHOTO 3 PHOTO 4

Step 4. Turn it over and cook the other side until lightly browned, about 1 minute (photo 5). Repeat until all the batter has been used.

Step 5. To make the Suzette sauce, melt butter and sugar in a frying pan (opt for a nonstick skillet) over medium-low heat until the sugar begins to caramelize (photo 6).

Photo 5: Cooked crepe in a pan Photo 6: Cooked sugar with butter in a pan
PHOTO 5 PHOTO 6

Step 6. Add orange juice, Grand Marnier (be careful of the splash), and orange peel made with a channel knife or citrus peeler, and bring the sauce to a boil.

Step 7. Fold each crepe twice (or into a triangle) and place 4-6 in the pan with the butter sauce to soak (photo 7). Cook for a few seconds and turn them over (photo 8).

Photo 7: Folded crepes in a crepe pan Photo 8: Crepes with sauce in a pan
PHOTO 7 PHOTO 8

Step 8. To flambé, remove the pan from heat, add some Grand Marnier, and ignite carefully. Strike a long-handled match and bring it to the hot sauce. Flames will appear for a few seconds. When the alcohol burns off, the fire will disappear.

Step 9. Serve two crepes per person, and pour the remaining sauce over them. Serve the crepes with a scoop of vanilla ice cream, if desired. Repeat the serving with the remaining crepes, making the sauce again. Bon appetit!

Crepes Suzette flambe on a serving plate with orage sauce and ice cream

Expert tips

  1. Consult the French crepes recipe for helpful tips and tricks.
  2. If you feel uncomfortable making flambéed crepes, omit the procedure of igniting with Grand Marnier.
  3. Accompany the dessert with Sauternes, a French sweet wine.
  4. Make-ahead option: Make crepes in advance, stack them between layers of parchment paper, wrap them in a plastic film, and refrigerate for up to three days.
  5. Flambé safely. Take the pan off the heat before adding the Grand Marnier, use a long lighter, and keep a lid nearby to smother the flame if needed.
  6. Warm the sauce first. The alcohol only ignites when the sauce is hot, so make sure it is gently bubbling before you light it.
  7. Keep the crepes thin. A thin, lacy crepe soaks up the orange butter sauce better than a thick one, so pour just enough batter to coat the pan and swirl quickly.
  8. Use unwaxed oranges. Since the sauce relies on fresh orange zest, choose unwaxed or well-scrubbed oranges for the cleanest citrus flavor.

Recipe variations

  • Crepes Suzette without alcohol: Omit alcohol and use orange juice instead.
  • Crepes Suzette with berry coulis: Omit the flambé; instead, serve the crepes with berry coulis, fresh strawberries, or cherries.
  • Crepes Suzette with brandy: Replace Grand Marnier with your favorite brandy to flambé the crepes.

Storing & freezing

Crepes Suzette are best served and eaten while they are still warm from the pan. Store leftover crepes (not flambéed) in an airtight container in the refrigerator for up to 2 days.

Can you freeze Crepes Suzette? It isn't recommended to freeze the flambéed crepes, since the sauce and reheated crepes lose their texture. You can, however, freeze plain crepes for up to two months.

Stack the cooled crepes between sheets of parchment paper, wrap the stack in plastic film, and place it in a freezer bag. Thaw them in the refrigerator overnight, then make the orange butter sauce fresh and flambé just before serving.

Recipe FAQ

What is the difference between crepes and crepes Suzette?
They use the same crepe batter, but crepes Suzette are served in an orange butter sauce and flambéed with Grand Marnier at the table.

Why is it called crepes Suzette?
The dessert was reportedly created by accident when a young assistant waiter, Henri Charpentier, set the sauce alight while serving the Prince of Wales, the future King Edward VII. The prince asked that it be named after a girl in his party, Suzette.

What liqueur is used to make crepes Suzette?
Grand Marnier is traditional, but you can use Cointreau or curaçao. Some cooks add a splash of cognac for extra depth.

How do you flambé crepes Suzette safely?
Remove the pan from the heat first, pour in the Grand Marnier, then light it with a long-handled lighter or match while standing back. Keep a lid nearby to smother the flame, and never pour liquor straight from the bottle into a lit pan.

What if the sauce does not light?
The sauce needs to be warm for the alcohol vapor to catch. Gently reheat it, tilt the pan slightly toward the flame, and try again. If it still will not light, spoon the warm sauce over the crepes.

Can you make crepes Suzette without alcohol?
Yes. Replace the Grand Marnier with the same amount of orange juice and skip the flambé step. You still get the orange butter sauce and tender crepes.

What do you serve with crepes Suzette?
Serve them warm on their own or with a scoop of vanilla ice cream. A glass of Sauternes, a French sweet wine, pairs well too.

Can you make Grand Marnier crepes ahead of time?
Yes. Cook the crepes up to three days ahead, stack them between parchment, wrap tightly, and refrigerate. You can also prepare the orange butter sauce a day ahead and reheat it gently. For the freshest flavor, fold the crepes into the warm sauce and flambé just before serving.

Can you flambé crepes Suzette at the table?
Yes, and it makes a fun presentation. Warm the sauce and crepes in the pan first, then take the pan off the heat, add the Grand Marnier, and light it with a long lighter at the table. Keep the pan away from anything flammable and have a lid on hand to smother the flame.

How many calories are in crepes Suzette?
One serving of crepes Suzette has about 315 calories.

Love crepes? Try these next!

  • Galette Bretonne
  • Banana Nutella Crepes
  • Beggar's Purses
  • French Chocolate Crepes
  • Or browse all the crepe recipes

Want more delicious and beautiful recipes? Subscribe to my newsletter and follow me on Facebook, Pinterest, and Instagram for my latest updates. If you make this recipe, please leave a star rating on the recipe card and comment below!

Print

Recipe card

Grand Marnier Crepes (Crepes Suzette Flambé)

Crepes Suzette with orange slices in a skillet.
Print Recipe
Save Recipe Recipe Saved

5 Stars 4 Stars 3 Stars 2 Stars 1 Star

5 from 5 reviews

Crepes Suzette flambéed with Grand Marnier are thin French crepes served in a warm orange butter sauce and lit at the table. Not comfortable flambéing? Simply serve the crepes with the sauce and vanilla ice cream.

  • Author: Irina Totterman
  • Prep Time: 30 minutes
  • Cook Time: 30 minutes
  • Total Time: 1 hour (plus resting time)
  • Yield: 8 crepes 1x
  • Category: Crepes
  • Method: Cooking
  • Cuisine: French

Ingredients

Scale

For the crepe batter:

  • 2 large eggs, room temperature
  • ½ cup + 2 tablespoons (80 g) all-purpose flour
  • 1 tablespoon granulated sugar
  • 1 pinch of salt
  • ½ teaspoon vanilla extract
  • 2 tablespoons Grand Marnier
  • 1 teaspoon lemon zest
  • 1 teaspoon orange zest
  • 1.4 oz (40 g) unsalted butter
  • ¾ cup + 1 ½ tablespoons (200 ml) whole milk
  • 1 tablespoon water

For the Suzette sauce (to serve 4-6 crepes):

  • 1 oz (30 g) unsalted butter
  • 2 tablespoons granulated sugar
  • ½ cup (120 ml) orange juice
  • ¼ cup (60 ml) Grand Marnier
  • orange peel

* If needed, please refer to Baking Conversion Charts.

Instructions

  1. To make the crepe batter, place flour, sugar, salt, eggs, vanilla extract, lemon and orange zest, Grand Marnier, and melted butter in a large bowl and mix with a hand whisk. Add half the milk, then gradually add the remaining milk and water, and mix to a smooth batter. Cover the bowl with plastic film and let it rest at room temperature for one hour.
  2. Cook crepes in a nonstick crepe pan (no need to grease). Cook both sides of the crepes until lightly browned, about 1 minute per side. Repeat until all the batter has been used.
  3. To make the Suzette sauce, melt butter and sugar in a pan until the sugar begins to caramelize. Add orange juice, Grand Marnier (be careful of the splash), and orange peel made with a channel knife or a citrus peeler, and bring the sauce to a boil. Fold each crepe twice and place 4-6 of them in the pan with the sauce. Cook for a few seconds and turn them over.
  4. To flambé crepes, remove the pan from heat, add some Grand Marnier, and ignite carefully. Strike a long-handled match and bring it to the hot sauce. Flames will appear for a few seconds. Once the alcohol burns off, the flames will disappear.
  5. Serve two crepes per person with plenty of sauce. Accompany with vanilla ice cream if desired. Repeat each serving of crepes, starting with making the sauce again.

Notes

  1. Consult the French crepes recipe for helpful tips and tricks.
  2. If you do not feel comfortable making flambeed crepes, omit the step of igniting the Grand Marnier.
  3. Accompany the dessert with Sauternes, a French sweet wine.
  4. Make-ahead option: Make crepes in advance, stack them between layers of parchment paper, wrap them in plastic film, and refrigerate for up to three days.

Nutrition

  • Serving Size: 2 crepes
  • Calories: 315
  • Sugar: 14.3 g
  • Sodium: 200 mg
  • Fat: 18 g
  • Saturated Fat: 10.4 g
  • Carbohydrates: 30.9 g
  • Fiber: 0.7 g
  • Protein: 7.3 g
  • Cholesterol: 135 mg

Thank you for following me on Pinterest, Facebook, and Instagram. Hashtag #bakinglikeachef so I can see your creations.

The nutritional information has been calculated using an online recipe nutrition calculator such as Verywellfit.com and is intended for informational purposes only. These figures should be used as a general guideline and not be construed as a guarantee.

The recipe was adapted from http://www.aveceric.com. It was originally published on February 08, 2018. The recipe has been revised to include improved content and photos.

French Chocolate Crepes Recipe (Easy Beer Batter)

Mar 26, 2020 · 20 Comments

French chocolate crepes folded in four served with raspberry jam icing sugar on a pink plate.

Quick Summary: French chocolate crepes are thin, cocoa-flavored crepes made from a light beer batter that rests overnight. Cook them in a hot crepe pan for about a minute per side, then fill with raspberry jam, Nutella, whipped cream, or fresh fruit for an easy breakfast or dessert.

A batch of chocolate crepes with a pink tea towel and a cup in the background

What are French chocolate crepes?

French chocolate crepes are thin, delicate crepes made the French way, with cocoa powder whisked into the batter for a soft, bittersweet chocolate flavor. What makes this version different is the beer: a splash of it lightens the batter and gives the crepes their signature lacy edges.

There is a little science behind it. Beer is carbonated and slightly acidic, so it limits the gluten that forms when flour is mixed with liquid. That keeps the batter light and full of tiny air bubbles.

Those bubbles create small holes along the edges of each crepe that look like lace and catch pools of jam or sauce. The more carbonated the beer, the looser the batter and the lacier the crepes.

French chocolate crepes folded in four served with raspberry jam icing sugar on a plate

Why you'll love this recipe

  • Beginner-friendly. This crepe recipe is easy to make, even if it is your first time.
  • A treat any time. These chocolate dessert crepes turn an ordinary breakfast into something special.
  • Perfect for dessert. They make a great finish to a romantic dinner or Valentine's meal.
  • Make ahead. The batter rests overnight, so you can mix it one day and cook fresh crepes the next.
Chocolate dessert crepes with jam and icing sugar served with a fork on a grey plate

Ingredients

For ingredients and detailed instructions, refer to the recipe card below.

  • All-purpose flour gives the crepes structure while keeping them thin and tender.
  • Unsweetened cocoa powder adds the soft, bittersweet chocolate flavor and deep color. Dutch-process cocoa gives a smoother taste, but natural cocoa works too.
  • Sugar lightly sweetens the batter, just enough for a dessert crepe.
  • Eggs bind the batter and help the crepes hold together when you flip them.
  • Milk thins the batter so it swirls easily across the pan.
  • Beer is the secret here. Its carbonation lightens the batter and gives the crepes their lacy edges. Use a lighter style of beer, such as a lager.
  • Salt balances the sweetness and rounds out the chocolate flavor.
  • Butter greases the pan and adds a little richness.

Equipment

  • crepe pan or nonstick skillet
  • fine-mesh sieve
  • mixing bowls
  • hand whisk
  • ladle

How to make chocolate crepes

Step 1. Using a flour sifter, sift flour and cocoa powder in a large bowl. Add sugar and mix with a hand whisk.

Step 2. In a separate bowl, beat the milk and eggs together. Add beer and melted butter (photo 1).

Step 3. Add this mixture to the dry ingredients and whisk (photo 2). Pass the batter through a fine-mesh sieve, cover with plastic film, and refrigerate overnight. 

Photo 1: Milk/eggs/beer/butter mixture in a bowl Photo 2: Batter in a bowl
PHOTO 1 PHOTO 2

Step 4. The next day, gently beat the batter to mix ingredients. Using a silicone brush, oil a crepe pan.

Step 5. Pour a small ladle of dough, swirl the pan to cover the bottom evenly, and cook for about 1 minute (photo 3).

Step 6. Flip the crepe and cook the other side for about 30 seconds (photo 4). Repeat with the remaining batter. 

Photo 3: Crepe on a crepe pan Photo 4: Flipped crepe on a pan
PHOTO 3 PHOTO 4

Step 7. Serve chocolate crepes with raspberry jam, folding crepes in four. Dust with powdered (icing) sugar.

Expert tips

  1. If the crepe batter seems thick the next day, add 3 to 5 tablespoons (50 to 80 ml) of milk and mix. It should be smooth and thin enough to swirl easily around the bottom of a hot crepe pan or skillet.
  2. Cook crepes in a well-heated crepe pan. Crepes cook quickly: it usually takes a minute on the first side and less than 30 seconds on the other side.
  3. Don't pour too much batter into the crepe pan. The chocolate crepe batter has to cover the bottom of the pan completely before the bottom starts cooking. 
  4. Do not worry if the first crepe is a flop. Once you get the pan to the right temperature, you will make the rest of the crepes perfectly. And the first flop is just as delicious!
  5. Sift the cocoa with the flour. Cocoa powder clumps easily, so sifting it with the flour keeps the batter smooth and lump-free.
  6. Handle chocolate crepes gently. The cocoa and sugar make these crepes a little more fragile than plain ones, so flip them carefully with a thin spatula.

How to serve French chocolate crepes

Serve chocolate crepes warm, while they are still soft. Fold each one into quarters or roll it up, then dust with powdered sugar. From there, add a filling or topping:

  • raspberry jam or preserves with a veil of powdered (icing) sugar
  • whipped cream with fresh raspberries or strawberries and shaved chocolate
  • cream cheese with cherry pie filling
  • Nutella hazelnut spread with sliced bananas
  • caramel or Dulce de Leche with sliced pears
  • peanut butter with a drizzle of chocolate sauce

For a party, set out a few bowls of fillings and let everyone build their own. Chocolate crepes also work as a make-ahead dessert: cook them in advance, then warm and fill just before serving.

Recipe variations

Once you have the basic chocolate crepe batter, you can change it up in a few ways:

  • Kid-friendly. Swap the beer for nonalcoholic beer or seltzer water so the whole family can enjoy them.
  • Orange or coffee. Add a little orange zest or a teaspoon of instant espresso to the batter for a deeper flavor.
  • Extra chocolatey. Fill the crepes with Nutella and sliced bananas, or drizzle them with melted chocolate.
  • Fruit forward. Serve with fresh raspberries, strawberries, or pears and a dusting of powdered sugar.

Storing & freezing

Store cooked chocolate crepes in an airtight container in the refrigerator for up to 3 days. Reheat them briefly in a warm pan or the microwave before filling and serving.

To freeze, double the batch and stack the cooled crepes with a sheet of parchment paper between each one. Wrap the stack well and freeze for up to a couple of months, then thaw in the refrigerator before reheating.

Recipe FAQ

Can you use a blender to make a crepe batter?
Yes, you can use a blender to mix the ingredients, but the traditional method is to use a hand whisk and then strain the batter through a fine-mesh sieve to remove any lumps.

Can you replace the beer in the crepe batter?
Yes. The beer adds carbonation, so any neutral, bubbly drink works. Use nonalcoholic beer or seltzer water to make the crepes kid-friendly.

What beer works best for crepe batter?
A light lager or pale ale works well. More carbonated beers make a looser batter and lacier edges, while the flavor stays mild once the crepes are cooked.

How are chocolate crepes different from regular crepes?
Chocolate crepes add cocoa powder to the batter, which gives them a deeper color and a light chocolate flavor. The method is the same as classic French crepes.

Do you have to rest the crepe batter?
Yes. Resting the batter overnight relaxes the gluten and hydrates the flour, so the crepes turn out tender and easy to swirl thin.

How do you serve chocolate crepes?
Fold each crepe into quarters or roll it, then fill with raspberry jam, Nutella, whipped cream, or fresh fruit and dust with powdered sugar.

Can you freeze chocolate crepes?
Yes. Double the batch, layer the cooked crepes with parchment paper, and freeze them for up to a couple of months.

Can you make chocolate crepes gluten-free or vegan?
Yes. For gluten-free crepes, swap the flour one-to-one with a gluten-free blend or buckwheat flour. For vegan crepes, use a plant-based milk, replace the butter with a neutral oil, and use nonalcoholic beer or seltzer.

How many calories are in a chocolate crepe?
One chocolate crepe has about 90 calories, without any filling or toppings.

Love crepes and pancakes? Try these next!

  • Beggar's Purses With Caramelized Apples
  • French Buckwheat Crepes
  • Vanilla Dutch Baby Pancake
  • Browse all the Crepes and Pancakes Recipes

Want more delicious and beautiful recipes? Subscribe to my newsletter and follow me on Facebook, Pinterest, and Instagram for my latest updates. If you make this recipe, please leave a star rating on the recipe card and comment below!

Print

Recipe card

French Chocolate Crepes (Easy Beer Batter)

French chocolate crepes folded in four served with raspberry jam icing sugar on a pink plate.
Print Recipe
Save Recipe Recipe Saved

5 Stars 4 Stars 3 Stars 2 Stars 1 Star

5 from 10 reviews

These easy French chocolate crepes are made with a light beer batter and cocoa powder for thin, lacy crepes. Fill them with raspberry jam, Nutella, whipped cream, or fresh fruit for a simple breakfast or dessert.

  • Author: Irina Totterman
  • Prep Time: 30 minutes
  • Cook Time: 30 minutes
  • Total Time: 1 hour (plus resting time)
  • Yield: 10 crepes 1x
  • Category: Crepes
  • Method: Cooking
  • Cuisine: French

Ingredients

Scale

For the batter:

  • ½ cup + 2 tablespoons (80 g) flour
  • 2 ½ tablespoons (20 g) cocoa powder
  • 1 ½ tablespoons (20 g) sugar
  • 1 cup + 1 tablespoon (250 ml) milk 
  • 2 eggs
  • 3 tablespoons beer
  • 1 oz. (30 g) butter, melted

For serving:

  • raspberry jam/preserves
  • powdered (icing) sugar

* If needed, please refer to Baking Conversion Charts.

Instructions

  1. Using a flour sifter, sift flour and cocoa powder in a large bowl. Add sugar and mix with a hand whisk. In a separate bowl, beat milk and eggs just to mix; add beer and melted butter. Add this mixture to the dry ingredients and whisk. Pass the batter through a fine-mesh sieve, cover with plastic film, and refrigerate overnight. 
  2. The next day, gently beat the batter to mix ingredients. Using a silicone brush, oil a crepe pan. Pour a small ladle of dough, swirl the pan to cover the bottom evenly, and cook for about 1 minute. Flip the crepe and cook the other side for about 30 seconds. Repeat with the remaining batter. 
  3. Serve chocolate crepes with raspberry jam, folded into four. Dust with powdered (icing) sugar.

Notes

  1. If the crepe batter seems thick the next day, add 3 to 5 tablespoons (50 to 80 ml) of milk and mix. It should be smooth and thin enough to swirl easily around the bottom of a hot crepe pan or skillet.
  2. Cook crepes in a well-heated crepe pan. Crepes cook quickly: it usually takes a minute on the first side and less than 30 seconds on the other side.
  3. Don't pour too much batter into the crepe pan. The chocolate crepe batter has to cover the bottom of the pan completely before the bottom starts cooking. 
  4. Do not worry if the first crepe is a flop. Once you get the pan to the right temperature, you will make the rest of the crepes perfectly. And the first flop is just as delicious!

Nutrition

  • Serving Size: 1 crepe
  • Calories: 90
  • Sugar: 3.3 g
  • Sodium: 42 mg
  • Fat: 4.2 g
  • Saturated Fat: 2.3 g
  • Carbohydrates: 10.7 g
  • Fiber: 0.8 g
  • Protein: 3.2 g
  • Cholesterol: 41 mg

Thank you for following me on Pinterest, Facebook, and Instagram. Hashtag #bakinglikeachef so I can see your creations.

The nutritional information has been calculated using an online recipe nutrition calculator such as Verywellfit.com and is intended for informational purposes only. These figures should be used as a general guideline and not be construed as a guarantee.

The recipe was adapted from http://madame.lefigaro.fr. It was originally published on April 07, 2019. The recipe has been revised to include improved content and photos.

Beggar's Purses (Apple Cinnamon Crepes)

Mar 17, 2020 · 46 Comments

French crepe filled with caramelized apples and cinnamon, served on a dessert table.

Quick Summary: A beggar's purse, also called a crepe purse, is a thin French crepe filled with caramelized cinnamon apples, then gathered into a pouch and tied shut. Known in French as an aumônière, it turns simple apple crepes into a plated dessert. This recipe makes 9 purses and works with sweet or savory fillings.

Crepe filled with caramelized apples and cinnamon, served on a dessert table.

Beggar's purses (apple cinnamon crepes)

Once you have mastered French crepes, try serving them as beggar's purses, crepe bundles tied into a pouch and filled with caramelized apples and warm cinnamon. This simple twist turns apple crepes into a plated dessert.

Make the crepes ahead of time using this recipe, basic crepes, or Parisian crepes, then fill with seasonal fruits and get creative with sweet and savory variations.

If you love apple desserts, try easy Apple Pancakes, simple Apple Crumble Bread, or a simple Sponge Apple Cake.

What is a beggar's purse?

A beggar's purse is a crepe tied like a pouch, originally filled with caviar and creme fraiche and served as a savory bite. Today it is often made as a dessert with sweet fillings like caramelized apples.

Its name comes from the pouch-like alms purse carried in the 14th century to give money to people experiencing poverty. In French, it is called an aumônière de crêpes, where "aumônière" means alms purse or almoner's pouch.

Why you'll love this recipe

  • Simple ingredients: a basic crepe batter and caramelized apples are all you need.
  • Make-ahead friendly: cook the crepes and filling in advance, then assemble before serving.
  • Sweet or savory: the pouch works with fruit fillings or savory options like mushrooms and cheese.
  • A plated finish: tying each crepe into a purse turns a simple dessert into a dinner-party plate.
  • Classic French technique: the aumônière is a traditional way to serve crepes across France.

Ingredients

For ingredients and detailed instructions, refer to the recipe card below.

  • Eggs: Use whole, large eggs at room temperature.
  • Flour: Use all-purpose flour.
  • Milk: Choose whole, 2%, or 1% milk.
  • Vanilla extract: Add Madagascar Bourbon Pure Vanilla for flavor.
  • Orange flower water: Add optionally to bring aroma.
  • Salt: Add to enhance flavor.
  • Butter: Use unsalted butter. Melt it for the batter, and cube for caramel.
  • Apples: Select Golden or Granny Smith. They keep their shape when cooked.
  • Sugar: Use granulated white for caramel.
  • Orange juice: Use fresh-squeezed or store-bought.
  • Cinnamon: Add ground cinnamon for flavor.

Equipment

A few basic tools make these apple crepe purses easier to prepare:

  • Crepe pan or nonstick skillet
  • Large mixing bowl
  • Flour sifter
  • Hand whisk
  • Ladle or small measuring cup
  • Saucepan for the caramel
  • Wooden spatula
  • Toothpicks or kitchen string for tying

How to make cinnamon apple crepes

Step 1. To make the crepe batter, sift the flour into a large bowl. Add the eggs, salt, vanilla, and orange flower water, then whisk until smooth.

Step 2. Gradually add the water and cold milk in small portions, mixing well after each. Whisk in the melted butter, then let the batter rest for 2 hours at room temperature.

Step 3. Heat a crepe pan and pour in about ¼ cup of batter, tilting to coat the bottom. Cook until the edges turn golden, then flip and brown the other side. Repeat with the remaining batter.

Step 4. To make the filling, peel the apples and cut them into small cubes.

Step 5. Melt the sugar with water in a pan until it caramelizes, then stir in the butter.

Step 6. Add the apple cubes and orange juice, sprinkle with ground cinnamon, and cook gently over low-medium heat for 10 minutes.

Step 7. To assemble, place one tablespoon of the caramelized apples in the center of each crepe.

Step 8. Gather the edges of the crepe toward the center to form a pouch, then tie with one or two toothpicks. Serve 1 or 2 purses per person.

Expert tips

  • Rest the crepe batter for 2 hours. This helps the flour fully hydrate, making your crepes tender and easy to fold.
  • Use a nonstick crepe pan for smooth, even cooking and easy flipping without tearing.
  • Cook crepes over medium-low heat to avoid burning and get a nice golden color.
  • Caramelize sugar slowly. Be patient with the caramel to develop a rich flavor without burning.
  • Keep crepes warm. Stack cooked crepes between sheets of parchment paper and cover with a kitchen towel to stay soft and pliable while you finish.
  • Remove toothpicks before serving: if you use toothpicks to hold the purses together, take them out before eating. Be especially careful when serving to children.

Recipe variations

This recipe adapts easily to what you have on hand:

  • Different apples: swap Golden or Granny Smith for Honeycrisp or Braeburn, which also hold their shape.
  • Pastry version: for a firmer purse, make the pouches from puff pastry or phyllo instead of crepes.
  • Add warm spice: stir in a pinch of nutmeg, cardamom, or vanilla with the cinnamon.
  • Boozy caramel: add a splash of Calvados, rum, or Grand Marnier to the apples.
  • Mixed fruit: combine apples with pears, mandarins, or dried fruit for a richer filling.
  • Serve with a drizzle: top each purse with caramel sauce or a scoop of ice cream, the way many French aumônière desserts are plated.
  • Other crepe fillings: once you master the pouch, try banana Nutella crepes or turn leftover crepes into a mango crepe cake.

Filling ideas for beggar's purses

Sweet fillings:

  • Caramelized apples (recipe below)
  • A mix of caramelized fruits like apples, pears, and mandarins
  • Caramelized bananas or pineapple
  • Peaches with candied ginger and cottage cheese
  • Mango with passion fruit

Savory fillings:

  • Sautéed mushrooms with garlic and thyme
  • Spinach and feta cheese
  • Caramelized onions with goat cheese
  • Roasted butternut squash with sage and Parmesan
  • Smoked salmon with cream cheese and dill

What to use to tie crepe purses

You can tie your crepe purses with a variety of attractive options: a long sprig of blanched chives, strips of fresh or candied orange or lemon peel, licorice laces, a vanilla pod cut in half, toothpicks decorated with small pieces of fruit at each end, kitchen string, raffia, or bamboo skewers. These add both charm and function to your presentation.

Storing & freezing

Store apple-filled crepes in an airtight container in the refrigerator for up to 2 days. To reheat, warm them gently in a low oven or microwave just until heated through, so they stay tender and flavorful.

Avoid freezing, as it may affect the crepe texture. While plain crepes freeze well, freezing crepe purses filled with fruit or creamy fillings may affect the crepes' texture and moisture.

If you want to freeze, freeze the crepes and filling separately, then assemble and warm just before serving for best results.

Recipe FAQ

What is a beggar's purse?
A beggar's purse is a thin crepe filled and gathered into a small pouch, then tied shut. In French, it is called an aumônière. It can be sweet, like this apple version, or savory.

Why is it called a beggar's purse?
The name comes from the alms purse carried in the 14th century to collect coins for the poor. The tied crepe looks like that small pouch, which is where the name comes from.

Can you make beggar's purses with pastry instead of crepes?
Yes. Beggar's purses are also made from puff pastry or phyllo. This recipe uses crepes for a softer, more tender bite, but the pastry versions hold their shape better.

Can I make apple crepe purses ahead of time?
Yes. Cook the crepes and the apple filling separately up to a day ahead, keep them in the fridge, then assemble and warm the purses just before serving.

What apples are best for the filling?
Golden or Granny Smith apples work best because they hold their shape when cooked. Honeycrisp and Braeburn are good alternatives.

Can you freeze beggar's purses?
It is better not to freeze the assembled purses, as the filling changes the crepe texture. Freeze the plain crepes and the filling separately, then assemble after thawing.

How many calories are in an apple crepe purse?
Each serving has about 220 calories, based on the recipe as written.

Love apple desserts? Try these next!

  • Apple And Olive Oil Cake
  • French Apple Tart
  • Apple Tarte Tatin

Want more delicious and beautiful recipes? Subscribe to my newsletter and follow me on Facebook, Pinterest, and Instagram for my latest updates. If you make this recipe, please leave a star rating on the recipe card and comment below!

Print

Recipe card

Beggar's Purses (Apple Cinnamon Crepes)

French crepe filled with caramelized apples and cinnamon, served on a dessert table.
Print Recipe
Save Recipe Recipe Saved

5 Stars 4 Stars 3 Stars 2 Stars 1 Star

5 from 21 reviews

Beggar's purses are thin French crepes tied into a pouch and filled with caramelized cinnamon apples. This simple apple cinnamon crepes recipe turns everyday crepes into a plated dessert you can make ahead and serve to family or guests.

  • Author: Irina Totterman
  • Prep Time: 30 minutes
  • Cook Time: 30 minutes
  • Total Time: 1 hour (plus resting time)
  • Yield: 9 1x
  • Category: Crepes
  • Method: Cooking
  • Cuisine: French

Ingredients

Scale

For the crepe batter:

  • 2 large eggs at room temperature
  • â…” cup + 2 tablespoons (100 g) all-purpose flour
  • 1 cup + ½ tablespoon (250 ml) milk
  • 2 tablespoons (30 ml) water
  • ½ teaspoon vanilla extract
  • 1 tablespoon orange flower water (optional)
  • 1 pinch of salt
  • 0.5 oz. (15 g) butter

For the apple filling:

  • 3 large apples (Golden or Granny Smith apples)
  • â…” cup (150 g) sugar
  • 3 tablespoons (45 ml) water
  • 2.1 oz. (60 g) butter
  • â…“ cup + ½ tablespoon  (85 ml) orange juice
  • 1 pinch of ground cinnamon

* If needed, please refer to Baking Conversion Charts.

Instructions

  1. To make crepe batter, sift flour into a large bowl. Add eggs, salt, vanilla extract, and orange flower water, and mix with a hand whisk. Add water and cold milk in small portions, mixing well. Melt butter, pour into the mixture, and whisk. Let it stand for 2 hours at room temperature.
  2. Pour a ladle of batter (about ¼ cup) and tilt and rotate the crepe pan to distribute it and cover the bottom. When the crepe's edges turn golden and come off the pan, turn it over with a heatproof plastic spatula or flexible turner. Let it brown on the second side. Continue with the remaining batter.
  3. To make the apple filling, peel apples and cut them into small cubes. Melt the sugar with water in a pan to make the caramel. Shake the pan and let it brown. Add butter and mix with a wooden spatula. Add apple cubes and orange juice, and sprinkle with ground cinnamon. Cook over low-medium heat for 10 minutes. 
  4. To assemble purses, top each crepe with one tablespoon of the caramelized apples. Gather the edges of the crepe toward the center, fold, and tie with 1 or 2 toothpicks. Serve 1 or 2 per person.

Notes

  1. Rest the crepe batter for 2 hours. This helps the flour fully hydrate, making your crepes tender and easy to fold.
  2. Use a nonstick crepe pan for smooth, even cooking and easy flipping without tearing.
  3. Cook crepes over medium-low heat to avoid burning and get a nice golden color.
  4. Caramelize sugar slowly. Be patient with the caramel to develop a rich flavor without burning.
  5. Keep crepes warm. Stack cooked crepes between sheets of parchment paper and cover with a kitchen towel to keep them soft and pliable while you finish.
  6. Use Golden or Granny Smith apples since they hold their shape while cooking. 
  7. If you use toothpicks to assemble the purses, make sure to take them out before eating, and be especially careful when serving to children.

Nutrition

  • Serving Size: 1
  • Calories: 220
  • Sugar: 24 g
  • Sodium: 91 mg
  • Fat: 8.4 g
  • Saturated Fat: 5 g
  • Carbohydrates: 34.3 g
  • Fiber: 2 g
  • Protein: 3.4 g
  • Cholesterol: 57 mg

Thank you for following me on Pinterest, Facebook, and Instagram. Hashtag #bakinglikeachef so I can see your creations.

The nutritional information has been calculated using an online recipe nutrition calculator such as Verywellfit.com and is intended for informational purposes only. These figures should be used as a general guideline and not be construed as a guarantee.

The recipe was originally published on February 10, 2018. It has been revised to include improved content and photos.

Primary Sidebar

Personal photo of the website's author

Hi, I am Irina!

A home baker with over 30 years of experience, sharing baking recipes with step-by-step instructions, helpful tips, and tricks. Get baking, and let the fun begin!

About • Start Here • Contact

Summer Desserts

  • Fig tiramisu cups in a serving board.
    Fig Tiramisu (Easy No-Bake Dessert)
  • Louise cake on a cake stand.
    Ottolenghi Louise Cake With Plum And Coconut
  • Apple and blueberry crumble in a white ceramic dish with ice cream and two spoons.
    Apple and Blueberry Crumble Recipe (With or Without Oats)
  • Sliced JordgubbstÃ¥rta on a cake board.
    Jordgubbstårta (Swedish Strawberry Cake)

More Summer Desserts →

Readers’ Favorites

  • Sliced Sans Rival cake on a cake board.
    Sans Rival Cake (Filipino Cashew Meringue Cake)
  • A batch of baked madeleines in a baking mold.
    Classic French Madeleines Recipe (Madeleine Cookies)
  • Italian sponge cake on a marble board.
    3-Ingredient Italian Sponge Cake (Pan di Spagna)
  • Halved muffin loaded with blueberries with the rest of the cakes in the background.
    To Die For Blueberry Muffins With Crumb Topping
  • French financiers with almonds on a wooden board lined with parchment.
    Classic French Financiers (Authentic Recipe)
  • Stack of banana bread slices on a serving board.
    Banana Bread Without Baking Soda (Easy Recipe with Baking Powder)

More Cake Recipes →

Footer

Featured in banner with logos.

BAKING LIKE A CHEF

  • Home
  • About
  • Recipe Index
  • Baking 101
  • Cake Pan Converter
  • Contact
  • Log In

SOCIAL

  • Facebook
  • Pinterest
  • Instagram
  • Twitter

LEGAL

  • Privacy Policy
  • Disclaimer
  • Terms & Conditions
  • Accessibility Statement

Copyright © 2025 Baking Like a Chef • Baking Like a Chef is a participant in the Amazon Services LLC Associates Program, an affiliate advertising program designed to provide a means for sites to earn advertising fees by advertising and linking to Amazon.com. As an Amazon Associate, I earn a commission – at no cost to you –  from qualifying purchases.